Last weekend we had a fun workshop (not the redstone workshop from yesterday) in which a bunch of people got together and built mountains! Well, small mountains, at least. The workshop was only an hour, after all.
There are three techniques that you want to consider when constructing a mountain in Minecraft, and when you combine all three of them, you'll end up with great-looking terrain!
Technique 1: Irregularity
In this case, regular doesn't mean 'normal', it means 'symmetrical'. Real mountains only have partial symmetry... if you make them too regular and symmetrical, they look entirely artificial.
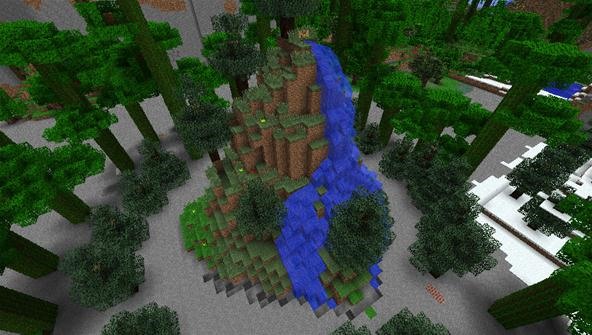
Note that in the above picture (mountain made by Freakje118), the base isn't a circle, or an oval, or any other recognizable shape. It's uneven, and lumpy, just like the mountain itself. That's what real mountains look like!

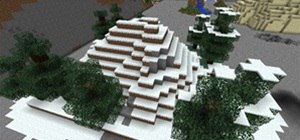
This snow-covered hill by Wakafanykai123 is regular in height (each level is one block-height above the next), but irregular in shape, which is why it looks more natural.
Technique 2: More Height Than Width
When making a mountain, until you get to the top you almost always want your levels to rise. Therefore, each level is going to be higher than it is wide. That is, sometimes the next level of blocks will only be one block in, but two, three, four, or even more blocks high. For example:

In the above picture (by Prospero13), you can see how the blocks rise much faster upward than inward, and the jagged peaks look natural and organic.
By contrast, here's one that's the opposite:

The terrain above, by Pmaguire, isn't really a mountain, but more of a wide hill. Its irregularity makes it look natural, but it's not really a mountain unless it rises more.
Technique 3: Smoothness
Generally speaking, you don't want lots of hard corners in your landscapes, because hard corners don't often occur in nature. Corners are worn down by erosion, which is why you don't see too many of them.
Granted, all Minecraft blocks have sharp edges, but you can still smooth them out a bit. The jagged peaks work in this small example that we previously showed, but they do not look as good in large-scale construction.

When you're working in large-scale, you really want to round it out as best as you can, so that you end up with a product that looks more like this:

In the above picture, even the sheer cliffs of the mountain are softened and smoothed out to create an organic look. The river and trees help make it look more natural as well, but without a solid base, the trees and river will look strange and out-of-place.
All of the above pictures are of mountains that were built during our workshop, which was only an hour long. So while placing a mountain block-by-block is time-consuming, you can see that it's certainly doable!
I hope that this is helpful for those of you who like the idea of incorporating natural terrain into your builds!
Just updated your iPhone? You'll find new emoji, enhanced security, podcast transcripts, Apple Cash virtual numbers, and other useful features. There are even new additions hidden within Safari. Find out what's new and changed on your iPhone with the iOS 17.4 update.



4 Comments
You forgot to mention that my mountain was completely filled with lava!!! lol
More naturel mountains would have lakes and rivers next to them, holes in them, caves, and weird floating blocks
ALAMRAYA SALAM
I LOVE ILKE
PEMANDANGANNYA AMAT MENAWAN DAN SESUAI MELANCUNG DI TEMPAT SEPERTI INI..
damn i missed this :( when was it? and are there going to be anymore similar things at the same next week?
Share Your Thoughts