

Are you tired of having to use two different enchanting tables when you want both low and high enchants? Are you sick and tired of hearing your faction/guild/clan members say that they need lower enchants because they don't have enough experience levels for high-end enchants?
With this tutorial, I'm going to show you how to make a customizable enchantment room. This will satisfy everyone in your group because of the enchanting variety it allows for! Watch the full video guide below, and check out the step-by-step written instructions after for more details.
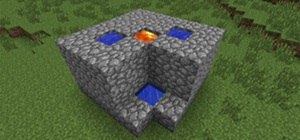
Step 1 Layout
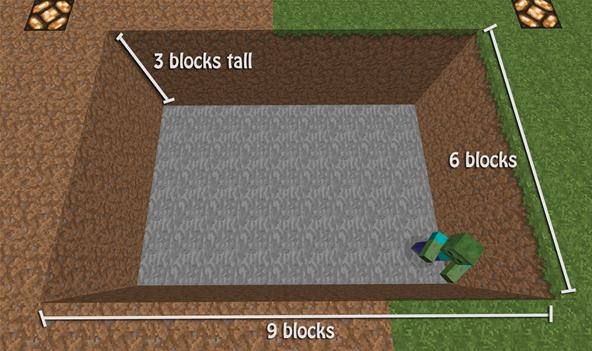
You will begin by creating a 9x6 hole that is 3 blocks deep. The longer side will be the front of your layout, so keep this in mind for the next few steps!
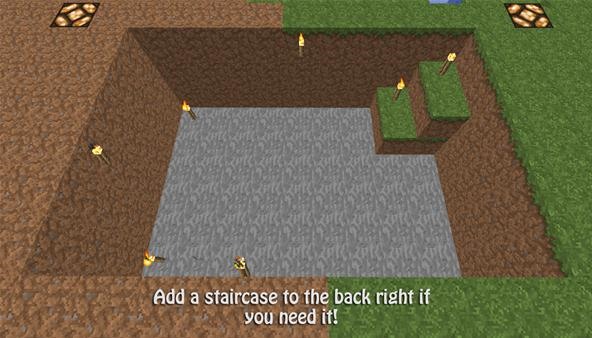
If you're playing in survival, you may need to add some light and/or a staircase. The staircase can fit nicely in the back-right of the layout. Torches or other light sources can be placed at all corners, except for the front right (this is where a lot of our redstone will be going).
Step 2 Platform #1
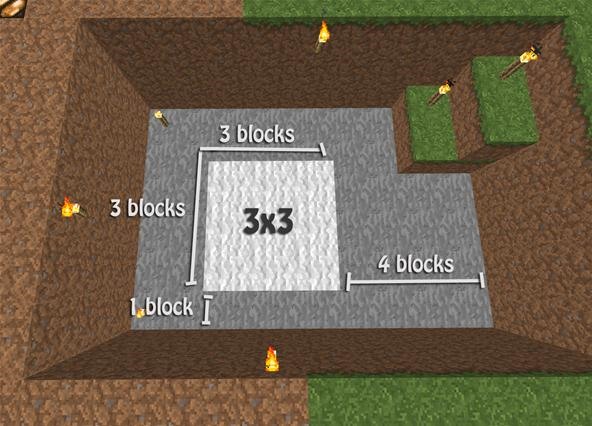
Counting four blocks from the right and one block from the front, you will begin making a 3x3 square out of any material you would like. This platform will only be one block tall, using a total of 9 blocks for this step.
Step 3 Sticky Pistons
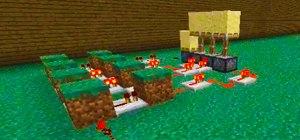
You will now place a total of 7 sticky pistons on top of your small platform. The sticky pistons should be facing upwards so that they will push and pull the floor out from our enchantment room.
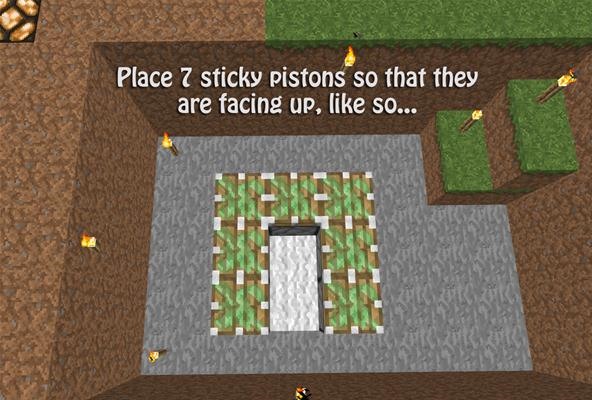
Do not put sticky pistons at the front center or in the direct center of the platform.
Step 4 Repeaters
Using a total of 7 redstone repeaters, you will want to place them on the ground level. Each one of them will be facing your platform. 3 repeaters will go on both the left and right side, and you will only need to place 1 repeater at the back center.


These repeaters will not directly be powering the sticky pistons. They will be powering the block below the sticky pistons. And there will be no delay on these repeaters, so don't worry about that!
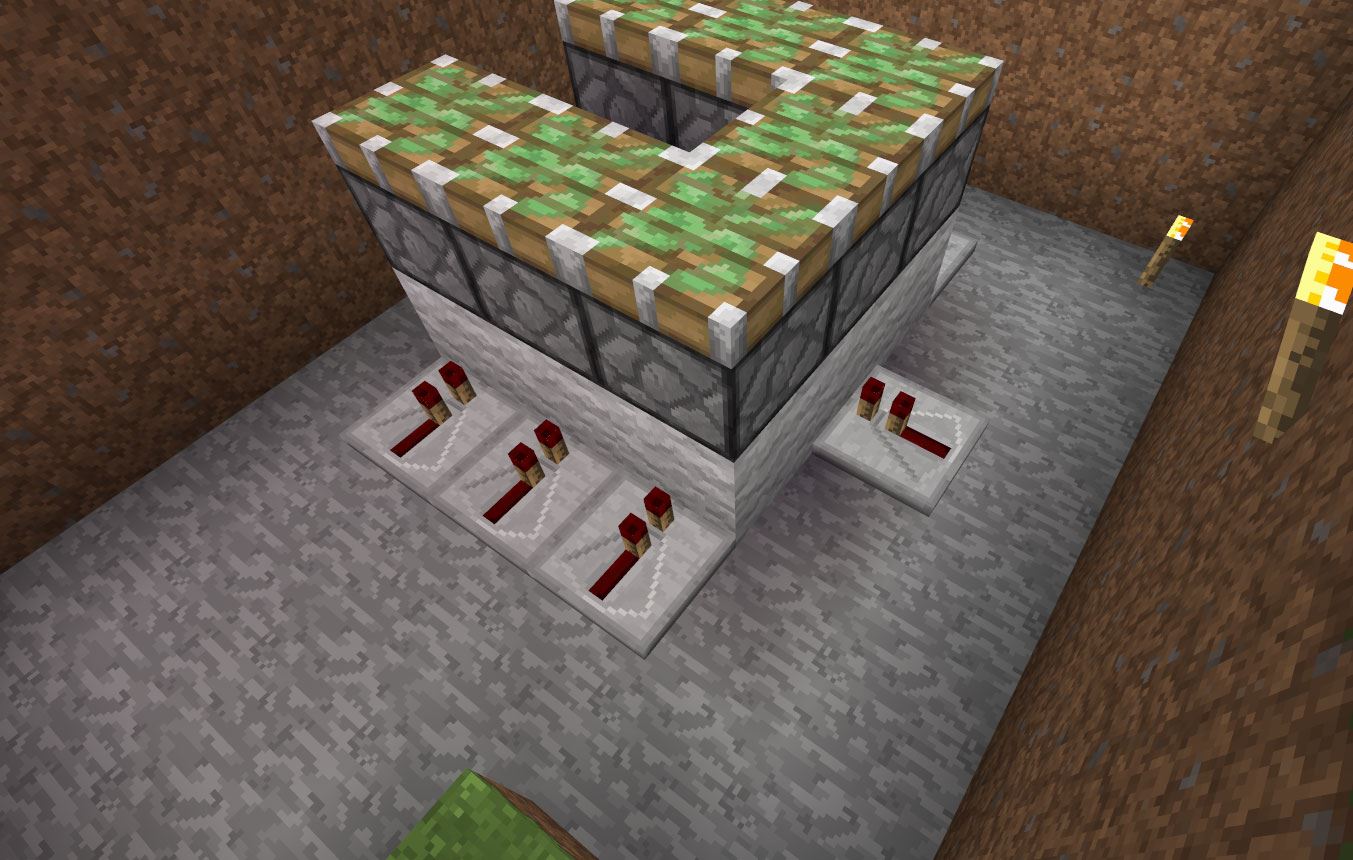
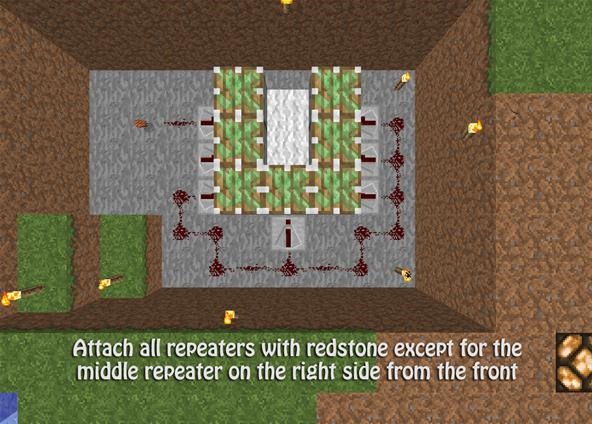
Step 5 Redstone Dust
Now, use a total of 14 redstone dust to attach all of the repeaters to each other. Looking at the side that has your staircase and the empty space, redstone dust will not be placed at the center repeater.
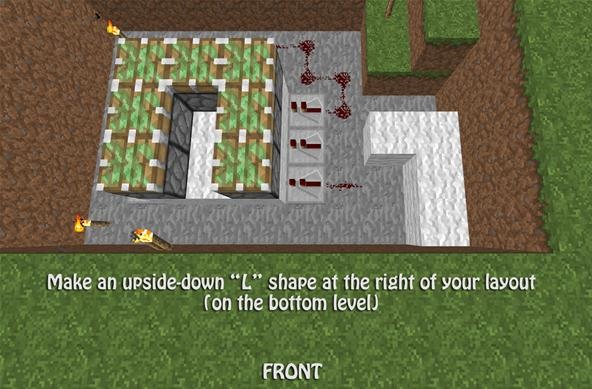
Step 6 "L"
Looking towards the back of your setup, to your right, you will want to place down an "L" shape. I used white wool, but you can use whatever material you want. This "L" shape will be resting against the right wall, and will be 3 blocks by 2 blocks big—but only 1 block tall.
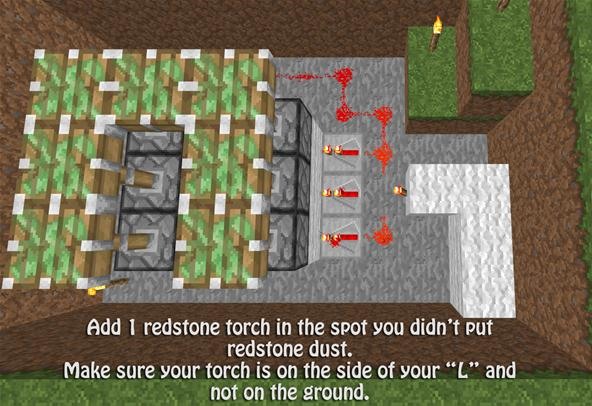
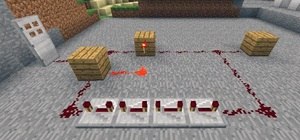
Step 7 Redstone Torch
Using one redstone torch, you will place it at the end of your "L" you just created in the last step. You do not want to place this torch on the ground though, it will be placed on the side of the wool block.
You will notice this redstone torch powers your sticky pistons so that they are stuck in an upright position. This means that we will need to invert the power somehow....
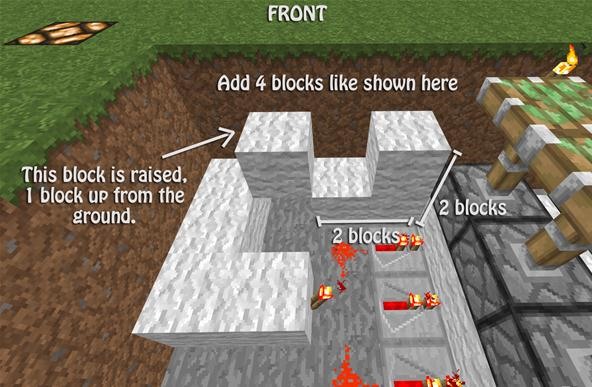
Step 8 Some Redstone Preparation
Looking towards the front of your layout, you will need to place another 4 blocks. Directly next to the top of your "L" shape, you will place one block against your front wall; this block will be one block up from the ground.
To the right of the floating block, place a line of two blocks. On the second block, place another block directly on top of that to make a mini staircase.
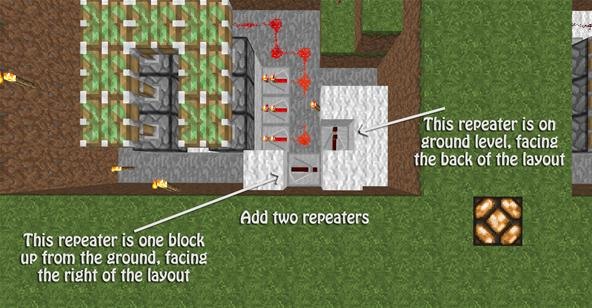
Step 9 More Repeaters!
Standing in the little gap between your "L" shape and the raised block, you will want to face the back of your setup. Look down, jump, and place a repeater.
This repeater will be set on 3 delay; right-click the repeater twice to set it on 3.
For the second repeater, it will be facing the raised block. It will also be sitting on the wool block that is 1 block above ground level.
This repeater will not receive a delay of any kind.
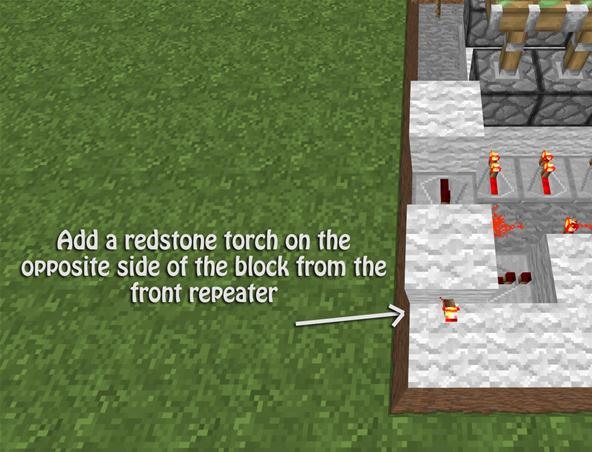
Step 10 Redstone Signal Inversion
Sounds complicated, right? Wrong! All you need to do for this step is place 1 redstone torch on the right-side of the raised block (right meaning, standing at the front of your setup, looking right). This redstone torch will invert the power so that the sticky pistons do not remain in an upright position.
Step 11 Last Bit of Redstone
Using 3 redstone dust, connect the two torches on the "L" shape. This will turn your sticky pistons off. Place the second-to-last redstone dust needed to complete the project on the wool block directly to the left of the top repeater. This dust will be later connected to our button.
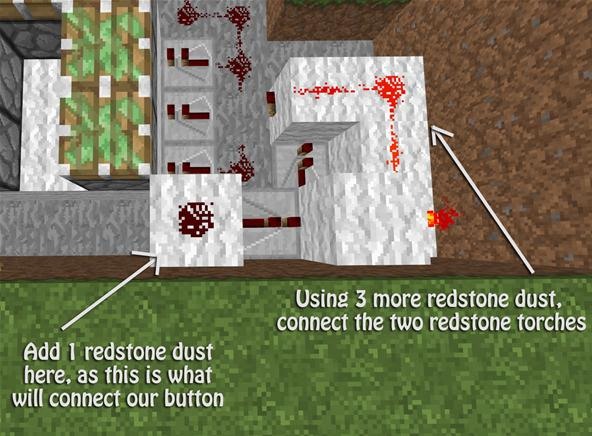
And the final redstone dust! Place it directly below the raised block so that it connects to the lower repeater.

Step 12 Camouflage
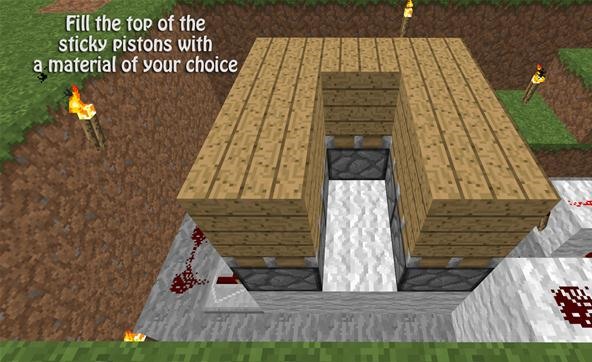
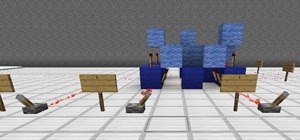
Fill the top of the sticky pistons with a material of your choice!
Step 13 Platform #2
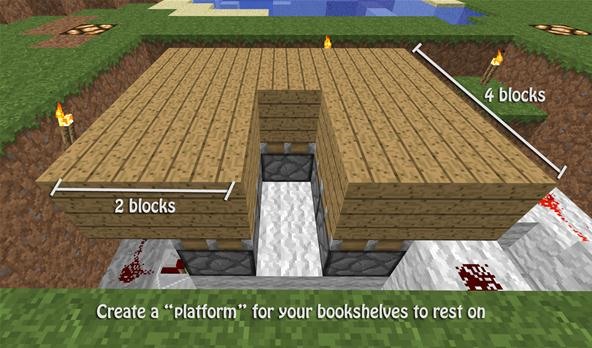
Using the blocks you just placed in Step 12, continue making a platform. This platform will be 4x4 total, but the center front and middle block will be missing... for now!
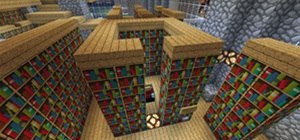
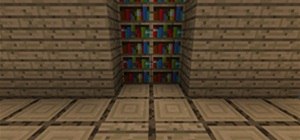
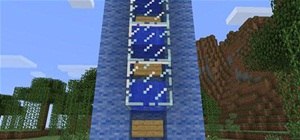
Step 14 Bookshelves
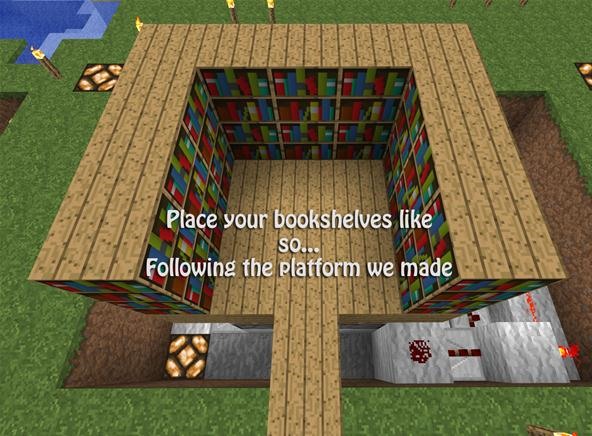
Start placing your bookshelves down to prepare for the placement of your enchanting table. Use the platform as a guide, and keep in mind that the bookshelves should be 2 block tall. Do not forget the corners of the bookshelf walls—they directly affect the outcome of the enchanting levels!
You will need a total of 30 bookshelves to get level 50 enchants in the enchanting table.
The redstone dust that will later power our button should also be covered with bookshelves.
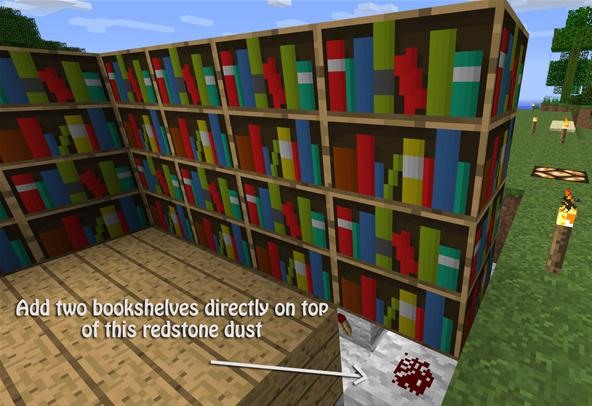
Continue placing the bookshelves down so you have a perfect square. You will leave the front center open so that you can enter/leave your enchantment room. Not to mention, you don't need to put bookshelves there in order to get maximum level enchants!

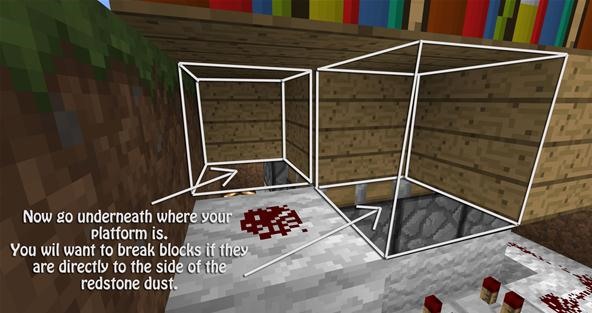
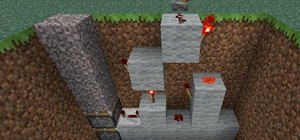
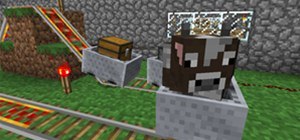
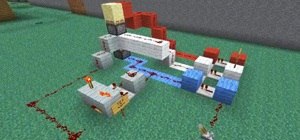
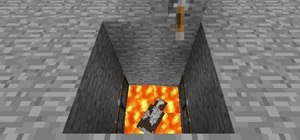
Step 15 Block Breakage
Below your enchantment room, head over to the redstone dust that will later power your button. There will be two blocks that you need to break down there, otherwise your button will break one of the sticky pistons.
Use the image below as a guide for which blocks need to be removed!
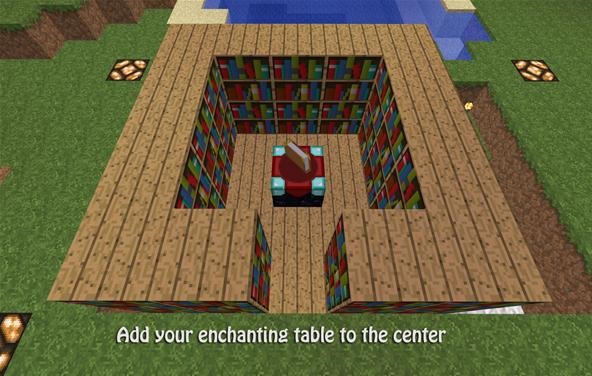
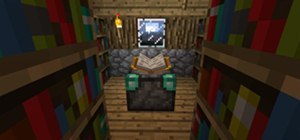
Step 16 Enchanting Table
Add your enchanting table to the center of your enchantment room. Feel free to try it out and see that it works!
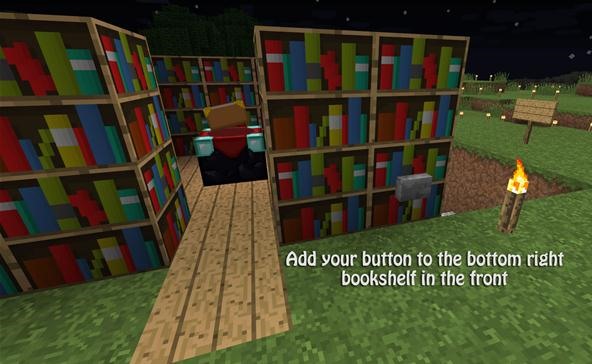
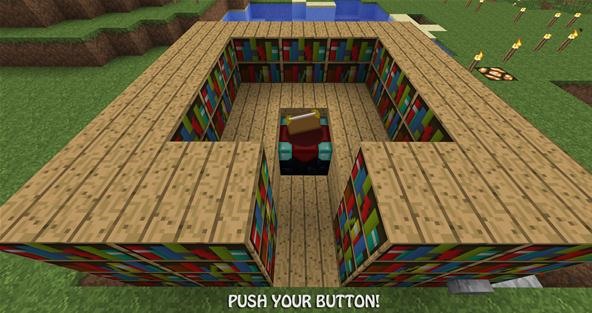
Step 17 Button!
Add your button to the bottom-right bookshelf in the front. The redstone dust below this bookshelf will be powered once you hit the button.
Step 18 Play Around
Play around with your button, push it a couple times and make sure everything looks good. If you've followed the steps (especially Step 15), everything should work perfectly!
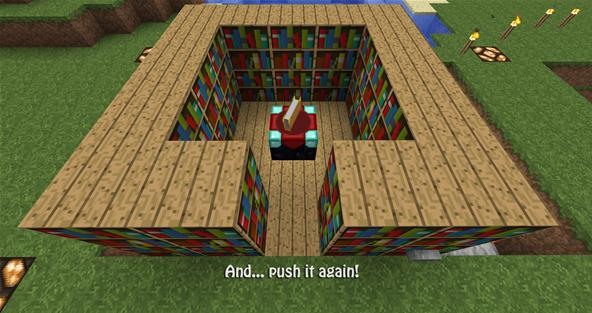
Once you hit the button, the sticky pistons will push up really quickly and will actually release the blocks, leaving them raised. The reason behind this is because sticky pistons need to register at two ticks in order for them to hold onto the block. We have this set up so that it registers at only one tick, so the sticky pistons instead act as standard pistons.
We do need to use sticky pistons though, because otherwise the sticky pistons wouldn't be able to drop the floor back down!
And... hit it again!
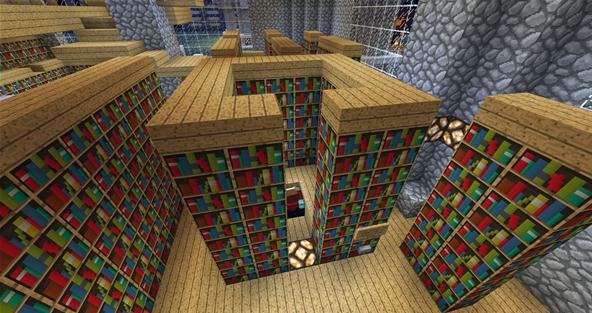
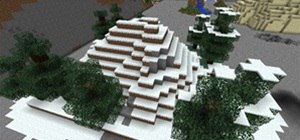
Step 19 Cover It Up
Using this tutorial, you can add awesome enchantment rooms to your current library. The wiring is pretty compact, so you would only need to worry about having underground room to work with!
Questions for the Audience:
- Were you able to follow this tutorial without confusion?
- How are you with redstone? Still learning? Or more advanced?
- Is there anything you're wanting to learn, have any tutorial suggestions?
I would love to hear a few words from the audience, so please... don't be shy!
Follow us on Twitter @MinecraftHowTo!
Just updated your iPhone? You'll find new emoji, enhanced security, podcast transcripts, Apple Cash virtual numbers, and other useful features. There are even new additions hidden within Safari. Find out what's new and changed on your iPhone with the iOS 17.4 update.


11 Comments
ever thought about using a switch instead of a button? if you use a switch you will be able to use standard pistons since the current would be constant on. i use that on my semi-automatic wheat field to keep the source block in its container until harvest. then it's just a matter of killing the power until the field is washed away and then turning the current back on to raise the piston and shut off the flow.
oh and it makes sense why you have to remove those two blocks. it's because they receive current from the redwire you lay on that block under the button or switch, which confuses the piston above it. making it go wonky on you. good tutorial btw....i'm rather impressed on your solution.
-facepalm- i mean the piston next to them, not above
question, i have just finished doing this, but when i click on the button, the sticky pistons go up, and imidiately, they go back down again.... how do u fix this?
Amalia, I am working on my enchanting room, and when I hit the button the pistons go up and then immediately back down like you described. Did you find a solution to this? I used cobblestone as my main building material, but that shouldn't be affected by gravity.
its possible that the circuit the L part uses is outdated
I had removed the L part all together, moved down the floating block, and replaced the repeater by the button with a redstone torch and placed a repeater in front of it, facing to the right side of the contraption.
In front of that I placed a second repeater facing the back of the contraption, going into a block, and a 3rd repeater facing the front of the contraption, and 2 redstone going from repeater 3 into repeater 2.
on the block in front of repeater 2, I placed a redstone torch on the right side of the block and redstone going from the back of the block to the redstone connected to the pistons, with a repeater to keep the signal going
as for delays, only repeater 3 has any positive effects, but even with max delay on it 3, it's not flawless.
putting a delay onto repeater 2 will essentially leave you with the same problem
Edit:
This is the layout, please disregard my poor MS paint skills
Wow you took the time to do this. Appreciate it man! If you have any other ideas please post em!
Great guide! I wasn't confused about anything in the steps. Suggestion, could you put a materials list on the text step by step, instead of just on the video.
What version of minecraft is this for?
You dont need this for the new one do you?
trouble is minecraft didn't work on my computer?
Incase all of you find it annoying how the blocks go up and down too quickly, just use a lever instead of a button
Share Your Thoughts