Welcome to Minecraft World! Check out our advanced tutorials and come play on our free server.
VoxelSniper is one of many very useful world editing plugins available to Minecraft servers. In my opinion, it is one of the best and certainly the most used of all server side plugins. For the unaccustomed, world editors are programs that when used in conjunction with Minecraft Servers, allow players to change the terrain, physics, and characteristics of a Minecraft map. Chances are VoxelSniper is responsible for much of epic projects you've seen online and on the WonderHowTo server as well.
Let's get our feet wet with some basics of Voxel Sniper, including the demos we did during last Saturday's Weekly Workshop.
Voxel Commands
To get started doing anything with VoxelSniper, you'll need to know some Voxel commands. Voxel Sniper uses the arrow as its point and click tool for each of its brushes (this is also called a "wand"). You'll access different Voxel brushes and editing game modes by typing various commands into chat, which will change the properties of your Voxel wand.
To access a list of Voxel brushes type "/vs brushes" or "/vs brusheslong" into chat. This will bring up a list of all possible Voxel brushes which you can use. There are currently about fifty brushes with various capabilities in this current release of Voxel Sniper.
The most commonly used Voxel brushes allow you to place (snipe) any type of block in a given amount and shape. While some brushes can be used to change the physics of blocks, and others do completely useless things like shoot lightning, they are still fun to play with. Let's look at the most common brushes used, and some cool things you can do with each.
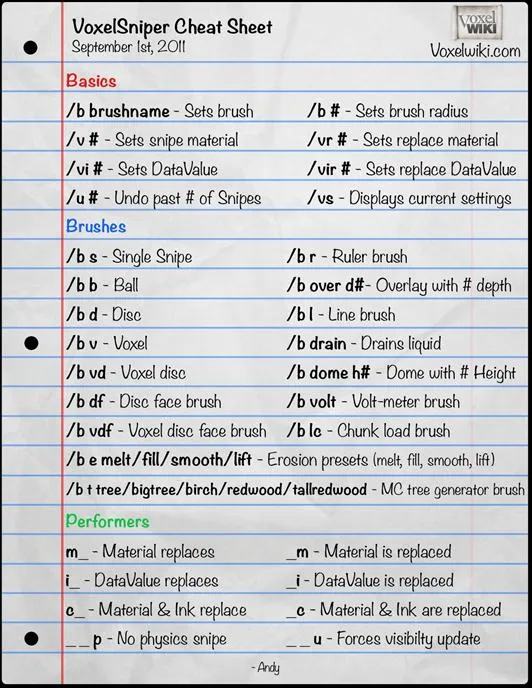
Here's a quick reference for the most commonly used Voxel Commands.
How to Snipe Blocks
Since the brushes you'll be most commonly using are sniping brushes in which you can place blocks, let's look at how to use them now.
Program Your Voxel Wand
To program your Voxel wand (arrow) to place blocks, you'll first need to select the type of block you want to place. To do this type "/v [block type]" in chat where [block type] will be the data value of the block you want to place. For instance, if I want to place stone I will type "/v 1" in chat, as 1 is the data value of stone. For a complete list of Minecraft block data values click here.
You can also program your Voxel Wand by pointing your game crosshairs in the center of your screen at the kind of block you want to place and typing "/v" in chat. So if you place your crosshairs on a dirt block and type "/v" in chat, you'll be selecting dirt to place.
Select the Shape of Blocks You Want to Place
You can place selections of blocks in eight shapes and each corresponds to a command in chat. They are disc "/b d", disc face "/b df", ball "/b b", voxel disc "/b vd", voxel face "/b vdf", and voxel "/b v". If you only want to place one block at a time you can type "/vs" in game, which will snipe only one block at a time.

To select one of these shapes, type the command in chat. So if we want to place a ball of some previous selected material we'll type "/b b" in game.
Select the Size of Blocks You Want to Place
Now that you have selected the kind of block and shape you want to place, you need to select the size of the object you want to place with the minimum being 2 and the maximum being 20. To do this, simply type "/b [size number]" in chat. So if you want to snipe a size 5 ball, type "/b 5" in chat.
Now let's take a look at the finished product. Once you have selected the desired block type, shape and size of your snipe, you can place them by right clicking on any blocks in game.
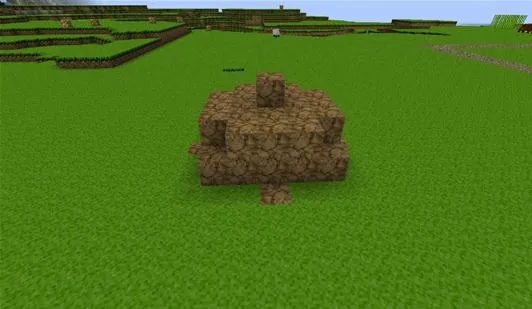
Here is a simple ball of dirt that I sniped on our server. To choose dirt I typed "/v 3", to get a ball shape I typed "/b b", and to get this size I typed "/b 5".
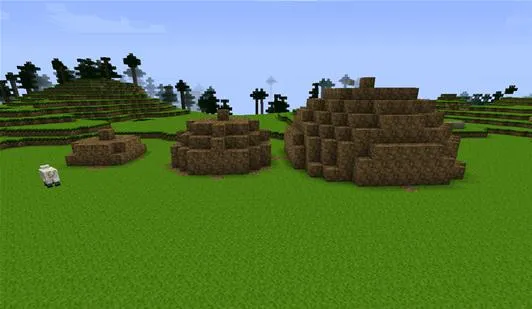
Here's are three different sizes of dirt balls. From left to right they are "/b 3", "/b 5", and "/b 8".
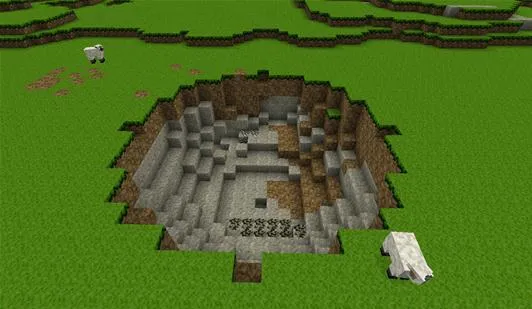
Remember you can select air as the type of block you want to snipe. This very useful for removing large areas of blocks. To do this type "/v 0" in game.
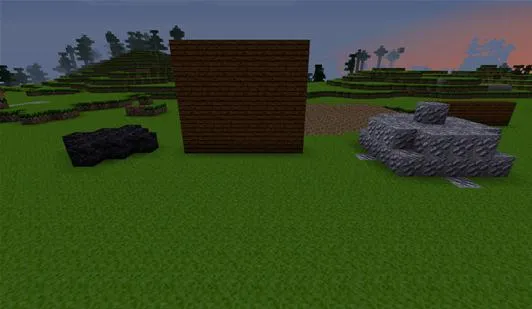
Here are three examples of snipes I've done in game. From right to left they are an obsidian disc, size 3, a wood voxel disc face, size 5, and an iron block ball, size 6.

Here is a simple ball of dirt that I sniped on our server. To choose dirt I typed "/v 3", to get a ball shape I typed "/b b", and to get this size I typed "/b 5".

Here's are three different sizes of dirt balls. From left to right they are "/b 3", "/b 5", and "/b 8".

Remember you can select air as the type of block you want to snipe. This very useful for removing large areas of blocks. To do this type "/v 0" in game.

Here are three examples of snipes I've done in game. From right to left they are an obsidian disc, size 3, a wood voxel disc face, size 5, and an iron block ball, size 6.
Other Commonly Used Brushes
Voxel Sniper has many great brushes that can be used to do anything from drain oceans to simulate erosion. Let's look at how to use some of the most useful brushes.
Drain Brush- The drain brush is used to drain lakes, rivers, and oceans of water. To use the drain brush, select a size and shape as you would with the snipe brushes and then type "/b drain" in chat. You're selection may look something like "/b b", "/b 5", and "/b drain". When you're ready to start draining simply select an area of water and right click.
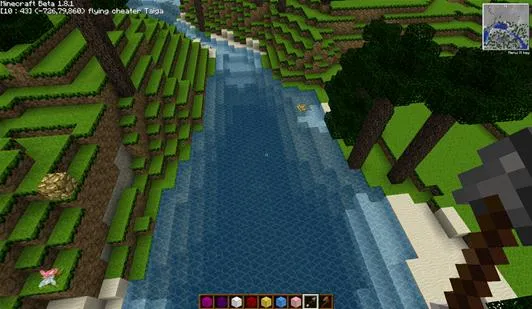
Here is a perfectly full river. I selected a size 5 ball brush to do the draining.
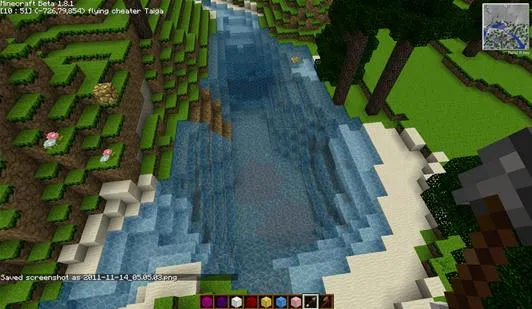
Simply right click the area you desire free from water.
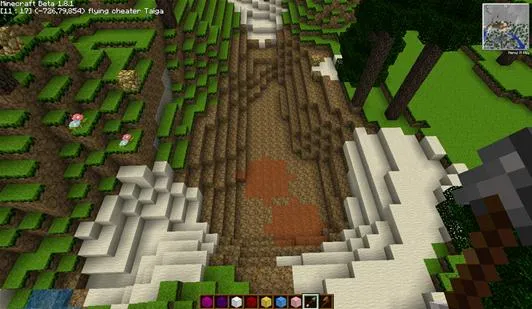
Remember to select water in high ground to ensure that it doesn't flow back down refilling the body of water.

Here is a perfectly full river. I selected a size 5 ball brush to do the draining.

Simply right click the area you desire free from water.

Remember to select water in high ground to ensure that it doesn't flow back down refilling the body of water.
Replace Brush- The voxel replace brush replaces one material with another. This is great for precision work. First, select the material you want to replace by typing "/vr [block type]" in game. If I wanted to replace grass, I would type "/vr 2".
Second, select the type of block you want to replace the first material you selected by typing "/v [block type]" in game. If I want to replace my first selected material with stone, I will type "/v 1" in game.
Finally, you must decide what shape brush you want to use to replace blocks with. This can be anything in the list mentioned earlier. To keep things simple, I'll use the ball brush again which is "b b". Now to program your brush to replace material with your chosen shape, type "/[block shape] mm" in chat. For my brush, I'll type "/b b mm".
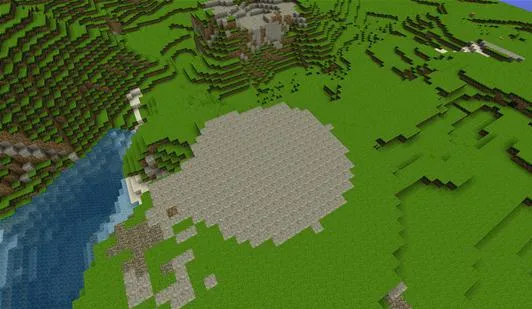
Here you can see the replace brush I used wherein stone replaces grass in a ball formation. Since the area I am selecting is flat and stone is only being placed on grass, the ball appears here as a disc.
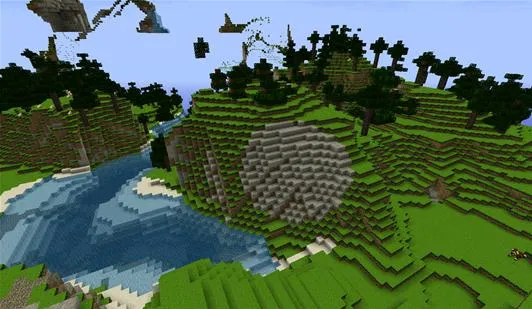
Here my ball replace brush also appears as a disc, but this time on the side of a mountain.

Here you can see the replace brush I used wherein stone replaces grass in a ball formation. Since the area I am selecting is flat and stone is only being placed on grass, the ball appears here as a disc.

Here my ball replace brush also appears as a disc, but this time on the side of a mountain.
Erosion Brush- The erosion brush actually includes a few selections which include melt, smooth, fill, and lift. "Melt" removes blocks in a simulated erosion which helps make structures look more organic, "fill" will fill an area based on the material around it in the shape you select, "smooth" will remove hard edges to objects, and "lift" will raise blocks one level at a time.
The commands for each of these brushes are "/b e melt", "/b e smooth", "/b e fill", and "/b e lift". For the fill brush, you'll need to previously select the size brush you want to use. So if you want to fill an area based on a disc shape, first type "/b d" in chat and then "/b e fill".
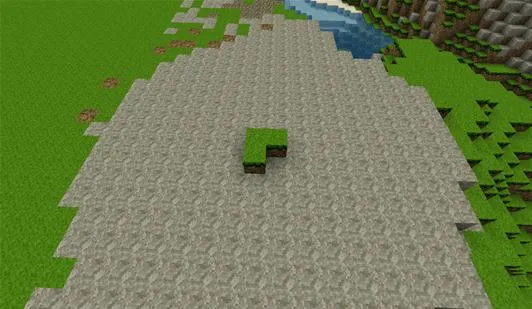
Here I am going to use a fill brush to expand this area. I first type "/b d" in chat to get a disc shape out of this brush and then "/b e fill".
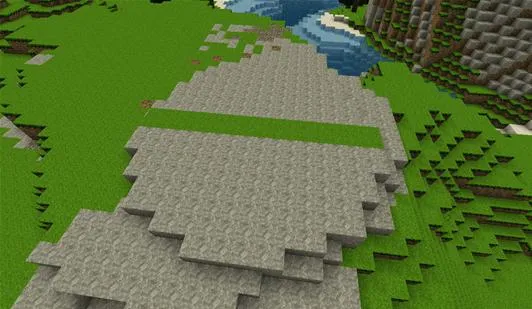
With the fill brush the more you click the more the brush works.
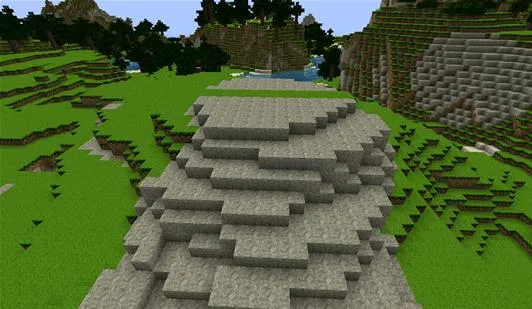
Here I am going to use the lift brush simply by right clicking the level of blocks I want to move upwards.
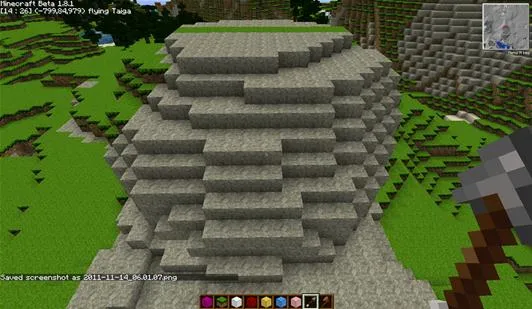
Here you can see the blocks have moved up in symmetry.
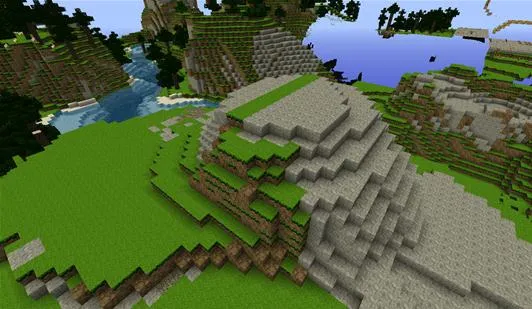
Here I am going to use the melt brush by right clicking an object.
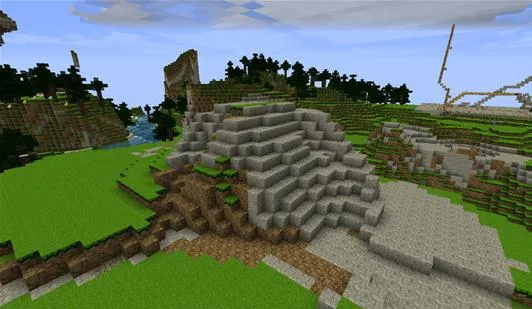
Here I have used the melt brush which can give hard edges a more natural look.

Here I am going to use a fill brush to expand this area. I first type "/b d" in chat to get a disc shape out of this brush and then "/b e fill".

With the fill brush the more you click the more the brush works.

Here I am going to use the lift brush simply by right clicking the level of blocks I want to move upwards.

Here you can see the blocks have moved up in symmetry.

Here I am going to use the melt brush by right clicking an object.

Here I have used the melt brush which can give hard edges a more natural look.
Splatter Brush- This brush creates a splayed pattern of blocks in a given shape. It can splatter in any of the voxel shapes mentioned earlier and is great for creating irregular blocks.
To use the splatter brush, you must first choose the shape of splatter you desire. The splatter shapes are /b sd: Splatter circle, /b svd: Splatter square, /b sb: Splatter ball, and /b sv: Splatter cube.
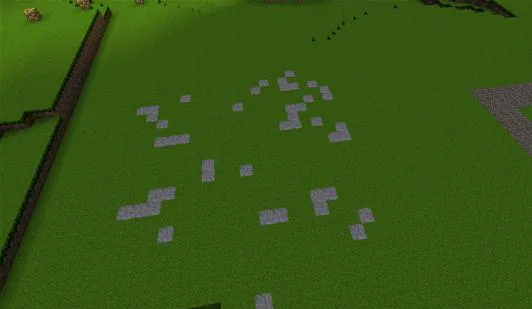
Here you can see me using the splatter disc brush in stone.
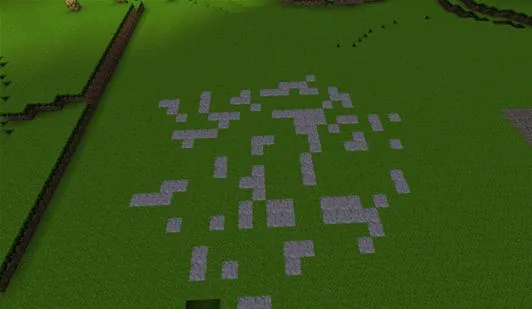
As always, the more you click the more it places.

Here you can see me using the splatter disc brush in stone.

As always, the more you click the more it places.
Getting Creative by Combining Brushes
The best part of Voxel Sniper is that you can just about replicate anything by using various combinations of its brushes. This is especially true of natural features, which are not always easy to recreate on one's own. Let's take a look at some structures we can create using combinations of Voxel brushes by making a mountain and a lake.
Making a Mountain- To create a make shift mountain, let's start by placing size 8 ball brushes of stone. To do this type "/v 1", "/b b", and "/b 8" in chat in any order, and start placing stone balls in roughly the size and shape of a mountain.

Next, let's use a erosion brush to make this look a bit more mountain-like. Type "/b e melt" in chat and remove blocks until you reach the desired effect.

Now that this mountain looks a bit more natural, let's add some layers of grass. To do this let's first select grass by typing "/v 2" in chat. Now let's set our brush to replace stone with grass by typing "/vr 1" in chat—this will ensure that our first selected block (grass) will replace stone. Now whenever we place grass it will replace only stone.
We could just place grass block by block, but that's time consuming. To speed up the process let's select the splatter brush in a ball shape by typing "/b sb mm" in chat. The "mm" will ensure that the splatter brush is only replace stone, not laying grass over it.
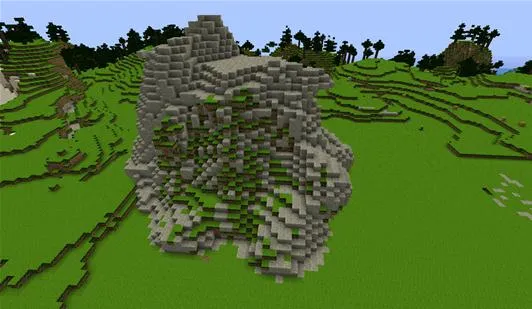
If you programmed your brush correctly, you should see a similar effect.
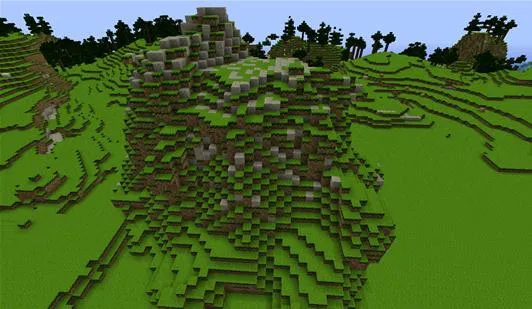
After a little bit more use our mountain look a bit more natural.

If you programmed your brush correctly, you should see a similar effect.

After a little bit more use our mountain look a bit more natural.
Now let's make things a bit more scenic by voxeling in a lake.
Creating a Lake- To create a lake lets set our brush to an air ball of size 5. To do this type "/v 0", /b 5", and "/b b" in game in any order. Now let's remove some ground to create a cavern that we will later fill with water.

Now let's use the erosion brush to make the edges of this lake look more realistic. Type "/b e melt" in game and right click the edges of the lake to make them look more natural.

Now to fill the lake in, let's use the replace brush. Type "/vr 0" to set the brush to replace air and then type "/v 8" to set the brush to place water. Let's also set the brush shape to "/b v" and set the brush shape to 8 by typing "/b 8". Now slowly begin by placing water in the lake. Do this carefully to ensure that it doesn't overflow or look weird. Continue to fill the lake with water until it is level with the top.

Congratulations, you have your own personal mountain and lake combo!

You can go into more detail by adding sand to the edges or gravel layers to the bottom.
Tips for Using Voxel Sniper
- If you ever want to see your Voxel wand's current settings, type "/vs".
- To undo any action type "/u" in chat. To replace more than one previous action, add the number of steps back you'd like to undo after "/u". So if you want to undo ten of your Voxel actions type "/v 10".
- Be careful placing water or lava as they are hard to remove.
- Be wary of brush size. Any brush size over 20 is usually too big.
- Be sure to read descriptions carefully as they can sometimes have devastating effects when used improperly.
I hope that by reading this brief guide some of the mystery is taken away from epic builds and you see that with over fifty brushes at your disposal, you too can create great things using Voxel Sniper. The only limit is your imagination.
If you are interested in practicing Voxel Sniper on our server feel free to PM, and we can set up a time. Unfortunately, we cannot give out Voxel permissions freely as they are an equally destructive force as they are a creative element.
For more on Voxel Sniper, visit their wikipedia page here.
As always if you have any questions or comments feel free to leave them below.
Follow us on Twitter @MinecraftHowTo!


Comments
Be the first, drop a comment!