

Welcome to Minecraft World! Check out our tutorials, post to the community corkboard, and come play on our free server!

The workshop last Saturday revolved around how to build a Hidden Passageway, and the turnout was great. We had around eight of us in TeamSpeak, and even I learned a few things from what the players created! The passageway that we put together is a great way to keep your belongings safe from would-be intruders. If you weren't one of the lucky people involved, you can still create one yourself with our how-to guide of the project below.
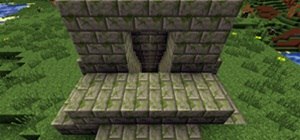
Secret Passage Overview
Here's a few videos of the hidden passageway in action.
Step 1 Layout
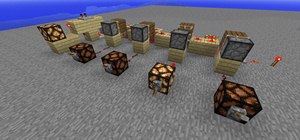
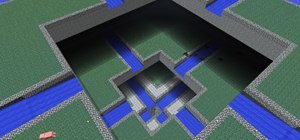
You're going to start by taking your chosen material (I used stone) and making a 6x6x2 "box", as shown in the picture below. Of course, if you're creating this inside the side of a mountain, you would be digging out this hole instead of placing blocks.

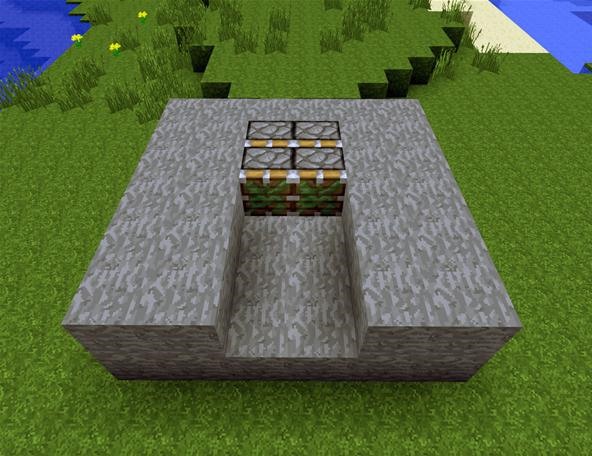
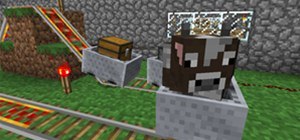
Step 2 Remove Blocks to Make Room
You are going to want to remove 10 blocks to make room for the sticky pistons. After you're done, there will be a 2x5x1 hole at the bottom center of your "box", just like in the picture. In the next step, you will be placing your pistons in the back of this hole.

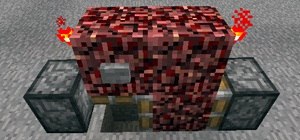
Step 3 First Layer of Sticky Pistons
Now place 4 sticky pistons at the back of the hole that you created in the above step. All 4 sticky pistons should be facing towards the front of the setup, as shown below.
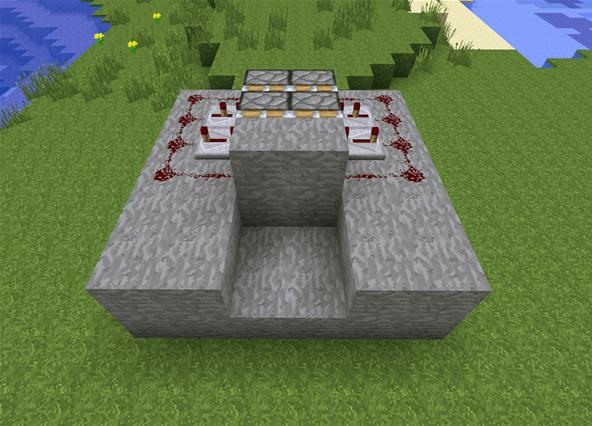
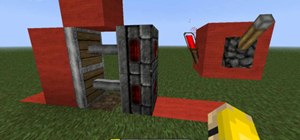
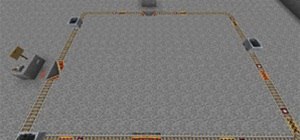
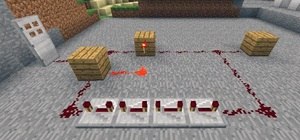
Step 4 Redstone
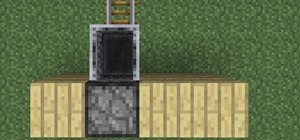
If you're not familiar with redstone, don't let the image below frighten you. It's honestly a very simple step. You're going to want to place 4 total redstone repeaters. Place them on the blocks directly to the side of the sticky pistons. When you're placing them, face the sticky pistons so the power from the redstone is going into the pistons. If you place them backwards, they won't work.

Set the back two repeaters to 2 (right-click each repeater 1 time) and the front two repeaters to 4 (right-click both repeaters 3 times, 4 is the longest delay possible). For the more advanced users, you can edit the delay as much as you want. I personally liked these settings because it gave it a more fun appearance when opening/closing.
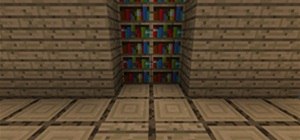
Once you're done with the repeaters, you will want to add 2 blocks (I used stone) in front of each set of pistons. Lastly, you will want to connect everything with redstone, as shown in the picture above (14 total redstone).
Step 5 More Sticky Pistons!
For this step, all you need to do is add another layer of sticky pistons (4 more, totaling 8 sticky pistons) and 2 more stone blocks.
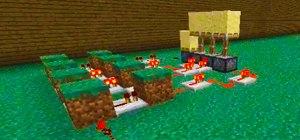
Step 6 Connecting Your Pressure Plate
I connected my pressure plate to the right of my setup, though feel free to make yours on the left side if it's easier (or you just prefer to). Place 1 stone block on the side of the device so you can gradually lower the redstone to the ground, block by block. Dig a line 3 blocks long and 1 block wide.
Connect the redstone from the stone block you just placed to the 1st hole in the ground you've just made. Then, place a redstone repeater (face the redstone line as you place it) and leave the delay on 1 (you don't need to right click it again to change delay like we did before). You will now want to place a redstone torch on the block behind the redstone repeater to power your pressure plate.
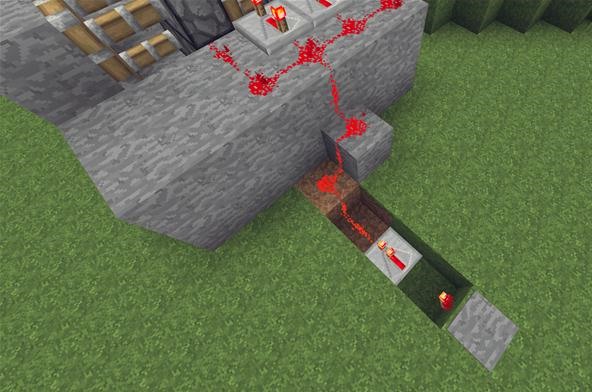
Lastly, place your pressure plate. You can use a stone pressure plate or a wooden one. I personally prefer wooden pressure plates because you can simply throw an item on the pressure plate to activate it!
Stay Tuned...
The new Weekly Workshop will be be announced this Wednesday, so be sure to check back to see what will be covering next! If you have a suggestion for this week's workshop, leave a comment below. We'd love to hear your ideas!
We use TeamSpeak3 for our workshop tutorials; you can download it free here.
Our channel is: ts.wonderhowto.com
Follow us on Twitter @MinecraftHowTo!
Just updated your iPhone? You'll find new emoji, enhanced security, podcast transcripts, Apple Cash virtual numbers, and other useful features. There are even new additions hidden within Safari. Find out what's new and changed on your iPhone with the iOS 17.4 update.


2 Comments
I missed the workshop, but found this page and just built one of these in my towns Library. This was awesome! I look forward to your next one!
Hey! I'm glad you found the tutorial useful! Be sure to check back Tuesday, as last week's workshop (redstone elevators) will be done in tutorial-form just like this was!
Share Your Thoughts