

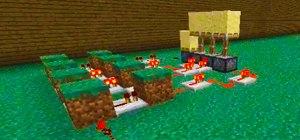
In last Saturday's workshop, the tutorial was on the ABBA switch, so named because it fires redstone pulses in A-B-B-A order. While the turnout was low, it was a really productive workshop! We experimented with a lot of things and had a great time. Hopefully you'll consider joining us next time!
Meanwhile, on to the ABBA switch.
An ABBA switch is a really, really simple thing to build, but it's incredibly useful in certain circumstances. ABBA switches are sometimes necessary in complex redstone builds in order to make them operate properly, but they can also be used to stack a piston on top of another piston, or to make stylish-looking doors, or anything else your imagination can conceive of.
They're a hard thing to explain properly, so why don't you watch this video of them in action?
So, here's how to build them:
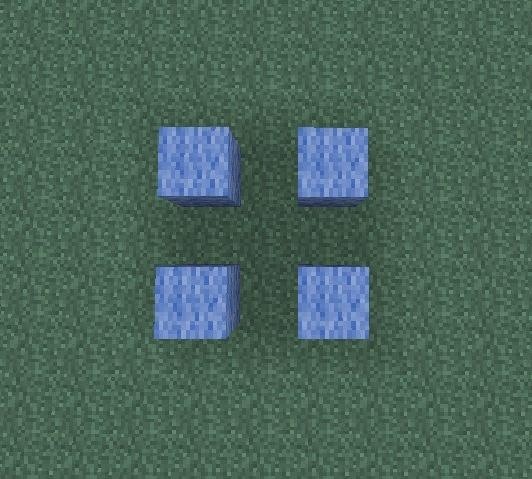
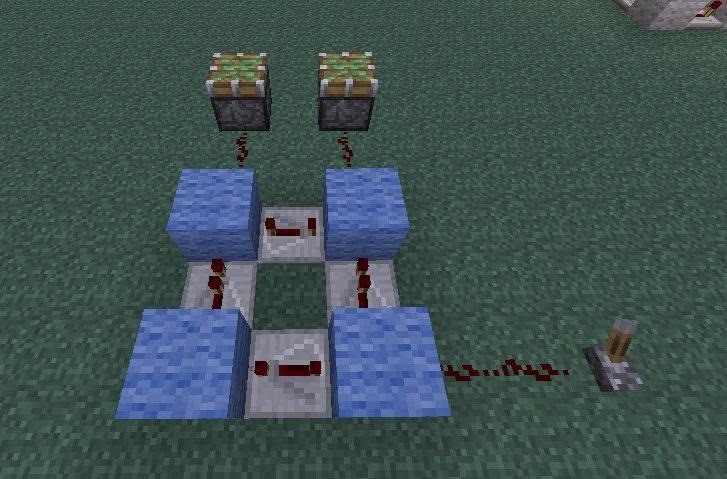
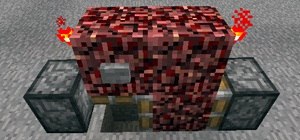
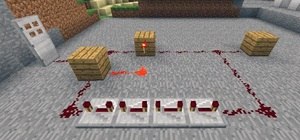
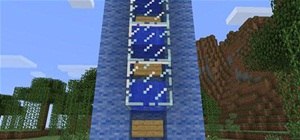
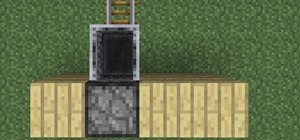
Step 1: Four Blocks
I've used wool in this picture, but you can use any redstone-conducting block of your choice. Lay four of them out like this:
Step 2: Add Repeaters Going Up and Down
Decide which direction you want your ABBA switch to face, and then add a repeater going away from your switch at the back and toward your switch at the front, making sure that both of these repeaters are set to maximum delay.
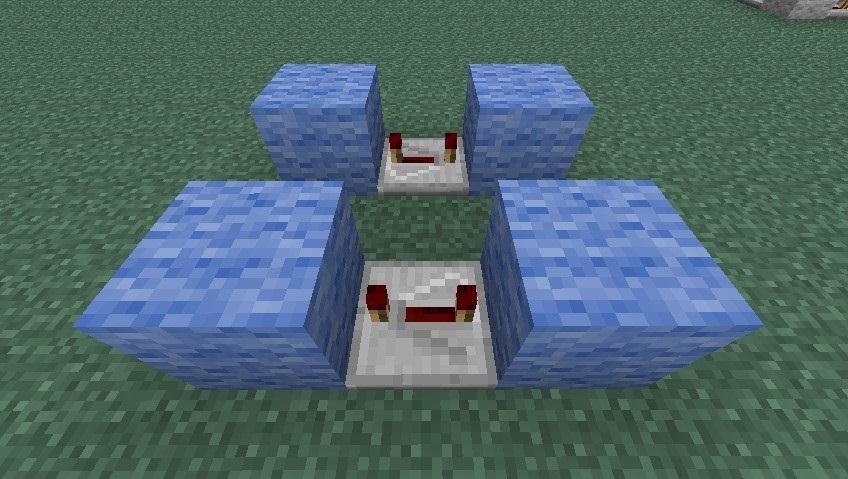
Note that these two repeaters are facing opposite directions.
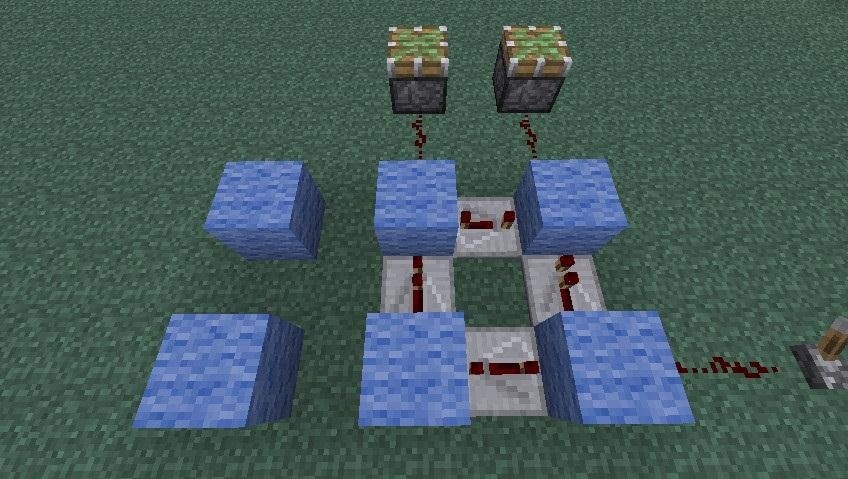
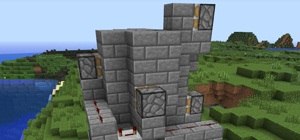
Step 3: Two More Repeaters
Now add two more repeaters, but unlike the first two, these are both going to face the same direction, and that's the direction that your devices will be in. Also unlike the first pair, these are set to no delay.
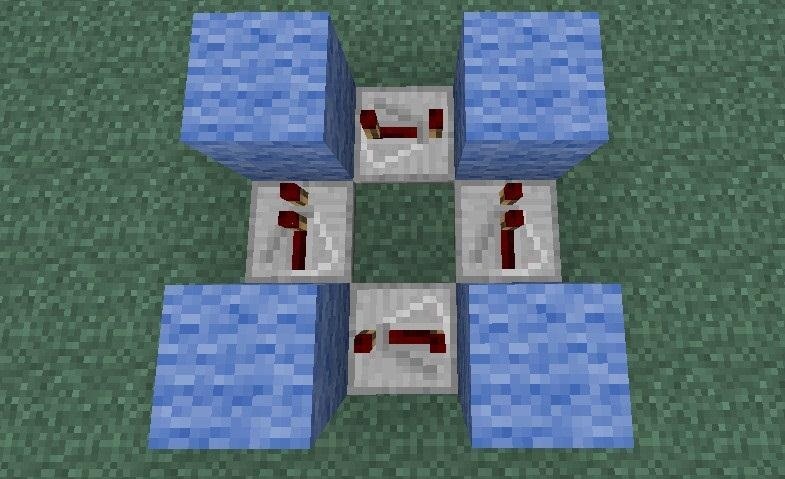
Note that they are facing the same direction.
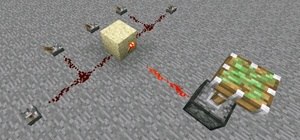
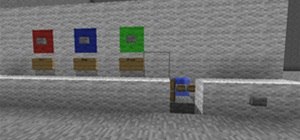
Step 4: Add a Power Source
You can use buttons, levers, pressure plates, rail detectors, or whatever you want as a power source. For this demonstration, I've used a simple lever. You'll be attaching your power source to the bottom left side, like so:

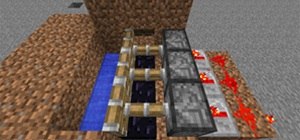
Step 5: Add Your Devices
I've used pistons in this picture, but you can literally use anything. Note how the pistons are oriented compared to the lever.
And then you're done—if you just want a simple ABBA switch!
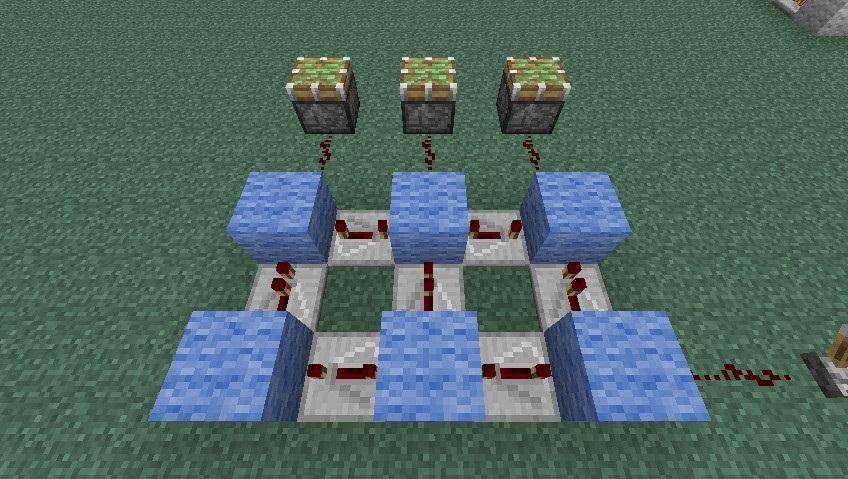
However, maybe you don't just want two outputs. Maybe you want three or more, for an ABCCBA switch, or the even-less-pronounceable ABCDDCBA switch!
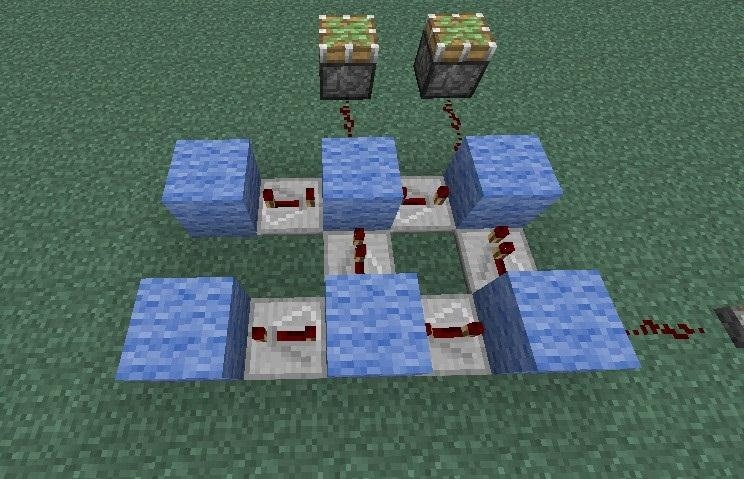
Step 6: (Optional) Two More Blocks
All we're going to be doing is expanding the same architecture we've already established.
Step 7: (Optional) Add Two More Repeaters
Now continue the direction of repeaters. The one at the back should be facing away from your power source, and the one in the front should be facing toward your power source. Additionally, don't forget to put both of them on maximum delay.
Step 8: (Optional) One Last Repeater
Now just add one final repeater pointing toward your output, and you're all set! Then if you want more outputs, just keep repeating these last few optional steps!

Simple!
However, if you know a better way to make ABBA switches, or you've found a great build that incorporates them, please submit a tutorial of your own!
Just updated your iPhone? You'll find new emoji, enhanced security, podcast transcripts, Apple Cash virtual numbers, and other useful features. There are even new additions hidden within Safari. Find out what's new and changed on your iPhone with the iOS 17.4 update.


3 Comments
WOW! I wish I came and read this sooner, this should help me build a lot more mechanisms and upgrade some existing ones. +1 Kudos
Great, I'm glad, Jason! Sometimes there are really simple ways to do things that are just hard to find or figure out. Personally, I needed these two months ago for a build, and totally drove myself nuts trying to figure out how to do it. =)
Wow, thanks!
I was looking for an ABBA gate, and here you've got not just an ABBA gate, but an ABCCBA gate. Strange anagram, but it's awesome none the less! thanks! this helps for bloody piston designing.
Share Your Thoughts