
BUD (Block Update Detector) switches can essentially take the place of a regular switch like a lever or a button, but instead of having a "usable" function like pressing the button or flipping the lever, BUD switches trigger when a block next to a piston changes states.
There's a long list of ways to trigger a BUD switch, including placing a block, breaking a block, using a furnace, hoeing grass, clearing snow, growing a tree, and more.
BUD switches work by virtue of a bug in Minecraft that affects how blocks recognize what other blocks are placed next to them, and also uses the glitch that pistons are essentially two blocks tall when it comes to power (that is, you can power the block above a piston and it will still work).
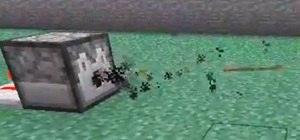
Here's a video demonstration of how they work:
Their design is incredibly simple, but when you don't understand how they work, it's hard to conceive of how to use them in your builds.
So, let's take a look a how to build each of these!
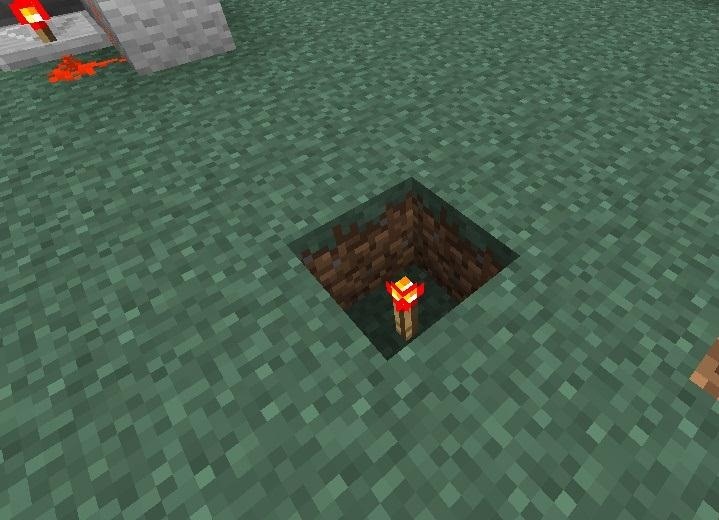
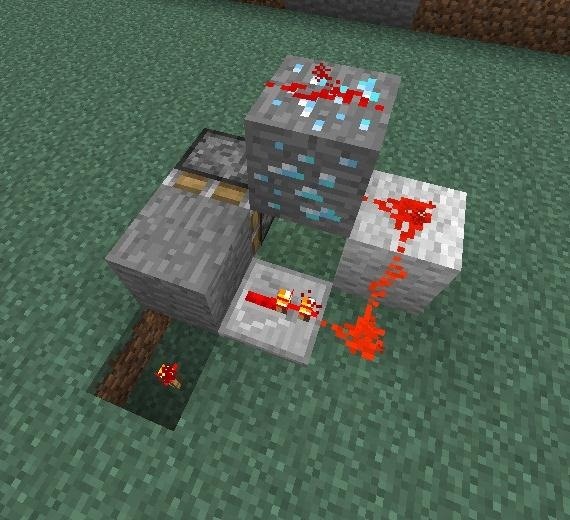
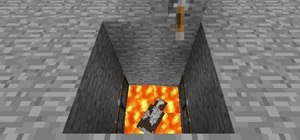
Basic BUD Switch
This is your basic BUD switch design. It functions like a lever, providing permanent states when on and off.
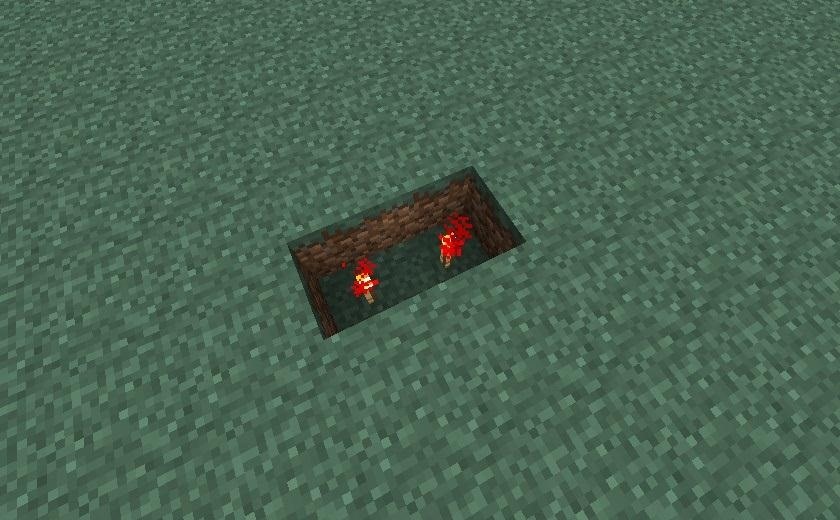
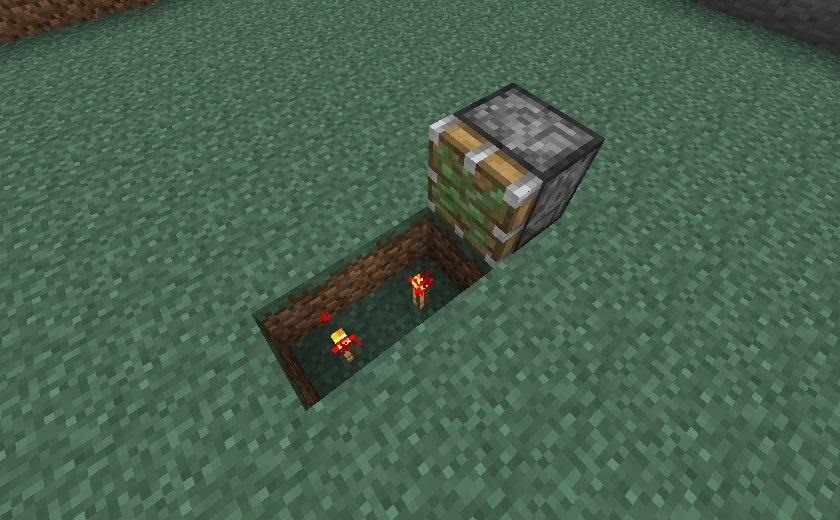
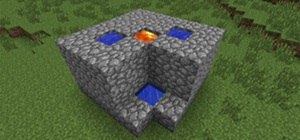
Start with just a hole with a redstone torch in it.
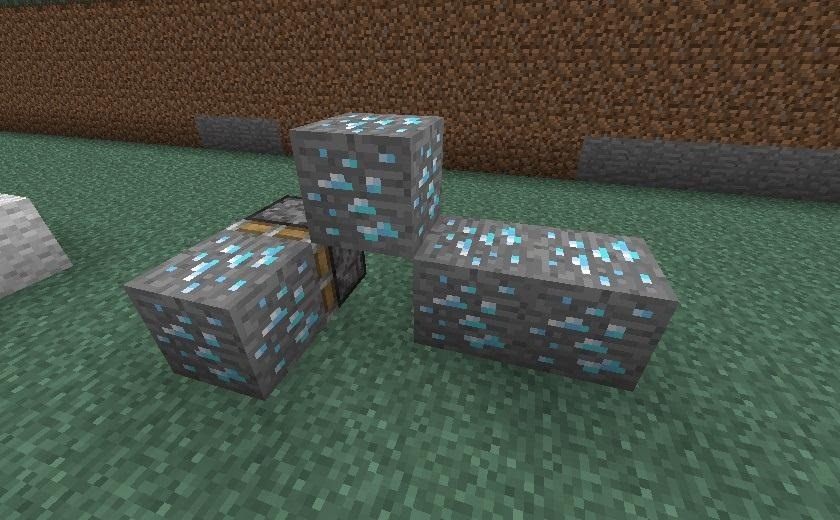
Then put a sticky piston next to it, facing inward.
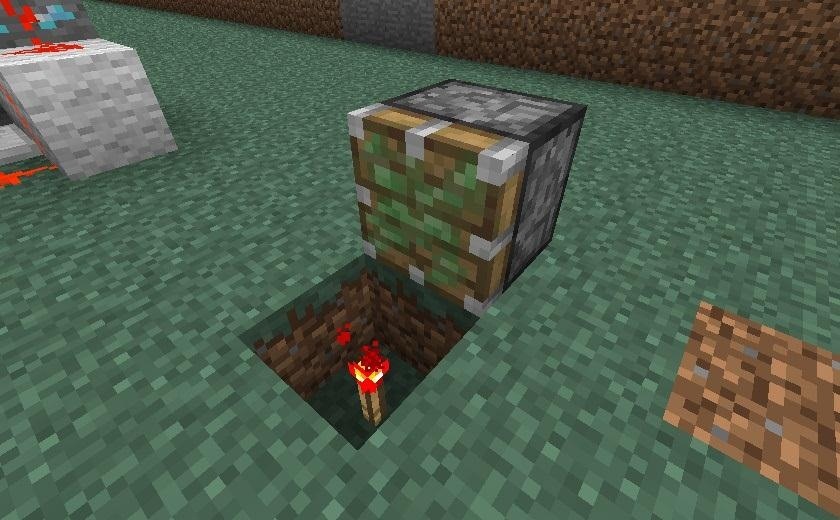
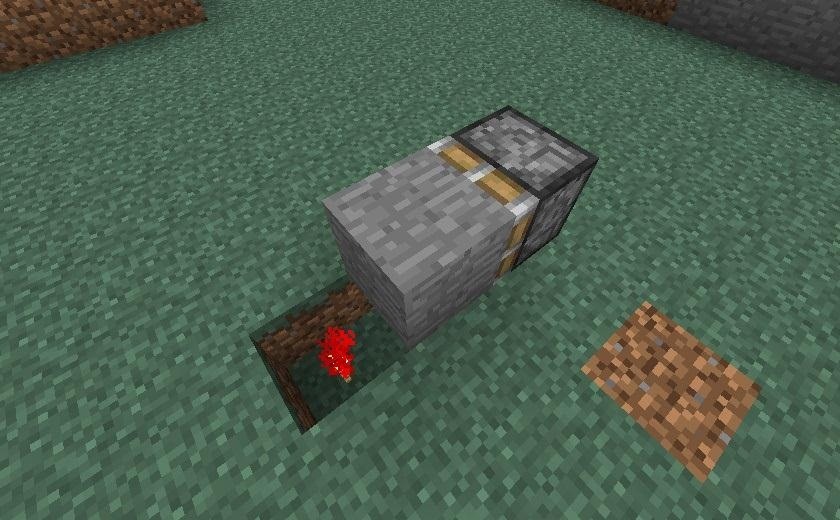
Then put a block over it. Any type of redstone-conducting block will be fine.
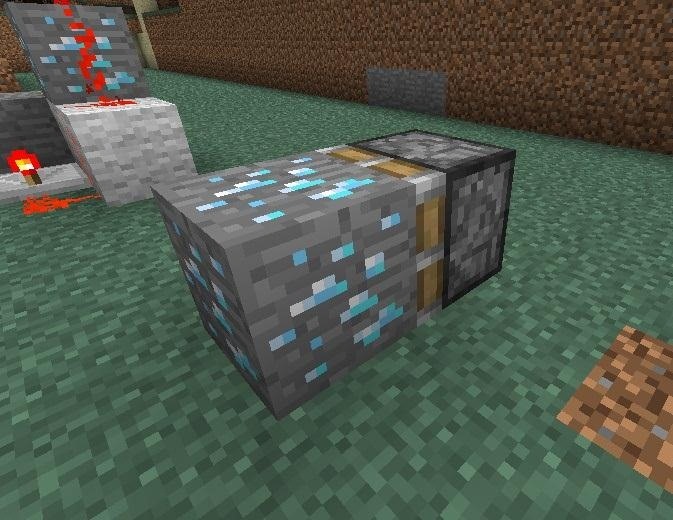
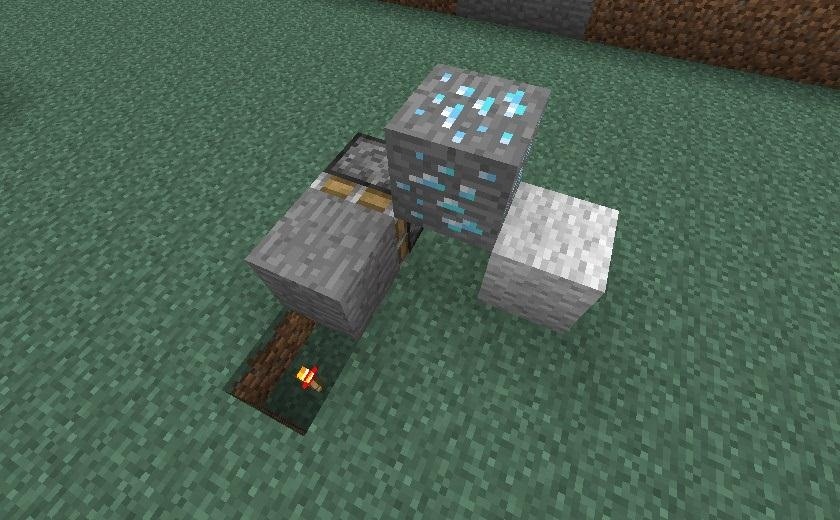
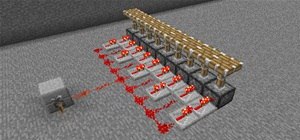
Then add a few blocks next to it, in a line.
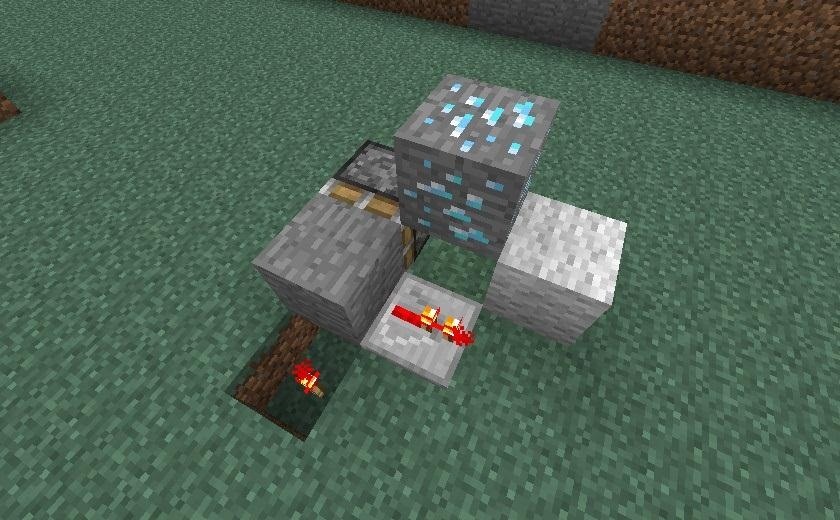
Add a repeater pointing into the top block, set to zero delay.
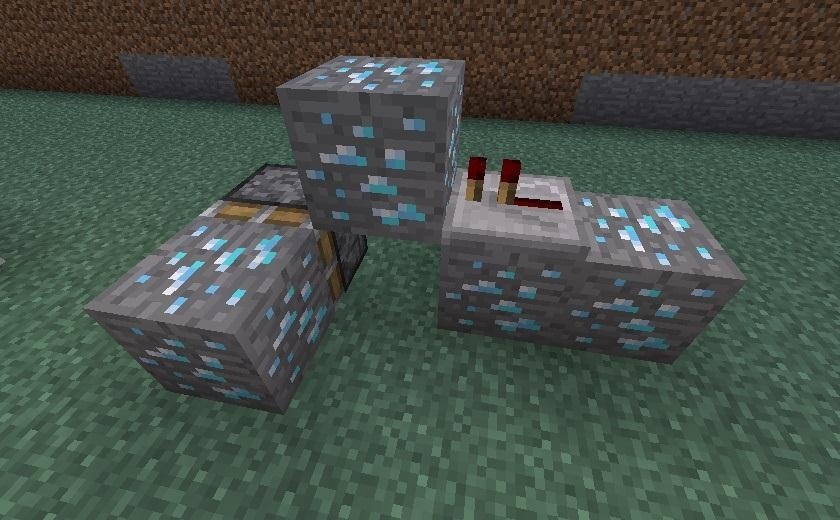
Then just connect the block in front of the piston to the repeater, and you're all set!
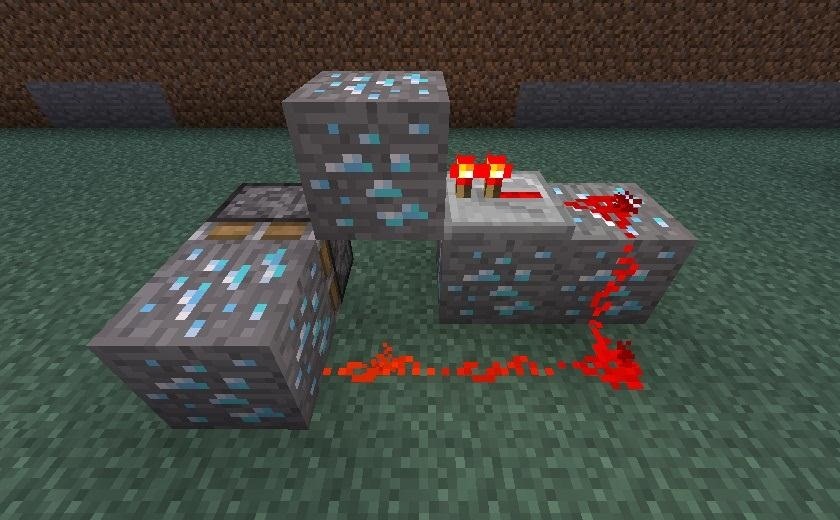
Now whenever something is updated next to the piston, the switch will trigger!
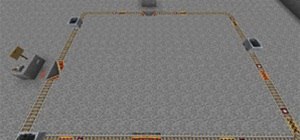
Self-Resetting BUD Switch
This BUD switch will provide a short burst of power much like a button. It, too, is very easy to build!
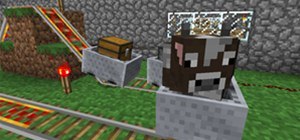
Start with a hole two blocks long, with two redstone torches in it.
Add a sticky piston at one end, facing inward.
Place a redstone-conducting block in front of the piston.
Now add two blocks next to the piston, one at ground level, and one in the air.
This is a little tricky, but add a repeater pointing away from the block attached to the piston, set to zero delay.
Now just add redstone going upward, and you're all set!
You now have a self-resetting BUD switch! Congratulations!
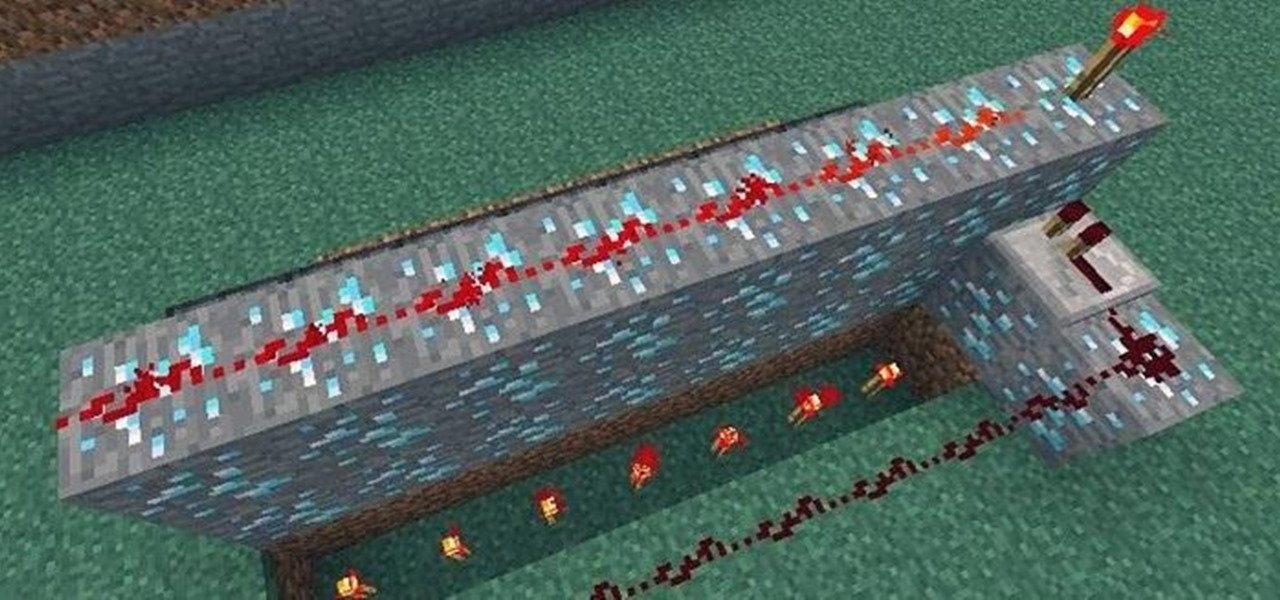
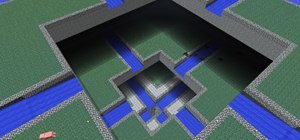
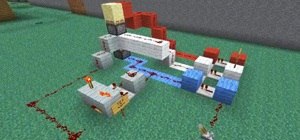
Self-Resetting BUD Switch Array
Say that you want an entire wall wired up to a BUD switch, so that if someone breaks any of your blocks, they get crushed to death.
No problem!
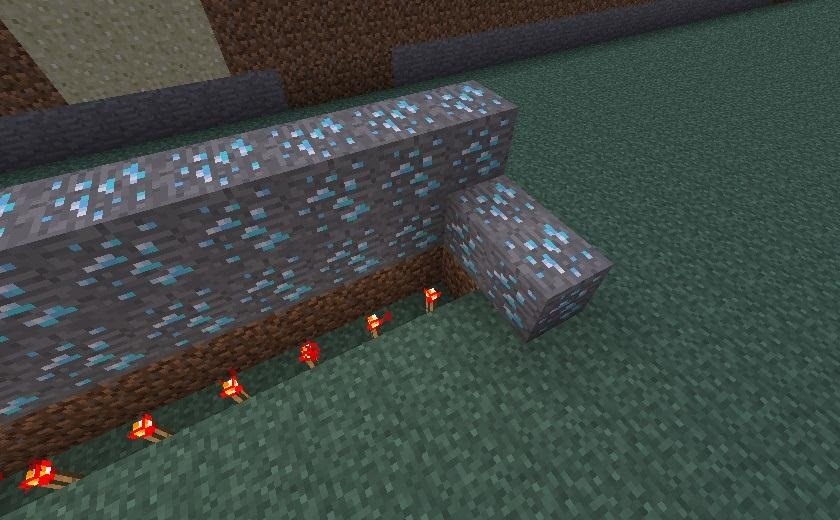
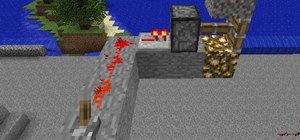
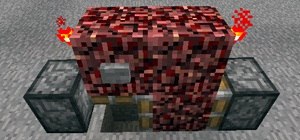
Start with a long trough with redstone torches in it. This can be a maximum of 12 blocks long.
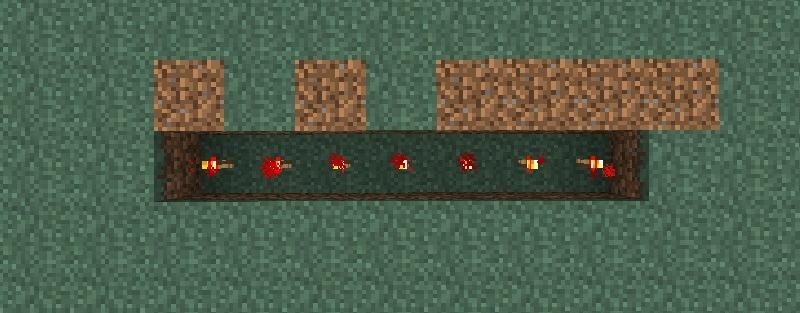
One block away from the trough, make the same number of sticky pistons pointing into it, like so:
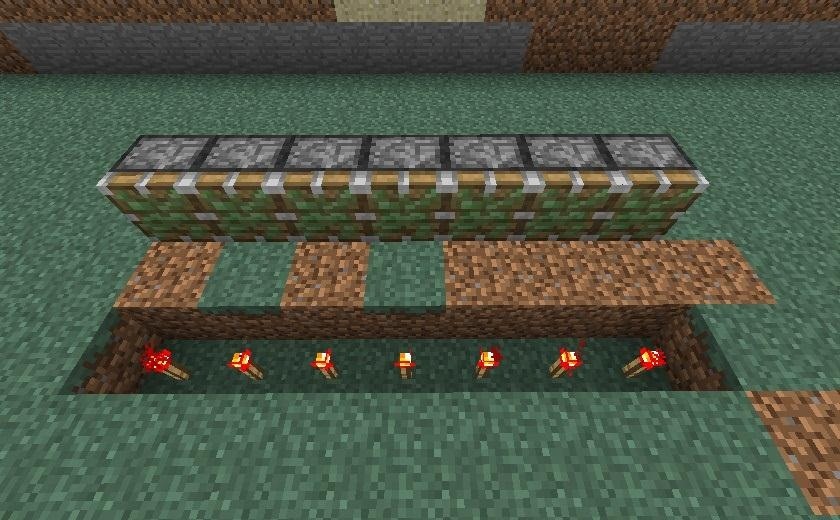
Now add two rows of blocks in front of the pistons, one on top of the other. Make sure that you extend these blocks one row longer than the trough is.
Now add two blocks alongside your trough.
Run a length of redstone wire along the front (or back, actually) of your trough. Take it right up onto the block at the end.
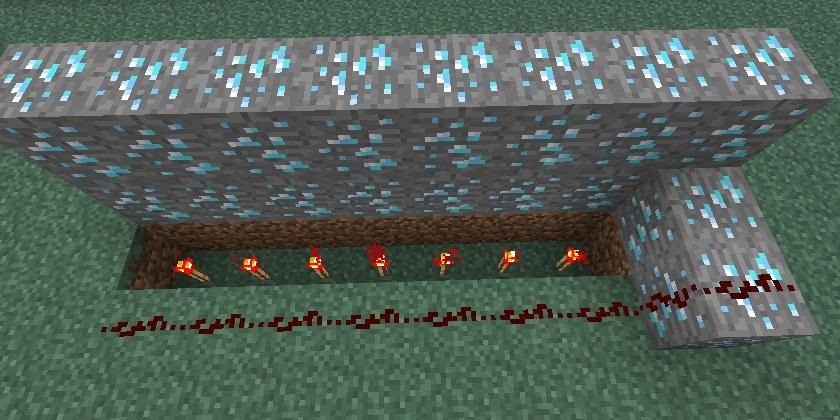
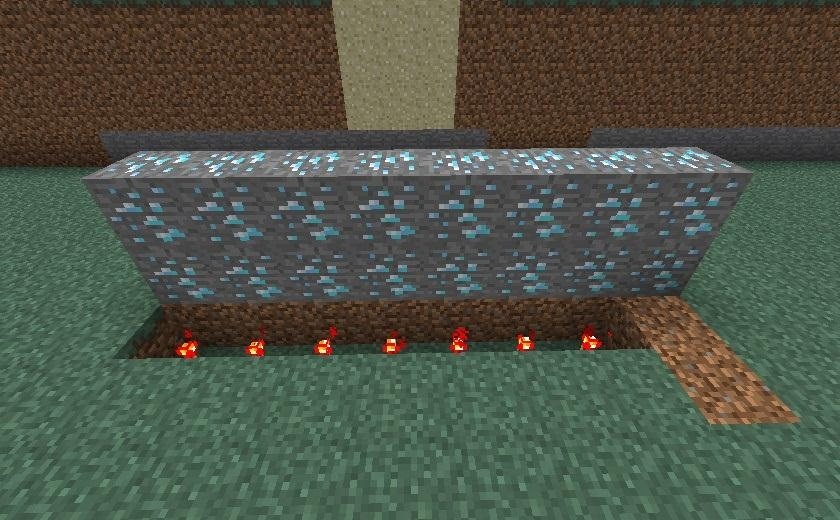
Now add a repeater facing into the top row, set for zero delay, and then put a redstone torch on the block above it.
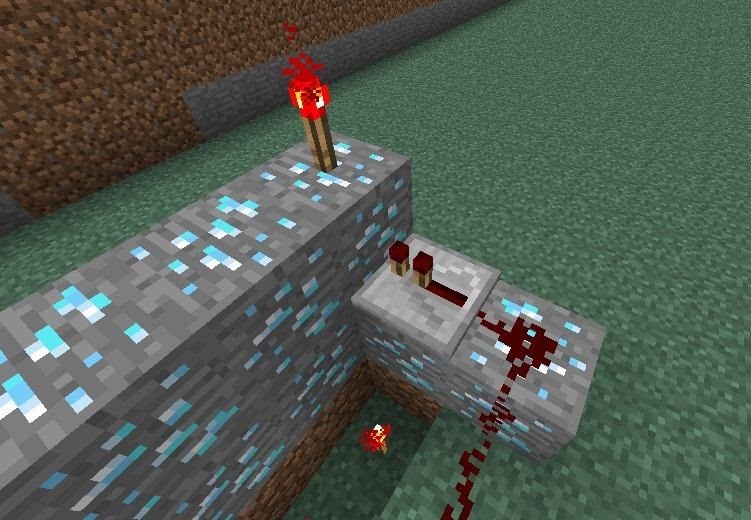
The last step is to add redstone wire all along the top of it.
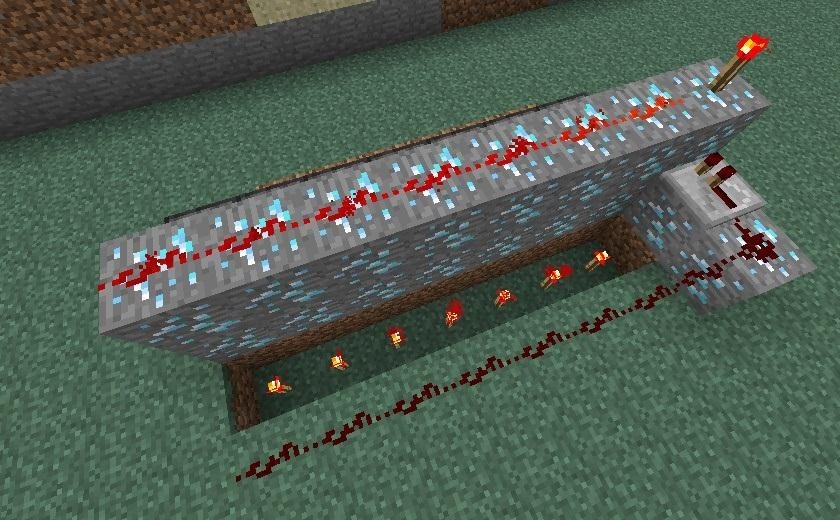
And that's it! You're all done!
There are a ton of designs for BUD switches, some which are uniquely suited for specific situations. If you have a design you'd like to share, go ahead and post a How-To for it, because we'd love to see it!
Just updated your iPhone? You'll find new emoji, enhanced security, podcast transcripts, Apple Cash virtual numbers, and other useful features. There are even new additions hidden within Safari. Find out what's new and changed on your iPhone with the iOS 17.4 update.


Be the First to Comment
Share Your Thoughts