


Welcome to Minecraft World! Check out our tutorials, post to the community corkboard, and come play on our free server!

The workshop this past Saturday was focused around making a Redstone Elevator, and everyone joined in and made their own versions—all very cool and creative. But this particular tutorial is for my personal favorite redstone-activated elevator. This style of elevator works beautifully on lag-free servers and is completely compatible with 1.1! So, for those of you that missed the last workshop, feel free to follow the detailed tutorial below to make your own!
Elevator Overview
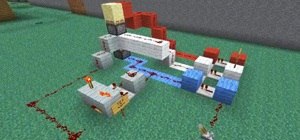
Here's a quick video of the redstone-activated elevator in action.
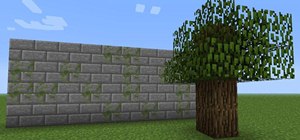
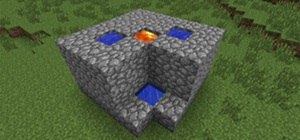
Step 1 Layout
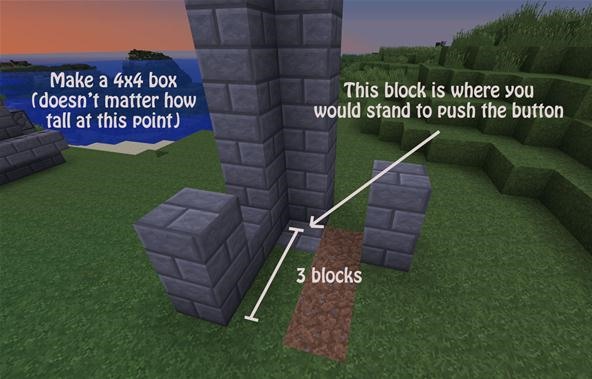
You're going to start by making walls for the elevator. The dimensions should be 4x4 and the height can be whatever you decide! Keep in mind that before you choose your building material, it will need to blend nicely with the stairs that we will add later on.
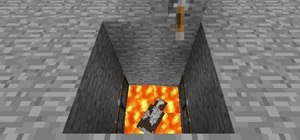
Add a block in the ground to show visitors where they need to stand in order to activate the elevator. I marked the ground here with a stone brick block.
Step 2 Button
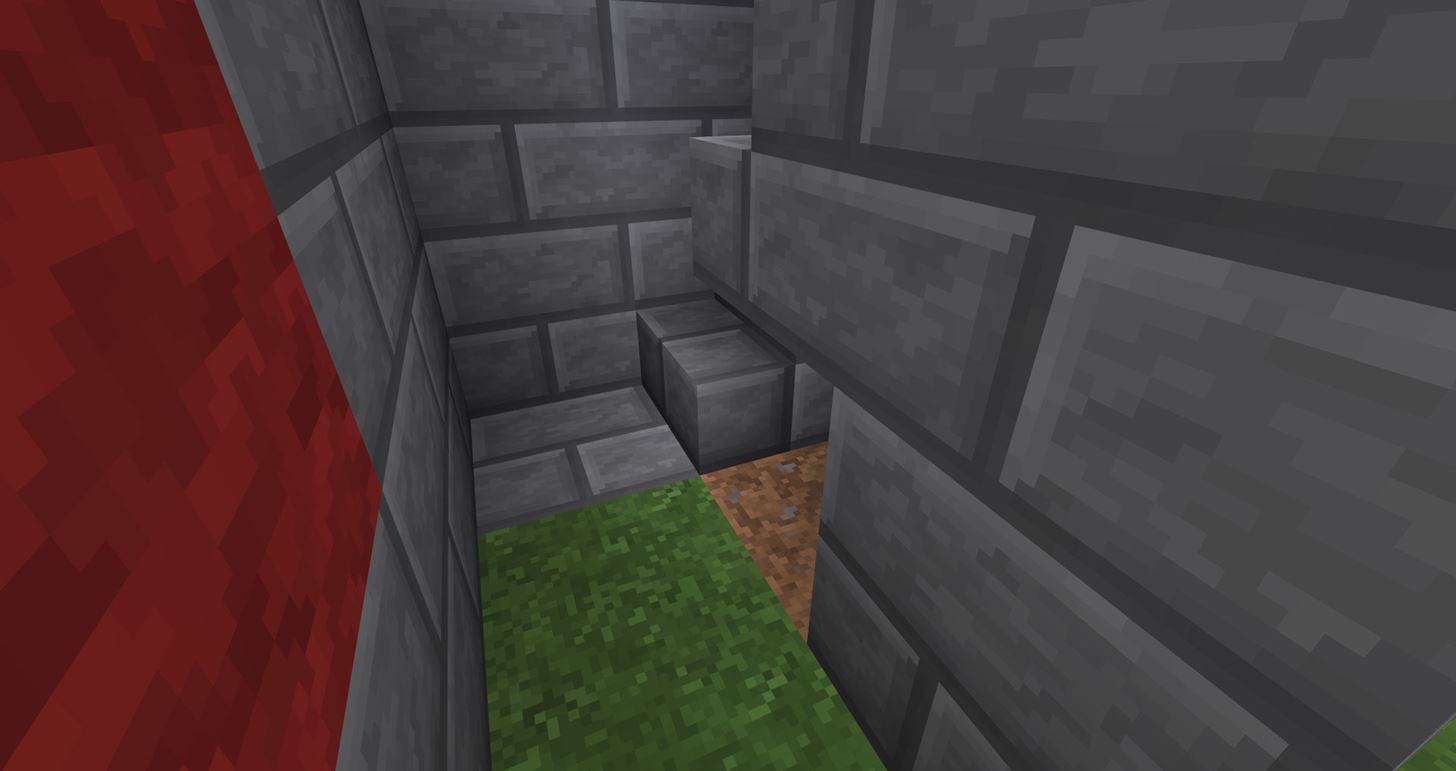
After you finished building your walls, you will want to add a marker. This is where your button will be placed later on.

Step 3 Spiral Staircase
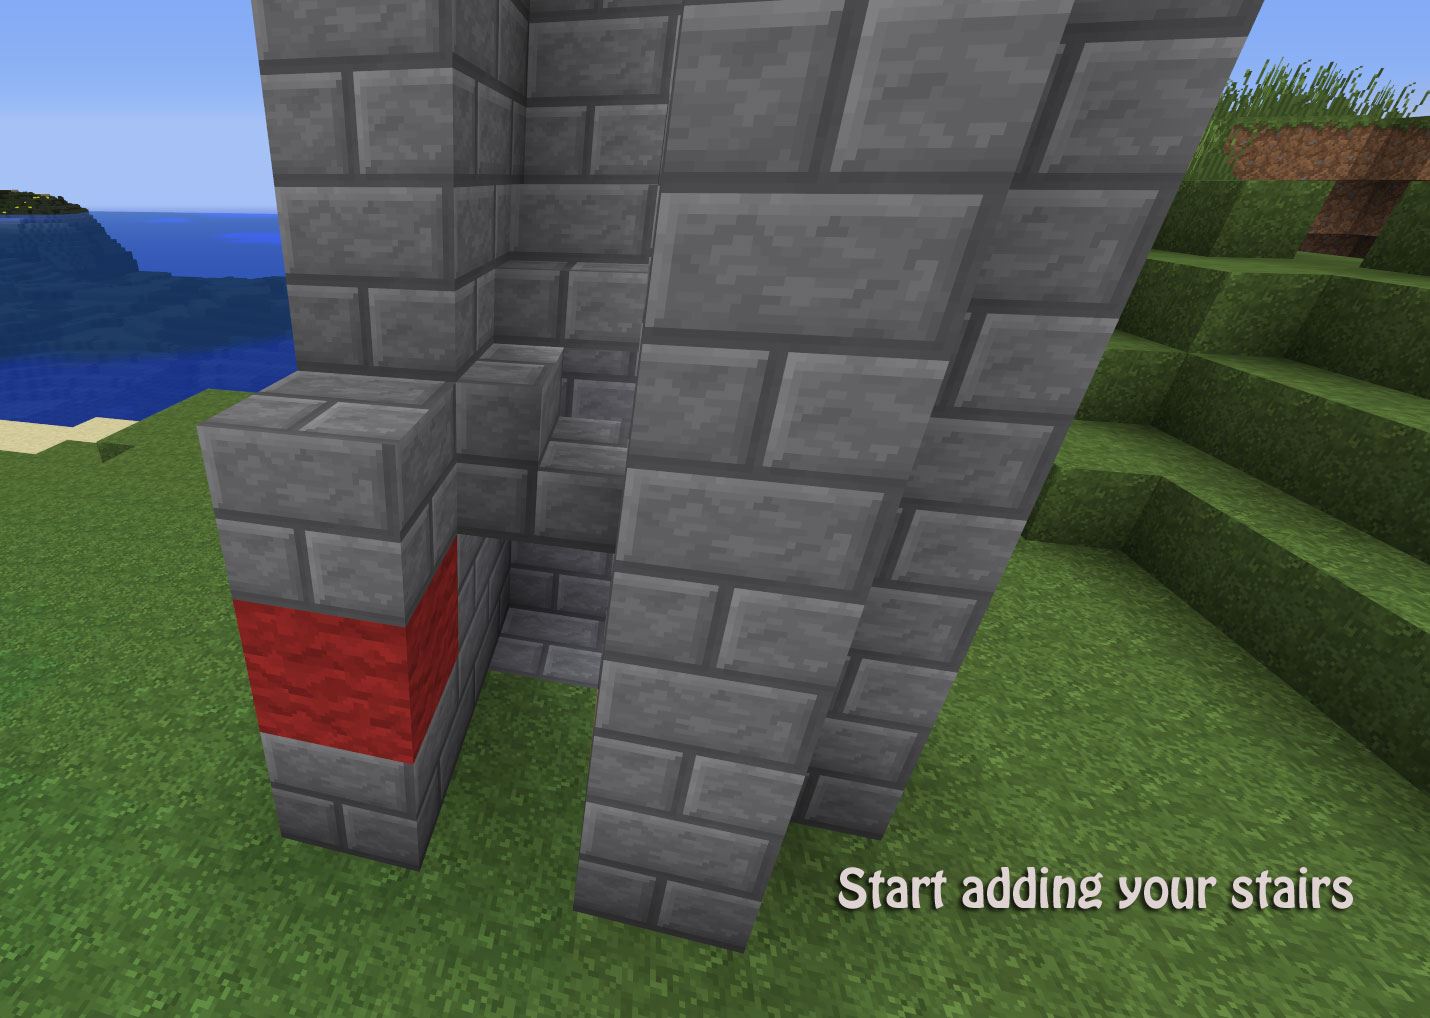
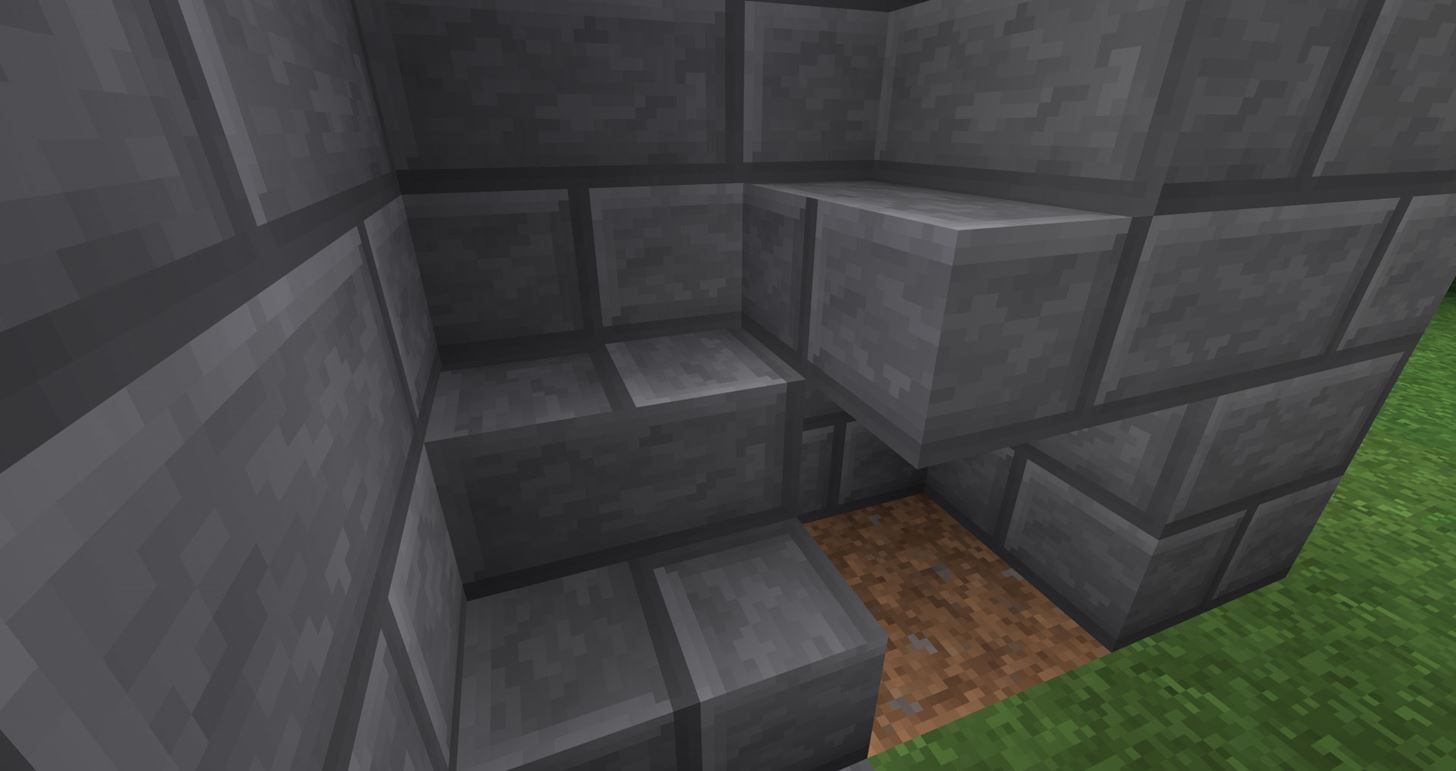
Next you will want to add your stairs. Stand on the marker you made earlier on the ground and face to your right. Place the stair there, and continue making the spiral staircase all the way up to the top.
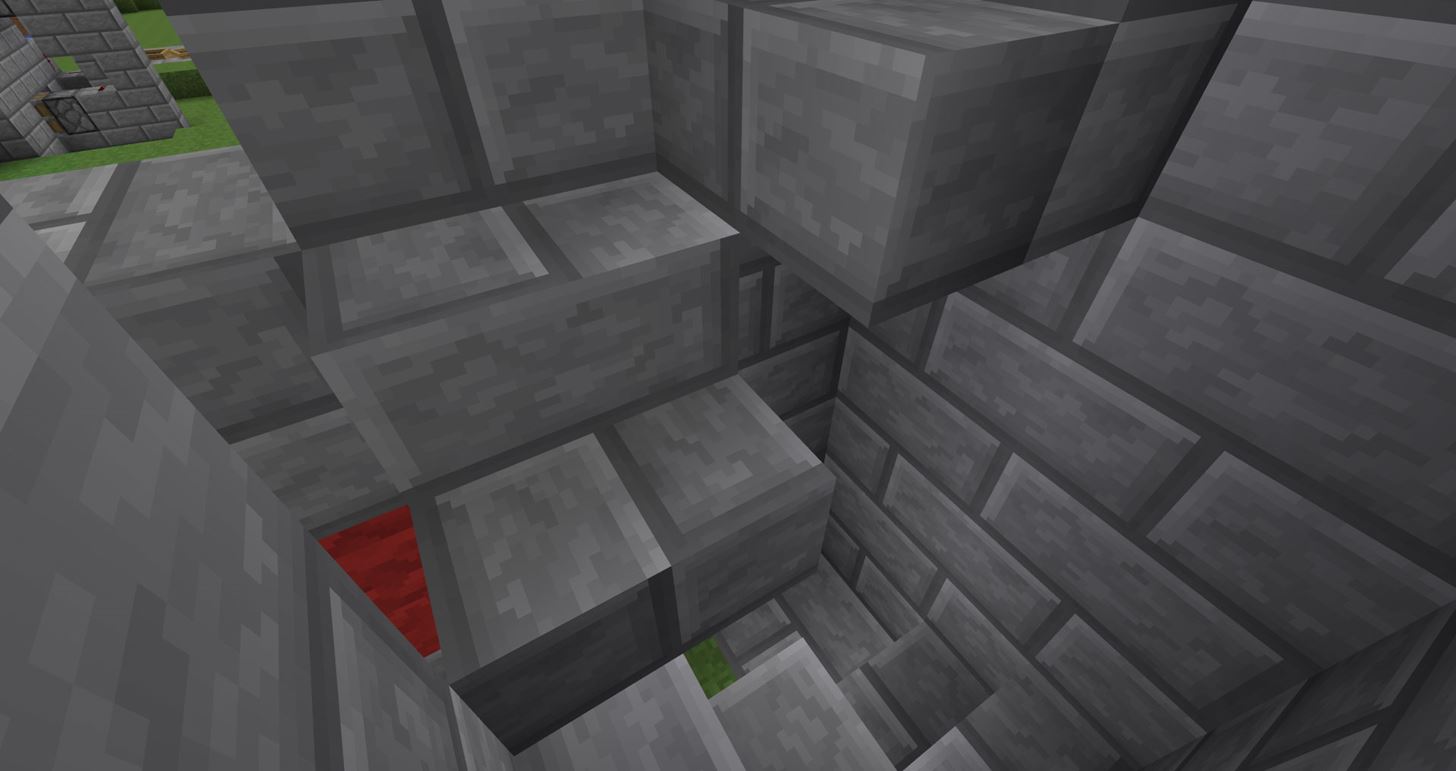
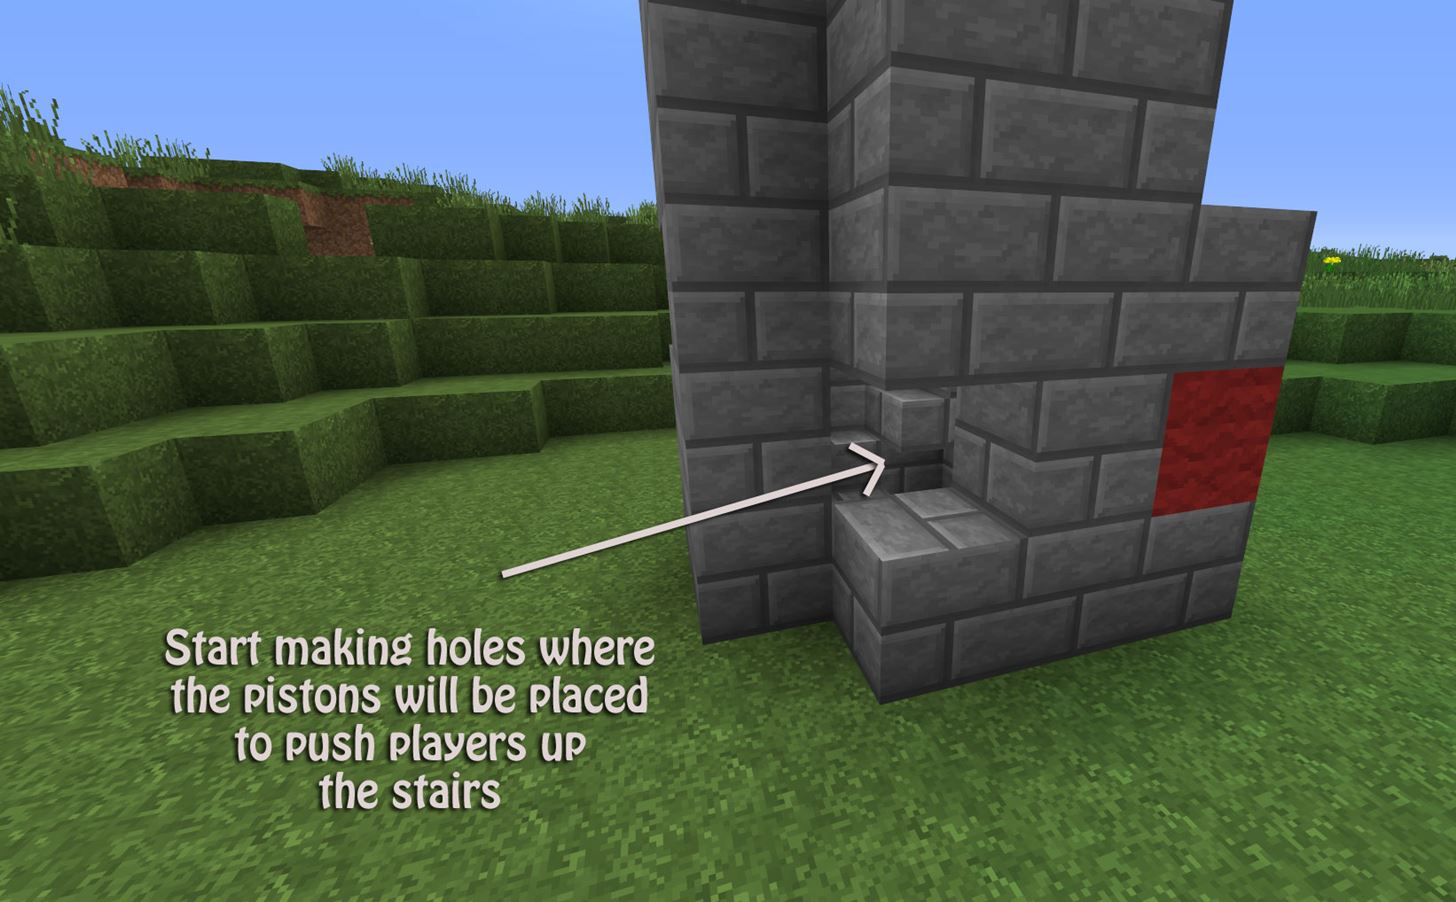
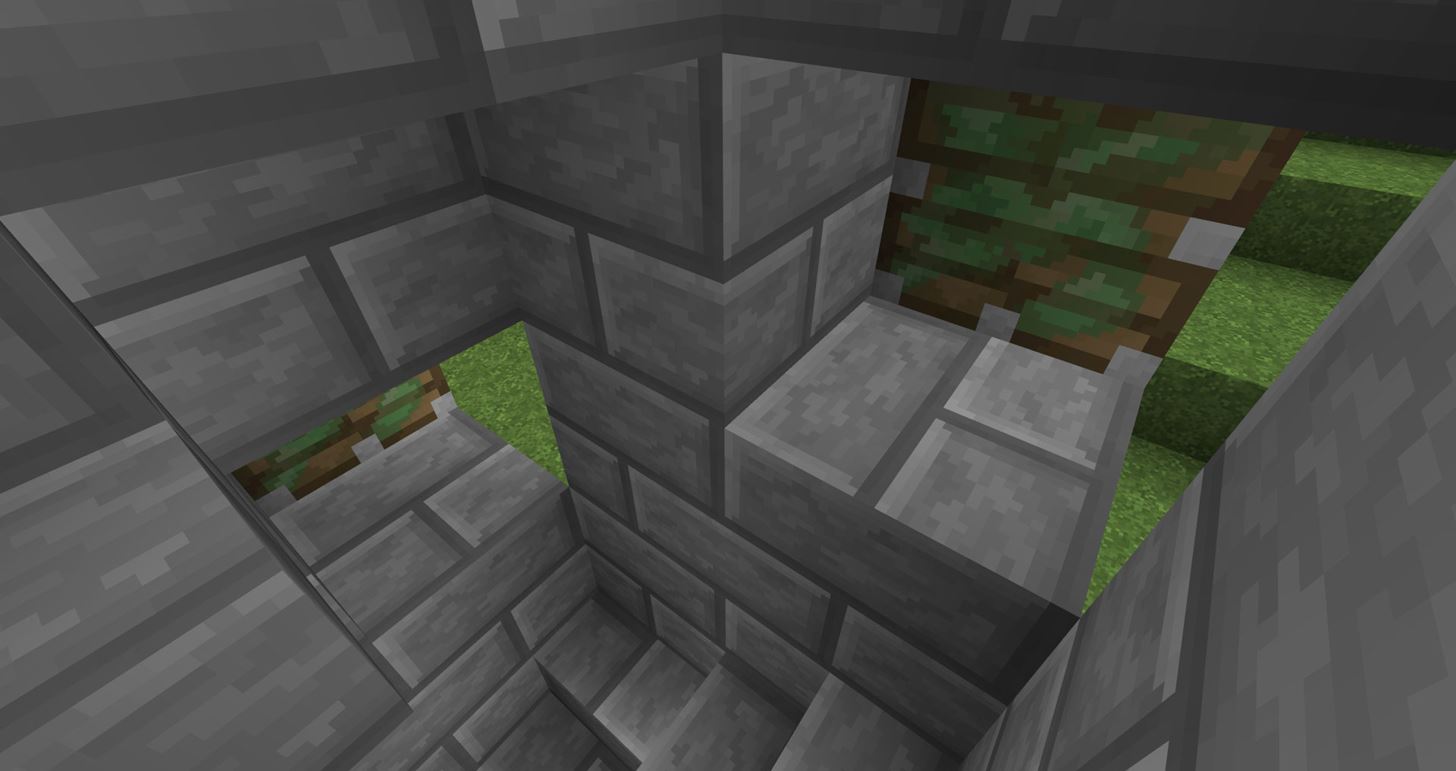
Step 4 Holes
You now need to add holes. These holes are just guidelines to show where the sticky pistons will need to be placed.
The way this elevator works, the sticky pistons push 1 block from the wall... which in return pushes the player literally right up—one stair at a time. Keep this in mind when making your holes, and that will ensure that you are placing your holes correctly!
When you walk through the front entrance of your elevator, look to the left of the marker in the ground. 1 block up from the ground (2nd block up), that is the first hole you will need to break. Continue breaking 1 hole all the way to the top of your elevator.

**NOTE: Keep in mind that the blocks are NOT going to be pushing the stairs, they are going to be pushing players up the stairs! **
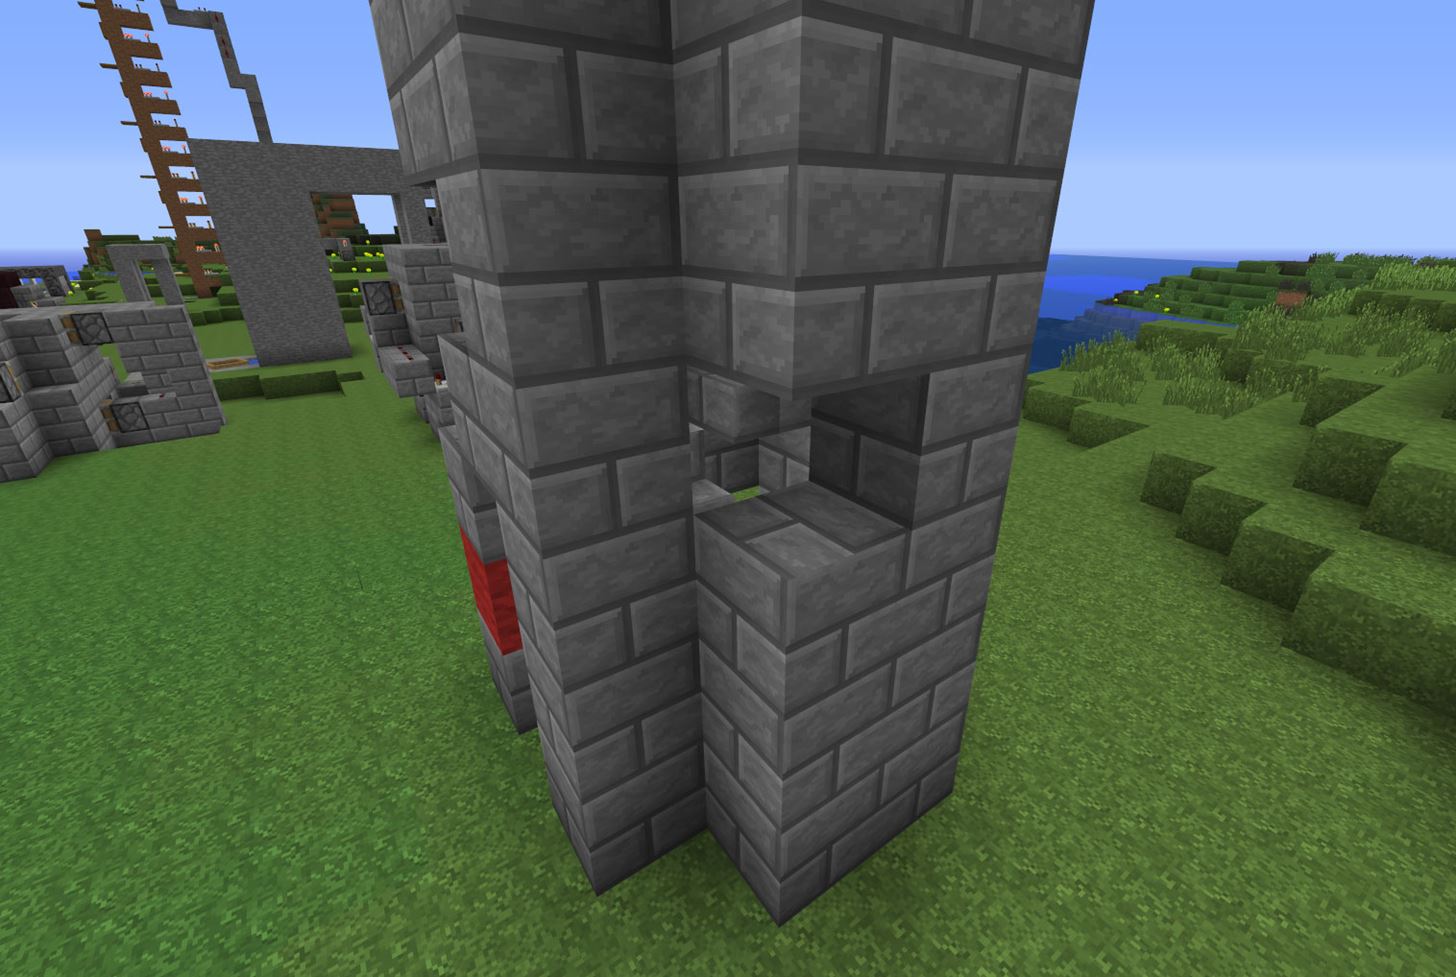
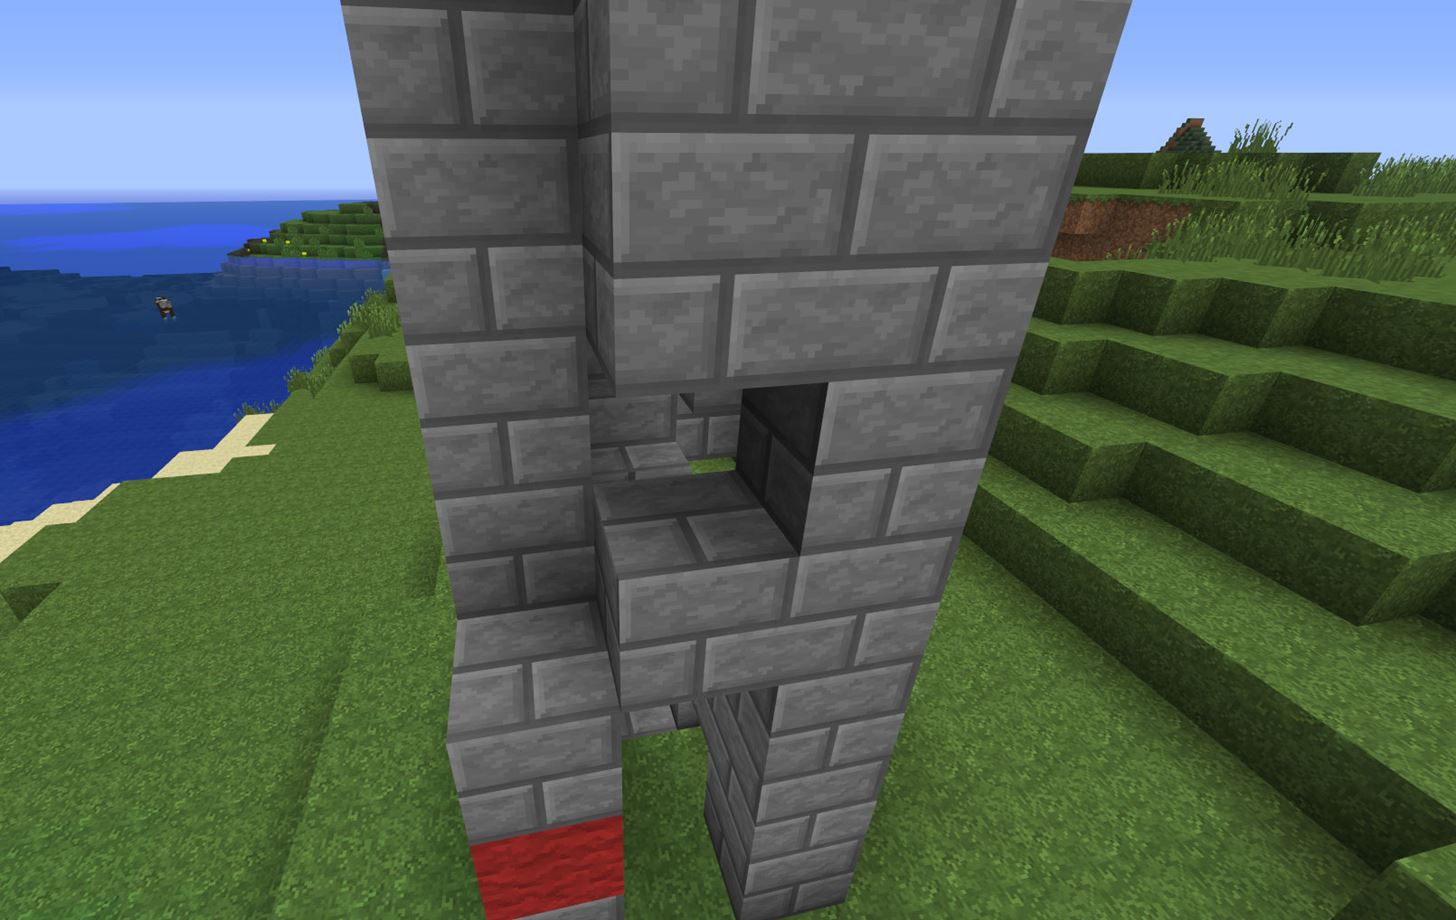
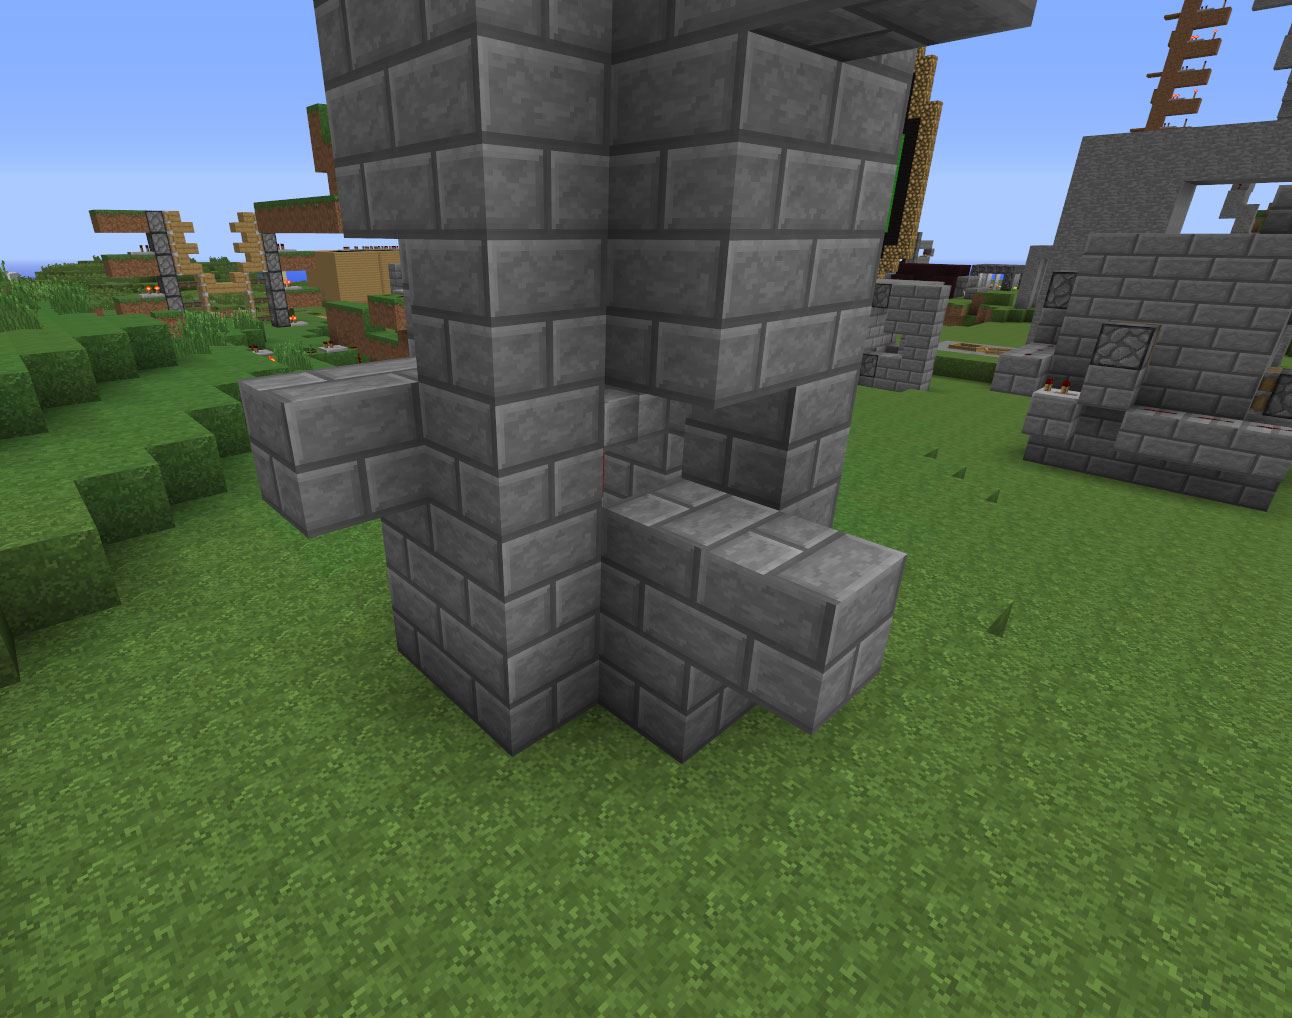
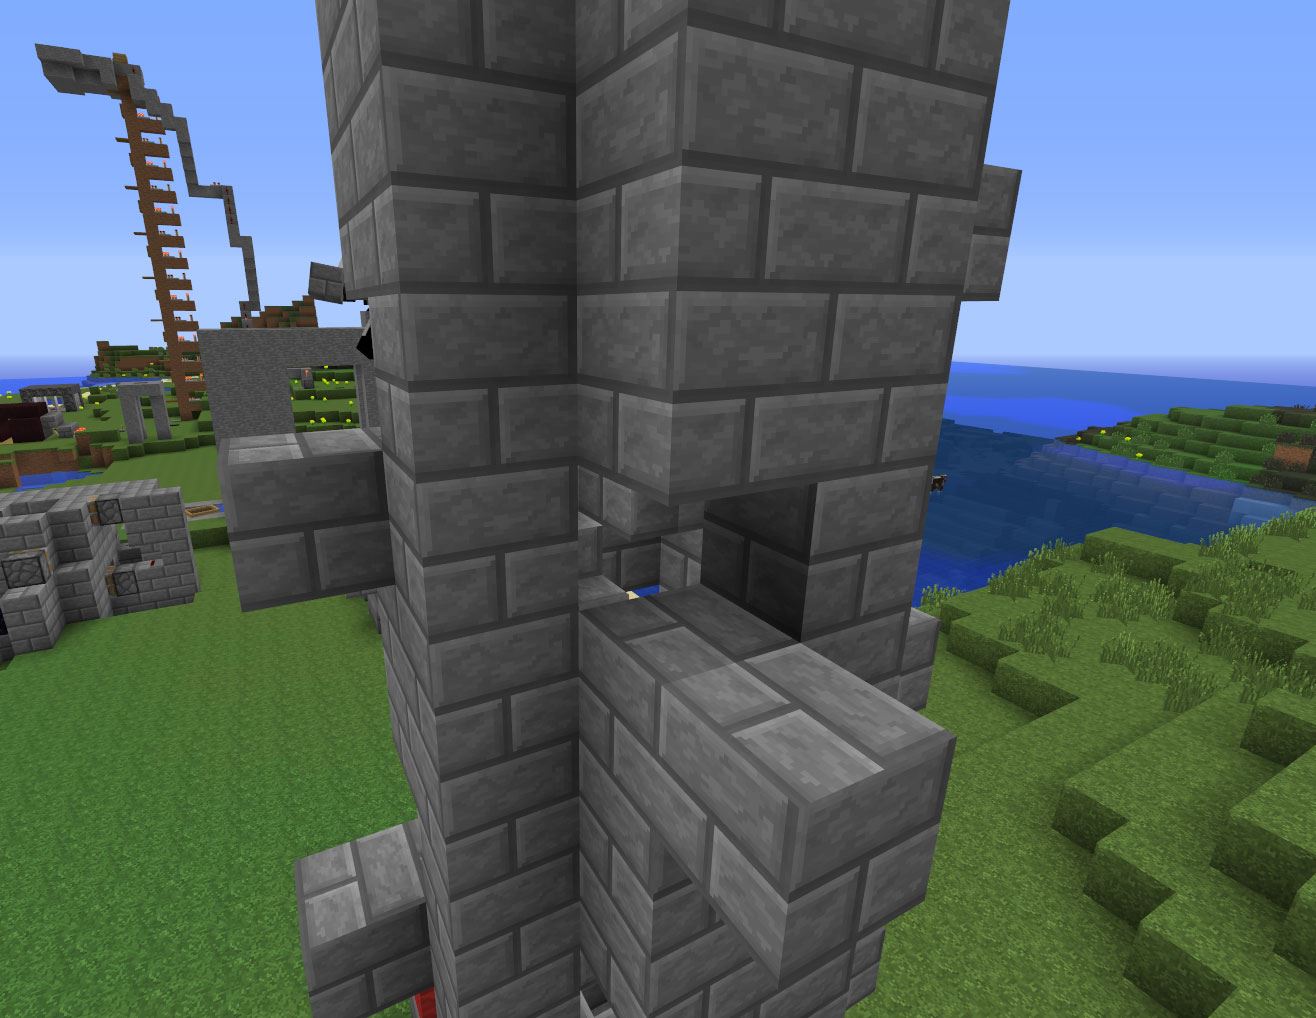
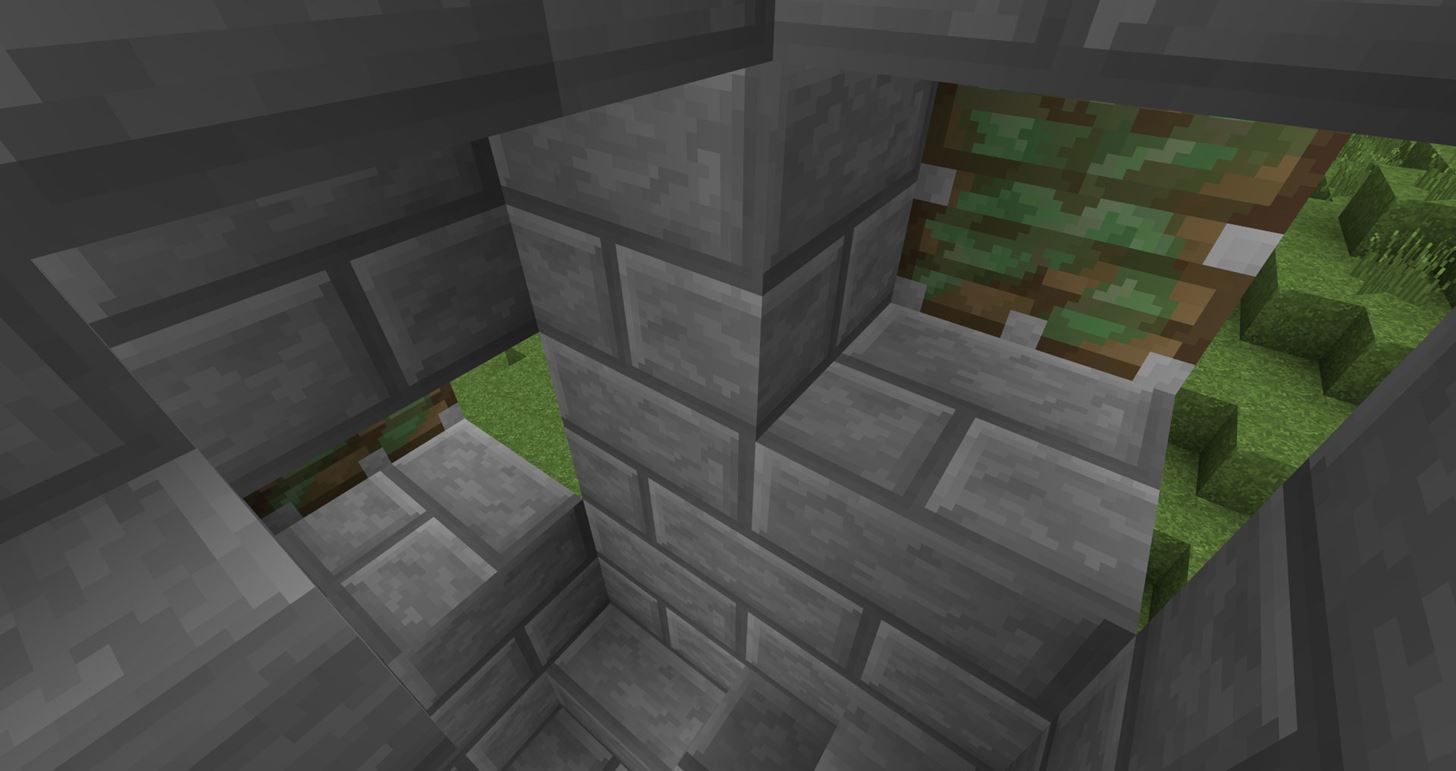
Step 5 Add Blocks
For this step, all you need to do is add one block below each hole you just created in Step 4.
Keep in mind that you are NOT placing blocks directly behind the holes... you're placing them 1 block down below each hole you just made.
Again, do the same thing all the way up to the top!
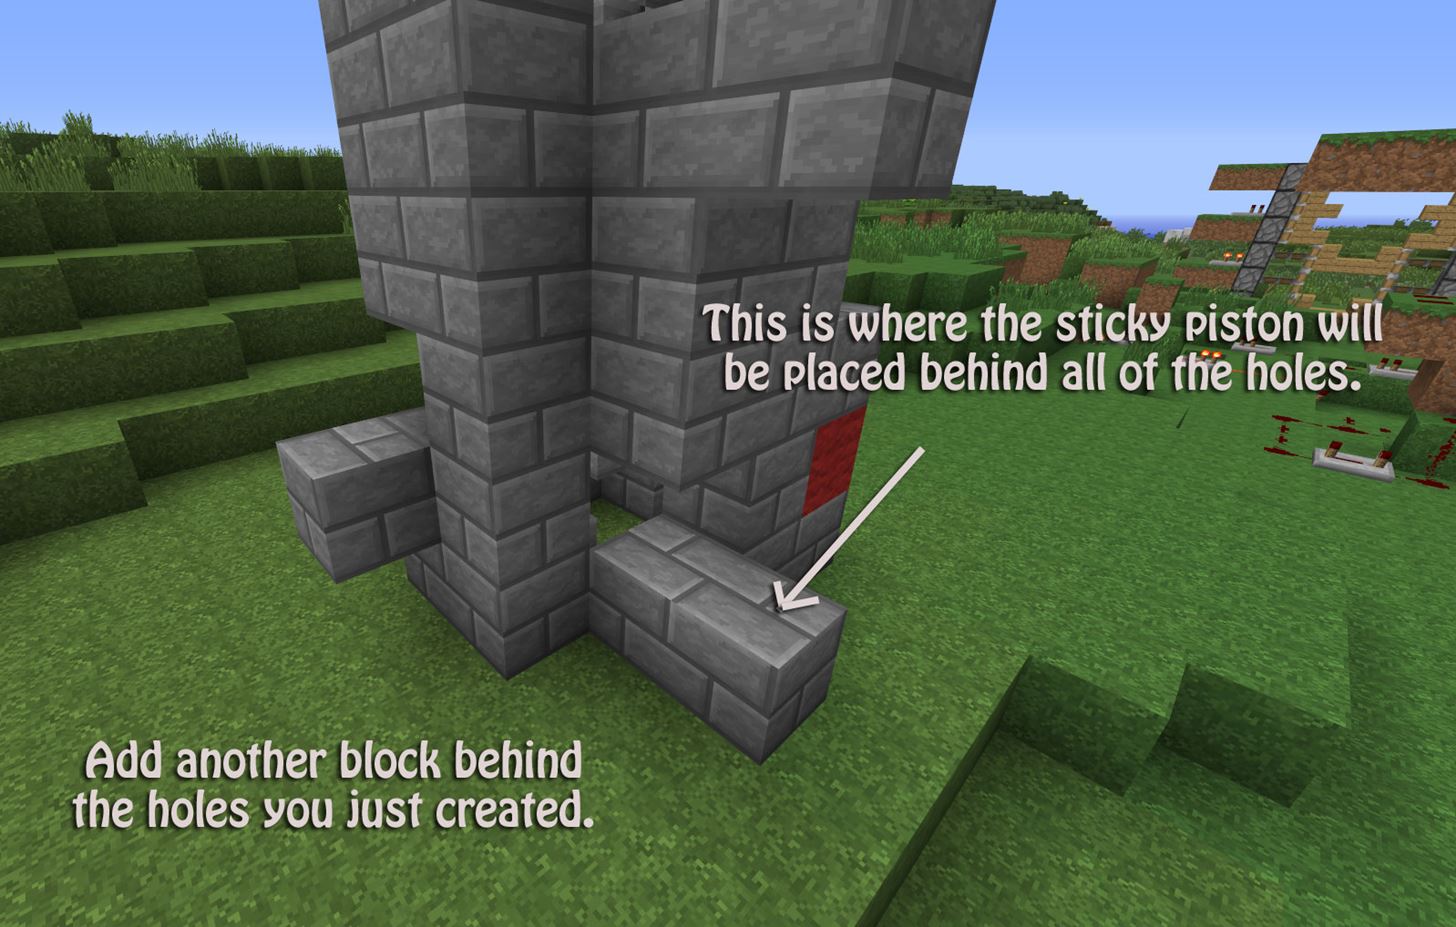
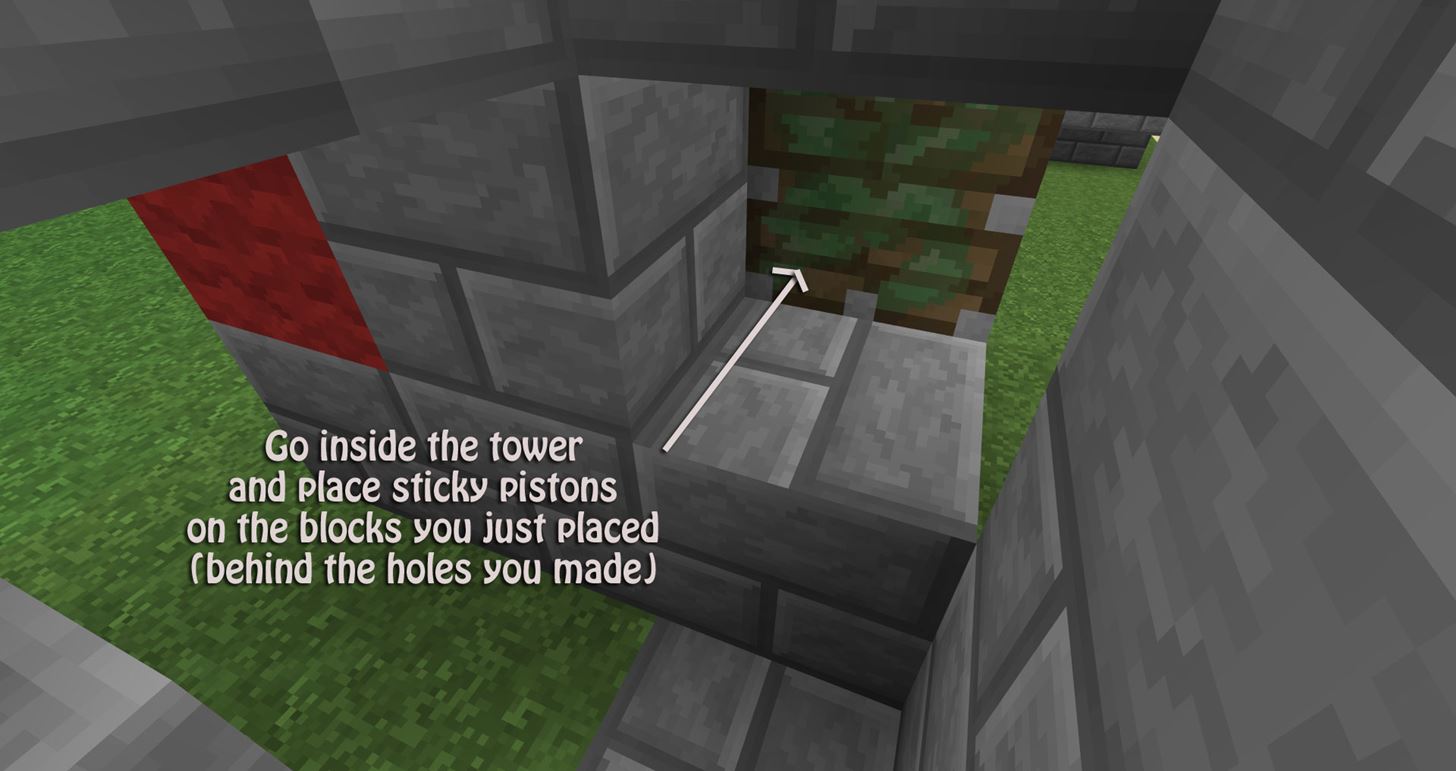
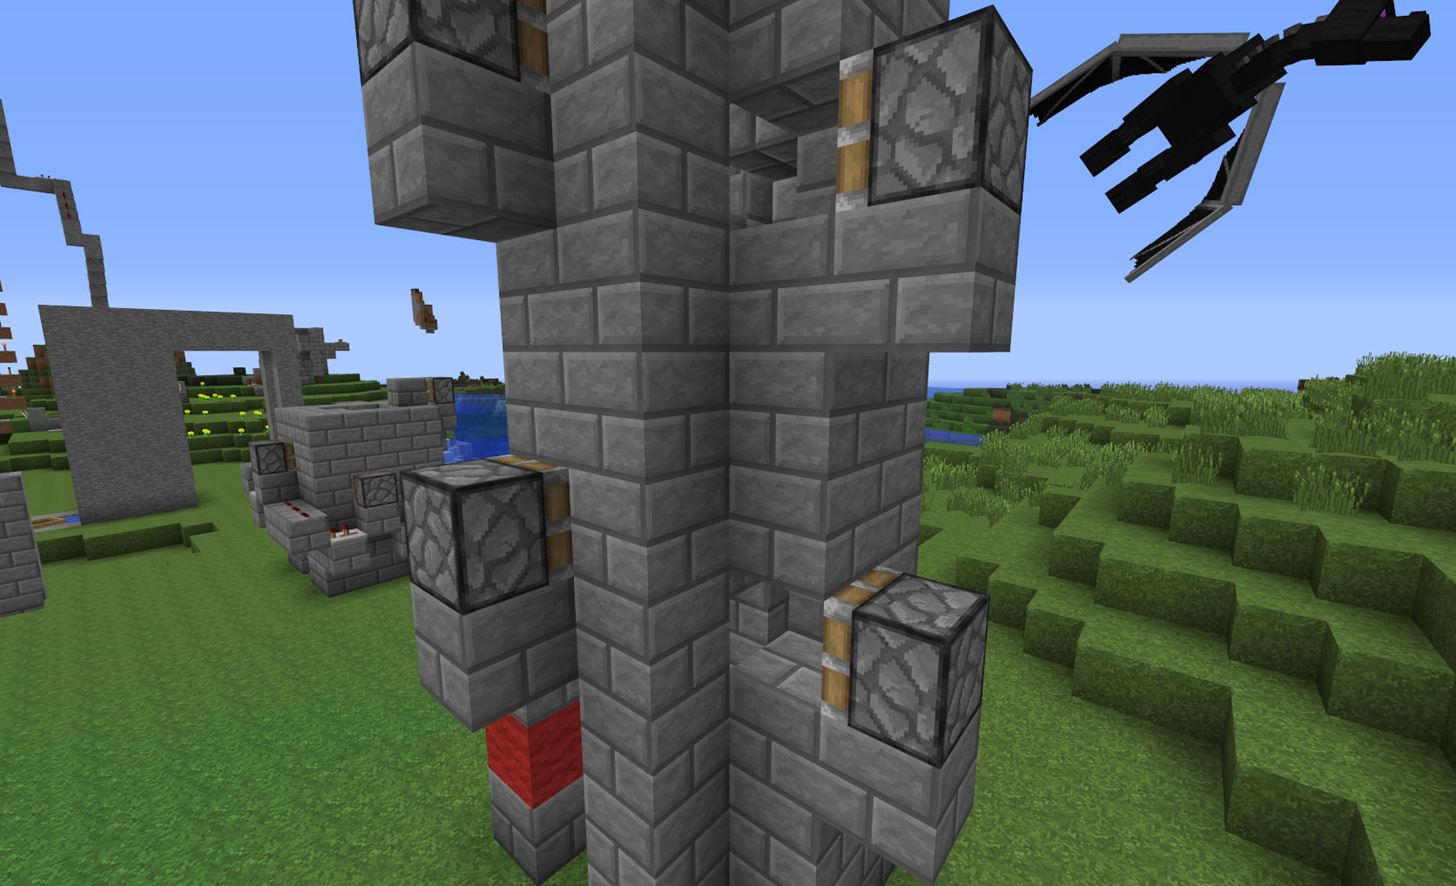
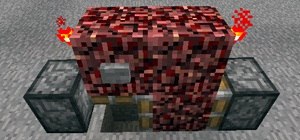
Step 6 Sticky Pistons!
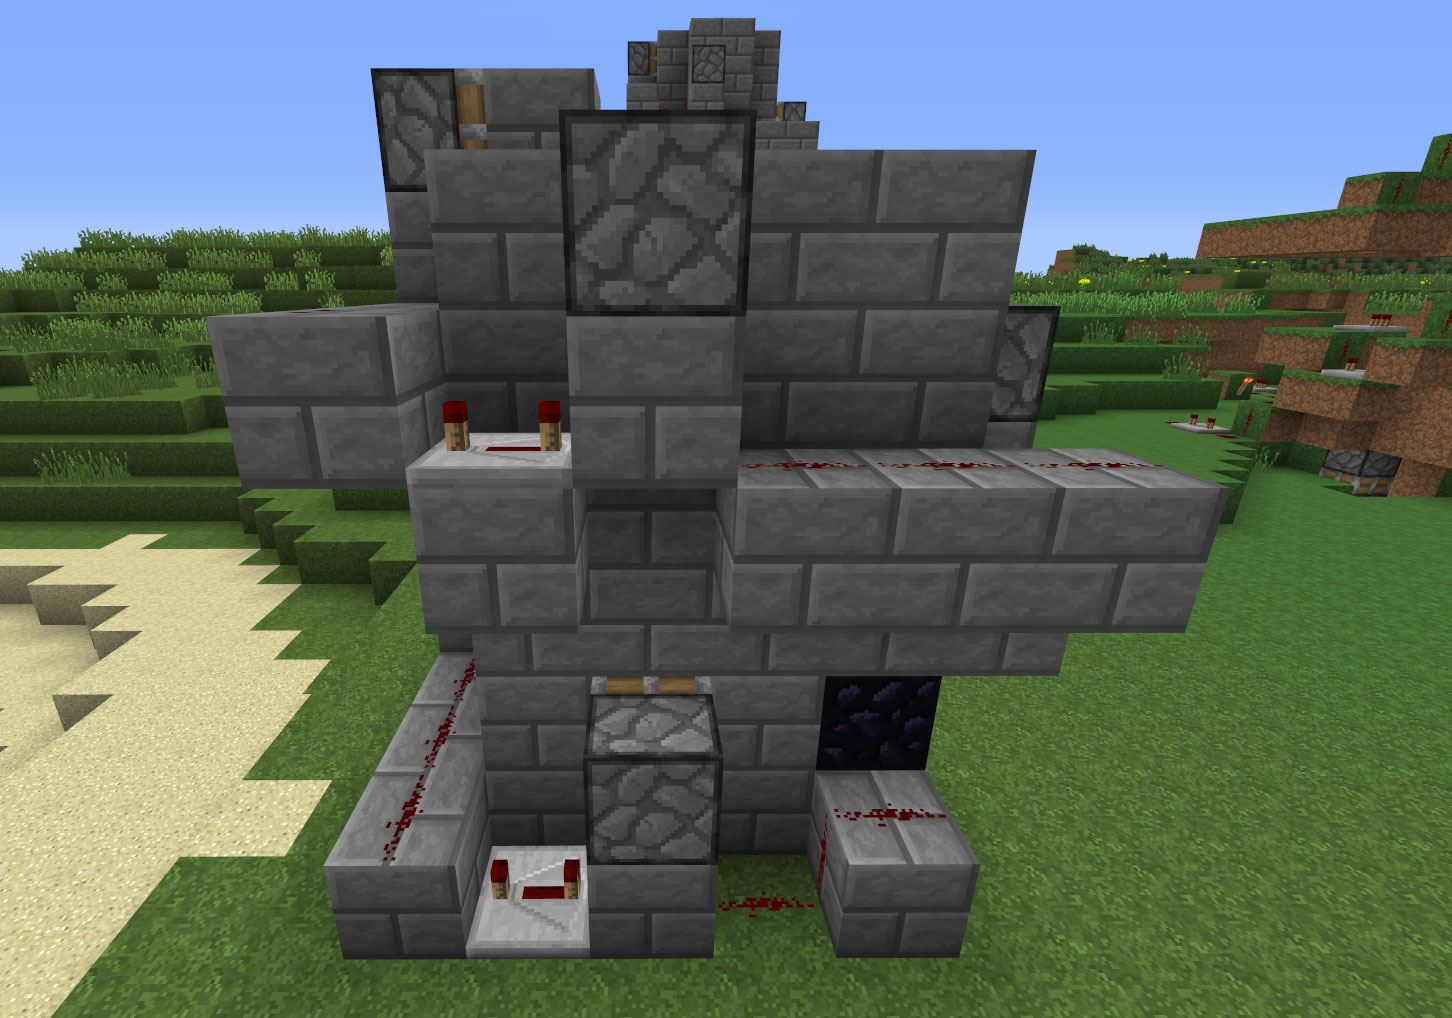
Go inside of your elevator tower, and place 1 sticky piston on each block you just placed in Step 5. The sticky pistons will be one block back. Look at the images below for reference!
Step 7 Cover Up!
You will need to go back into the tower and cover each individual sticky piston with 1 block. This is the block that the sticky piston pushes, and in return will push the player right up the stairs!

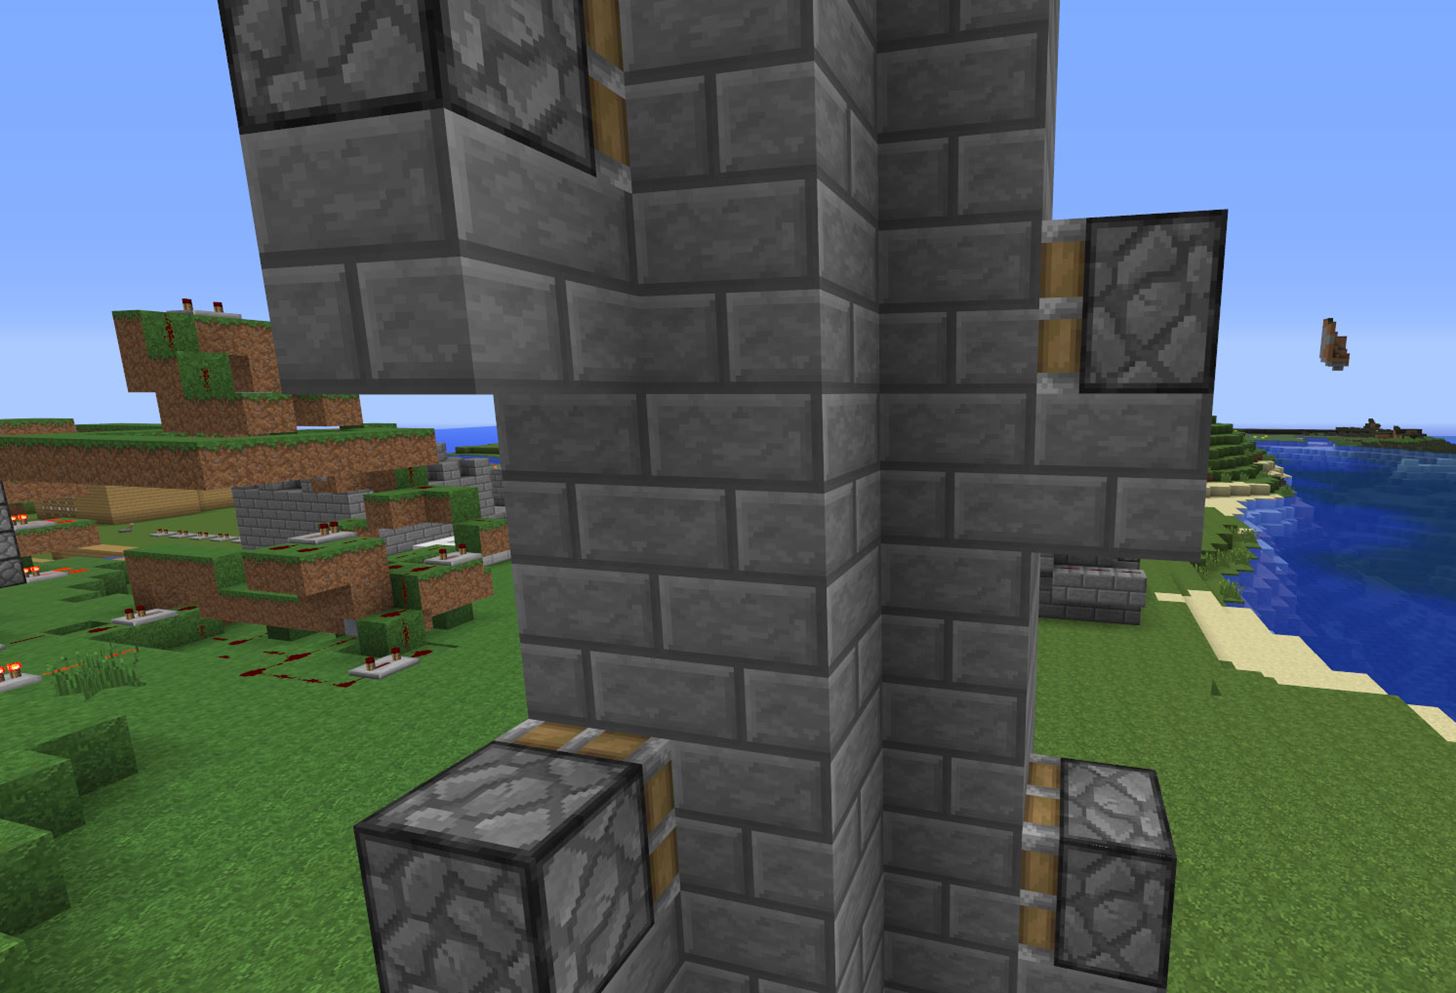
Step 8 Redstone / Redstone Repeaters
This next step might seem tricky at first, but I promise it's easy!
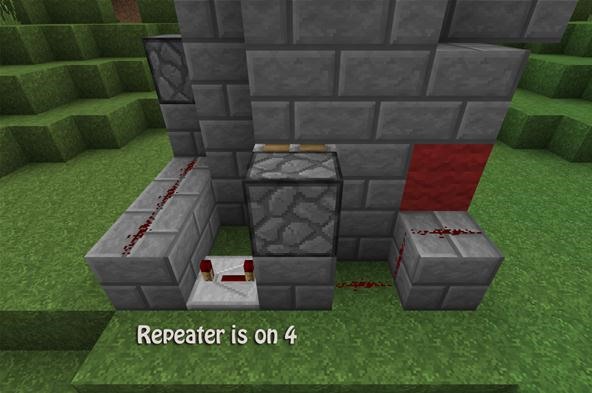
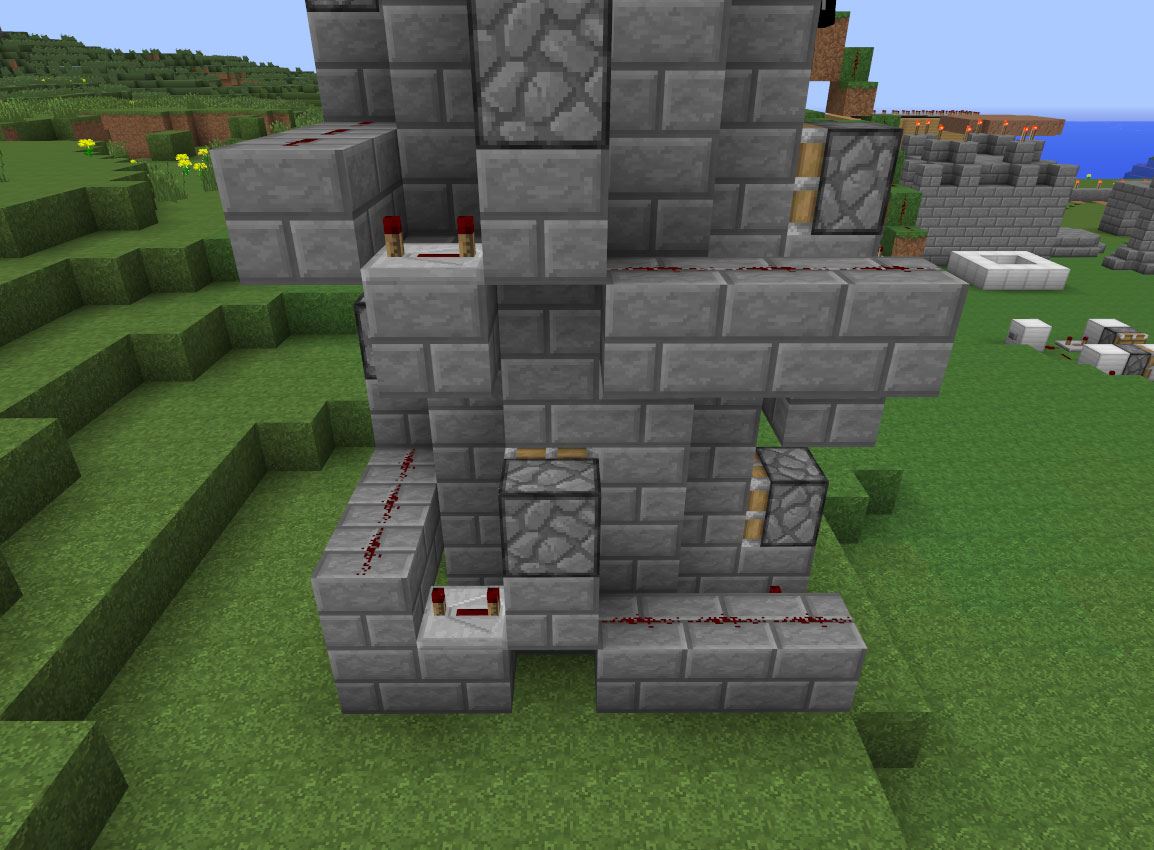
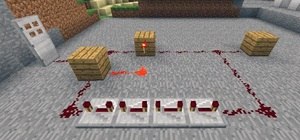
What you will need to do is place a block behind your button marker (our button marker is red wool). Place redstone on top of this block, and place another redstone 1 block down so that it charges the block below the sticky piston.
Next, stand to the left of the sticky piston, and face left. Look down, jump and place a redstone repeater. Make sure that the redstone repeater is facing left, otherwise it will not work. Set the repeater to 4 (right-click 3 times to the last setting). I personally like this setting, as it's the slowest. But feel free to experiment with faster times. If you like a faster elevator, change repeaters to 2 (1 click) instead of 4.
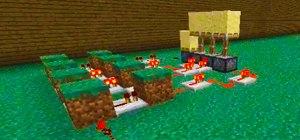
Continue connecting the sticky pistons to redstone and redstone repeaters all the way to the top. Make sure you are doing a stair-like method (the only option) along the outside of the elevator. Keep in mind that the redstone will always power the block BELOW the sticky piston—the redstone never actually is beside the sticky piston.
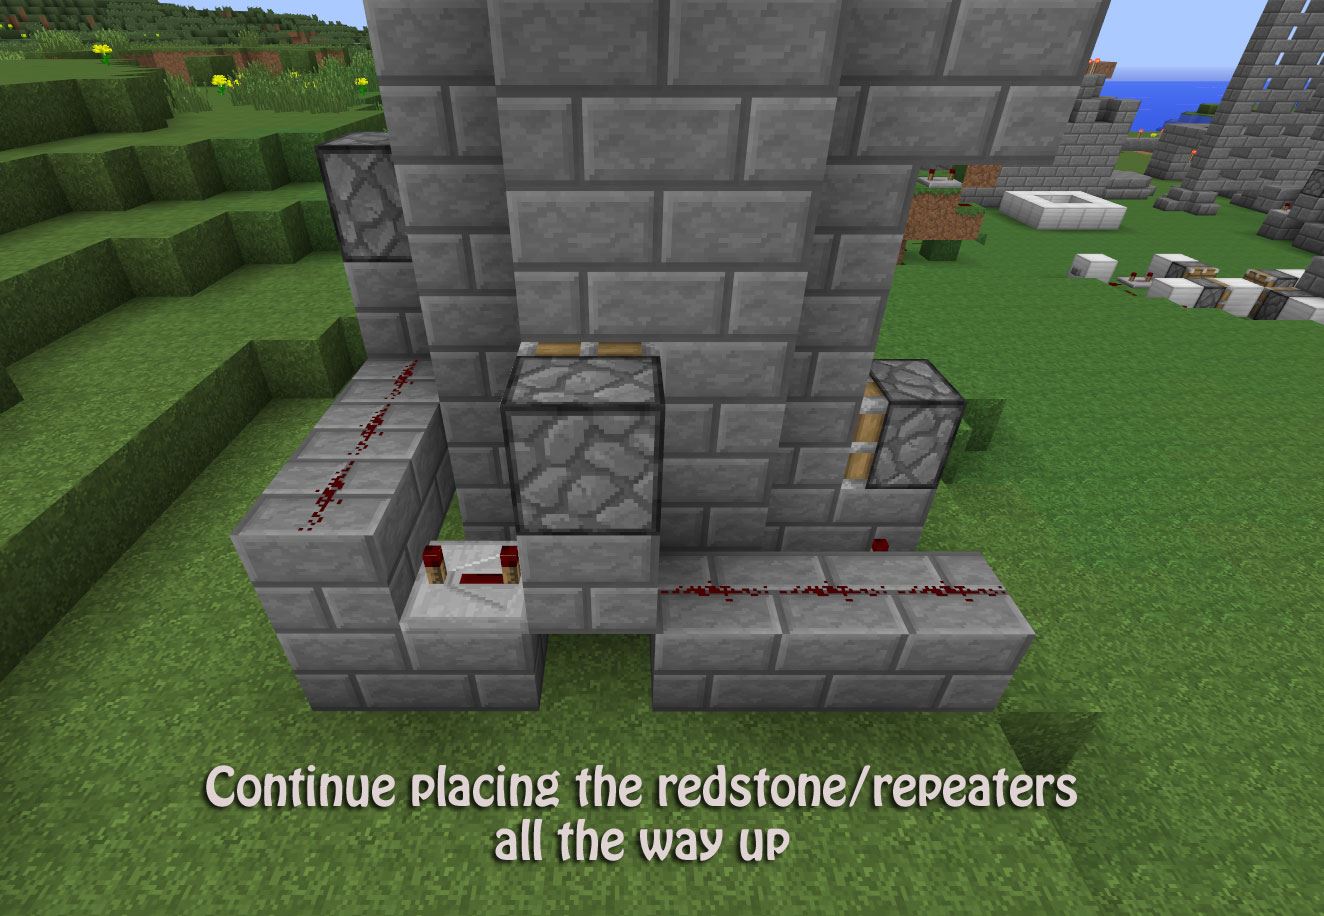

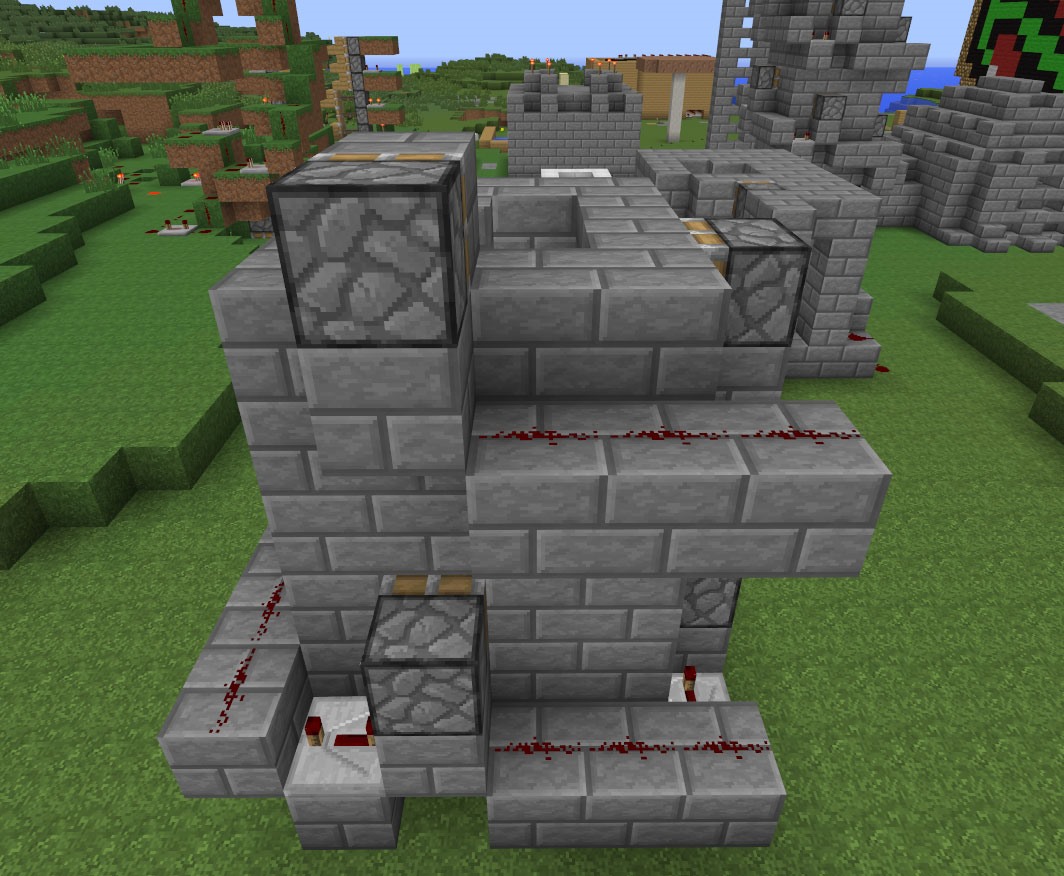
To sum it up: Redstone repeaters go to the left and down one block, and Redstone goes to the right and down one block. Use the images above if you're a bit confused about placement.
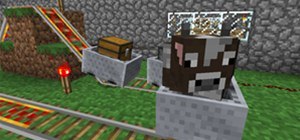
Step 9 Overview of Wiring/Hiding Wiring
If you made it this far, congratulations! You have now made the master of all elevators!
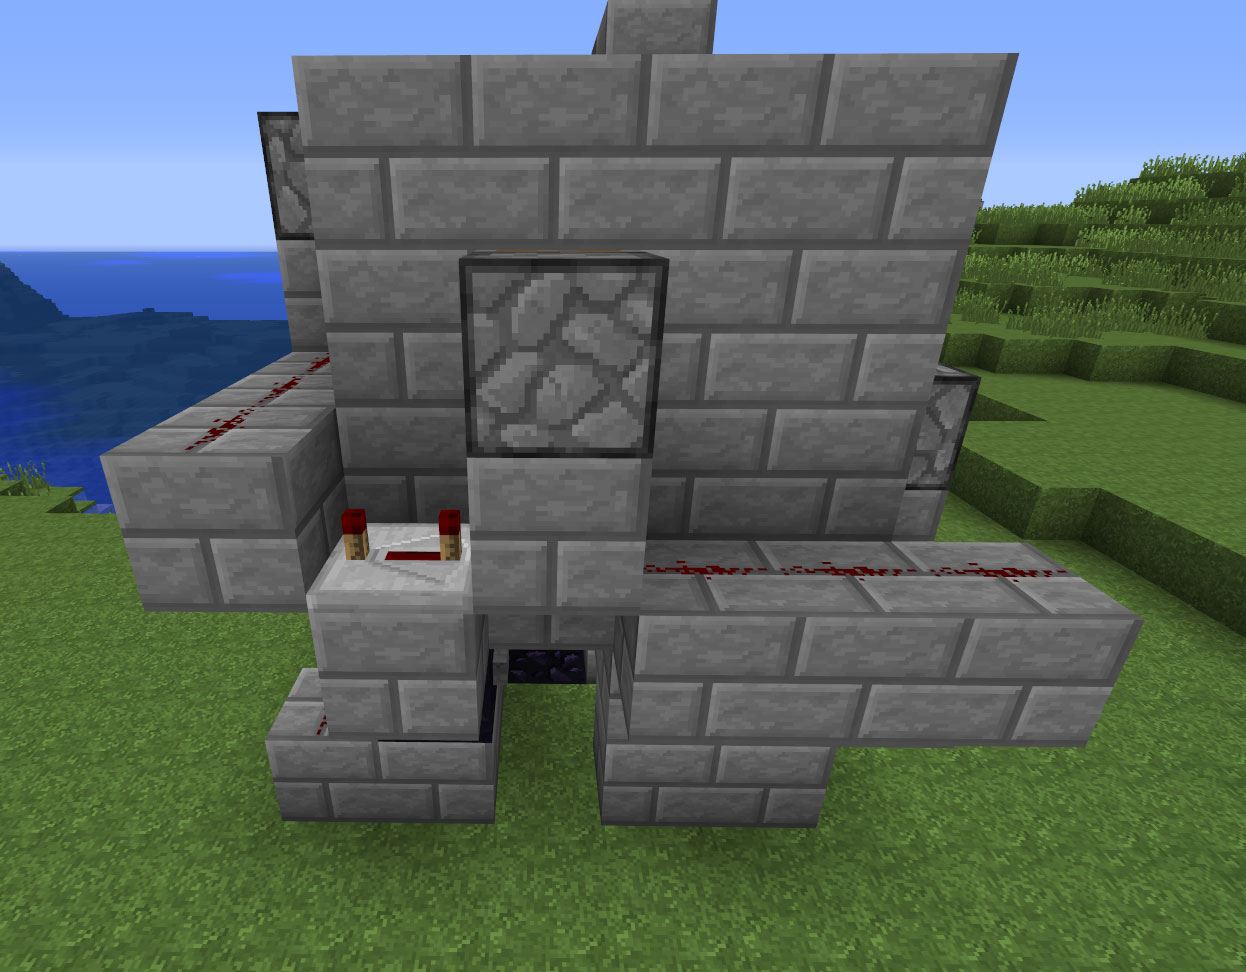
The images below are just quick screenshots showing everything in place.

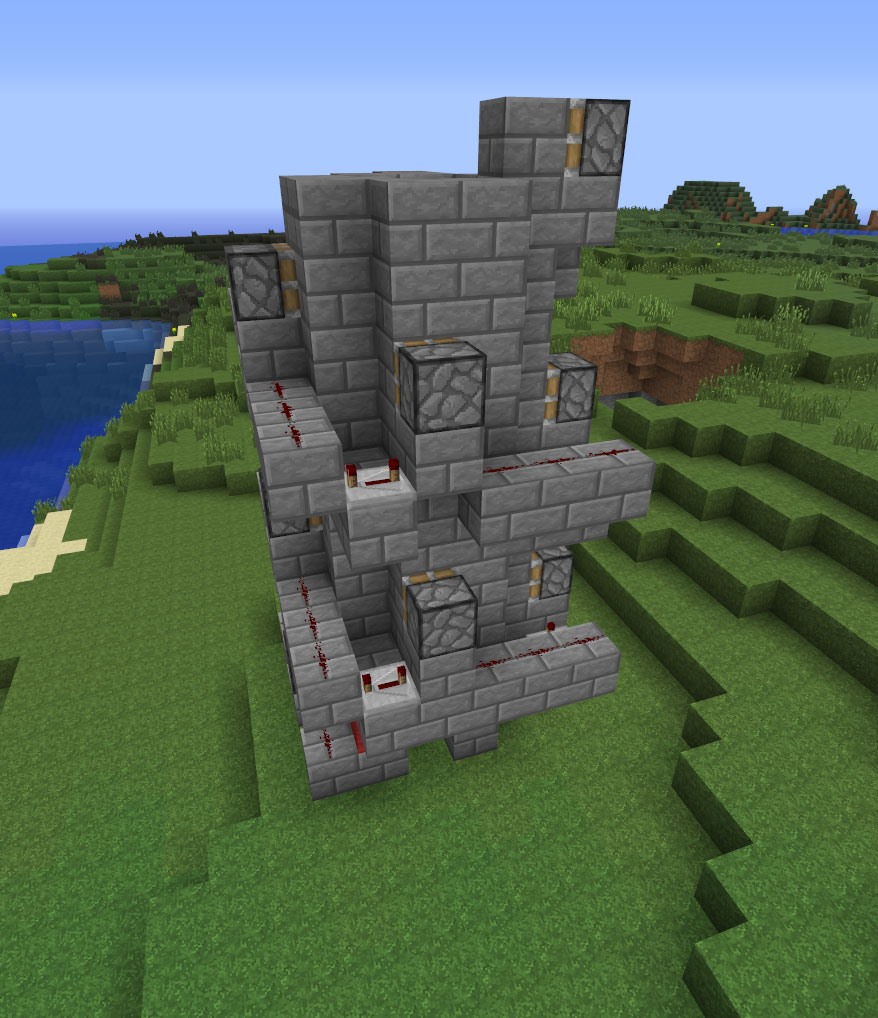
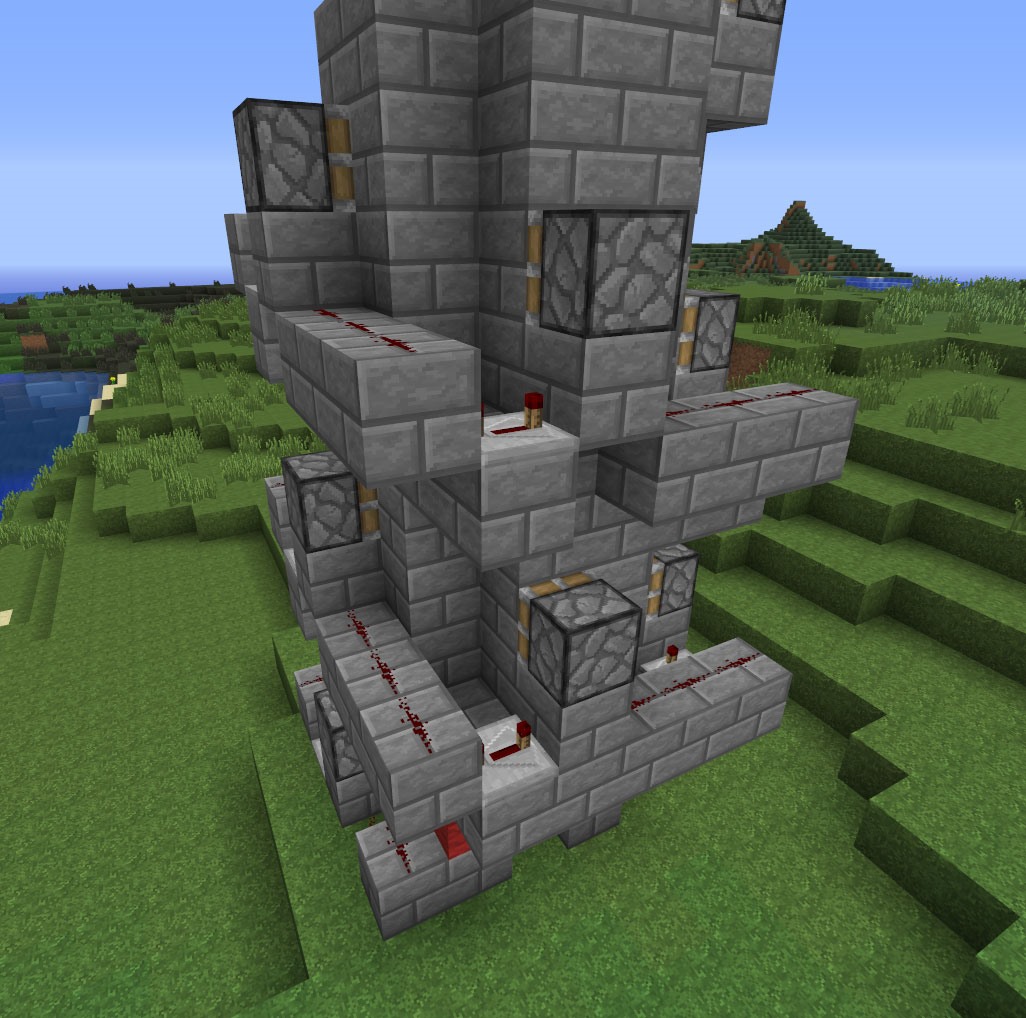
The final step for you would be to cover up the wiring, which shouldn't be too hard to do. This elevator is as compact as compact gets, so making a decent-looking elevator shouldn't be too much of a challenge for you!
Questions for the audience:
- What kind of elevator do you have experience making?
- What's your favorite version of Minecraft elevators (zipper, piston, or something completely different)?
- Did this tutorial help you understand redstone a little better?
- Is there a better way to make this elevator that you know of?
- What kind of redstone-related tutorials would you like to see in the future?
- Are you a more advanced redstone user, or are you just starting out?
I would love to hear a few words from the audience, so please... don't be shy!
Stay Tuned...
The new Weekly Workshop will be be announced tomorrow, so be sure to check back to see what will be covering next (Hint: It's more redstone)! If you have a suggestion for this week's and/or next week's workshop, leave a comment below. We'd love to hear your ideas!
We use TeamSpeak3 for our workshop tutorials; you can download it free here.
Our channel is: ts.wonderhowto.com
Follow us on Twitter @MinecraftHowTo!
Just updated your iPhone? You'll find new emoji, enhanced security, podcast transcripts, Apple Cash virtual numbers, and other useful features. There are even new additions hidden within Safari. Find out what's new and changed on your iPhone with the iOS 17.4 update.


7 Comments
i made an elevator who goes straight up but i have a problem with it :p
i tried making this and it didnt work
I will be building this .
Do you think you can make it go down as well.
Awesome! Helped a ton. The zipper won't work on the xbox version for some reason. This was perfect.
This is a rather cool design and it works very well in Creative mode on a local (PC) platform. Unfortunately, on a laggy server this elevator does damage to the user once in a while, and over a height of about 50 blocks will sometimes kill him outright. Also, the pistons occasionally glitch through the player, leaving him stranded on the middle of the stair.
Not your fault! I just wanted to point out that it can be hard to get mechanisms like this working smoothly and reliably in all environments.
When making this on PC i found that it would push me one block and then i would stop. I then started hovering (like in creative mode) and it started to work perfectly.
I'm on Switch. It only pushed me up half a stair so I tried hovering and it pushed me up one stair. After that I tried multiple different ways and inputs (which wasted about 7 hours of my life might I add) and it still wouldn't work. Cool design. Poor results. 3/10 would not build again
Share Your Thoughts