

Welcome to Minecraft World! Check out our advanced tutorials and come play on our free server.
There are many amazing redstone builds, but probably the pinnacle of redstone technology is the redstone calculator. The ability to turn simple game mechanics into a real-life calculator is one of genius, pioneered by some very clever Minecrafters many months ago.
In this tutorial, we are going to go over creating a basic Minecraft adding machine. This machine will add in binary using some redstone logic gates. Redstone logic gates manipulate the flow of redstone current so as to create various outputs of redstone signal. This allows for certain inputs to receive certain outputs based on the rules of the logic gate or gates.
Now, let's cover a simple, easy-to-build set of logic gates capable of simple addition.
Creating a Full Adder
This redstone adder is called a full adder and is just about the simplest binary adder you can possibly create. The full adder adds in ones. Our particular adder will add three ones, with a grand total adding capacity of three. While not very exciting, this is the building block to all other, more complicated adders. As you build your adder, pay attention to when redstone torches turn on and off; This is the system of logic gates in action.
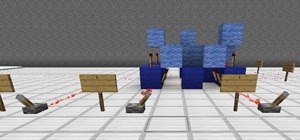
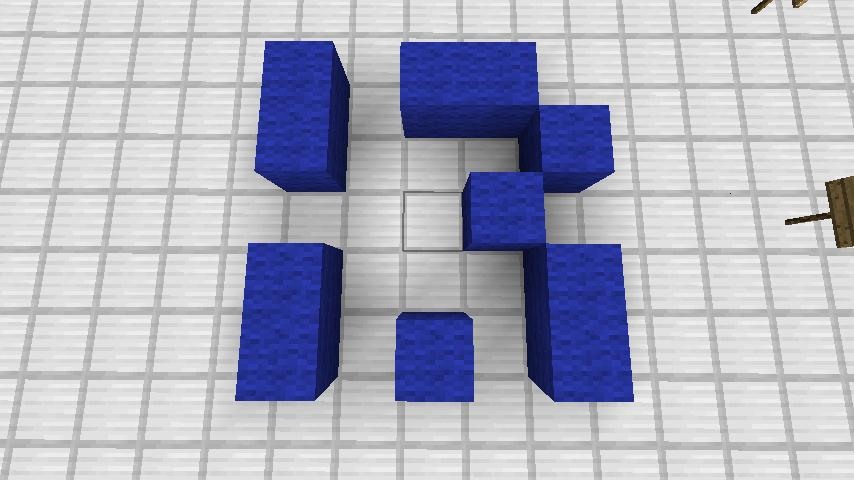
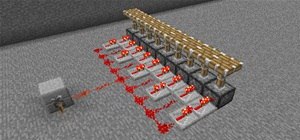
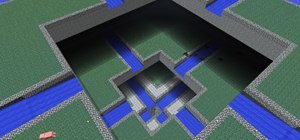
Begin by laying out any non-glass blocks in a five by five pattern in this exact formation.
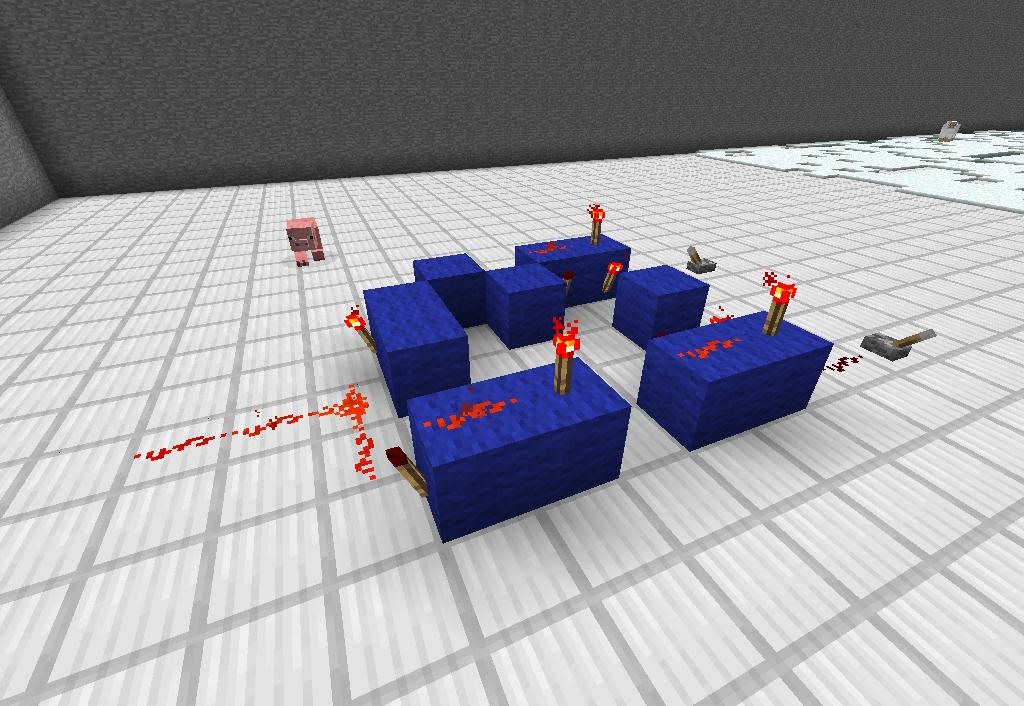
Next, run redstone wire from the front right and left blocks as seen below, and attach the lever to them. These are two of your three inputs. Putting them here first will help you keep track of the front and back of the machine. Now, place four redstone torches on the inside walls of the right and left blocks, two for each side.
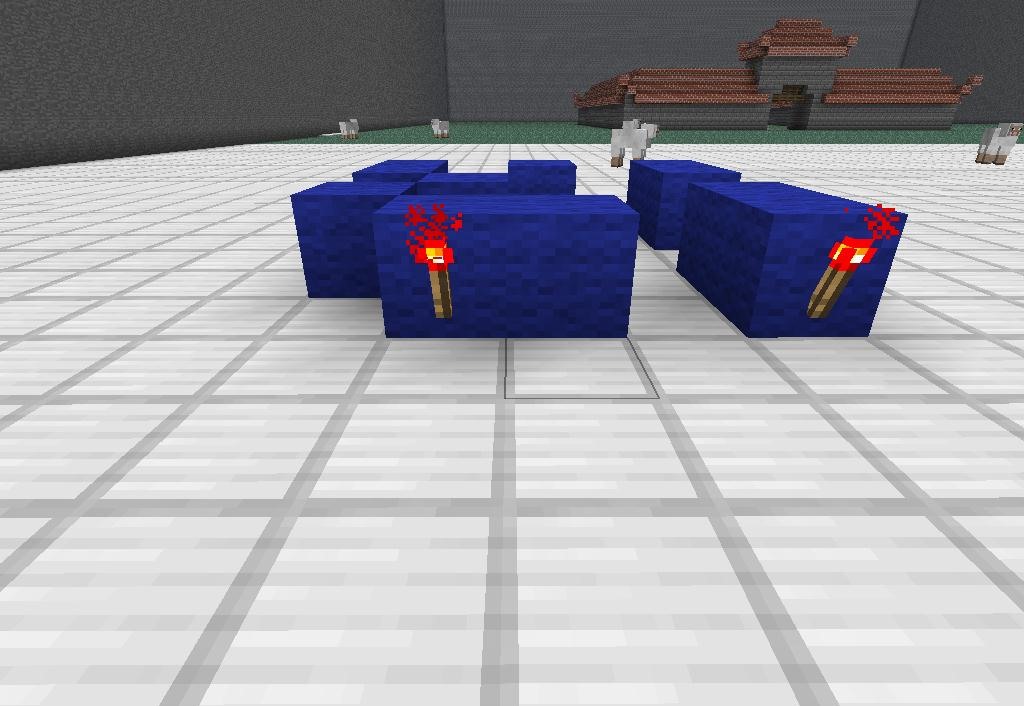
Place two torches on top of the left and right blocks. Behind each of the two torches, place one redstone wire. Notice some torches turn off while others remain lit.

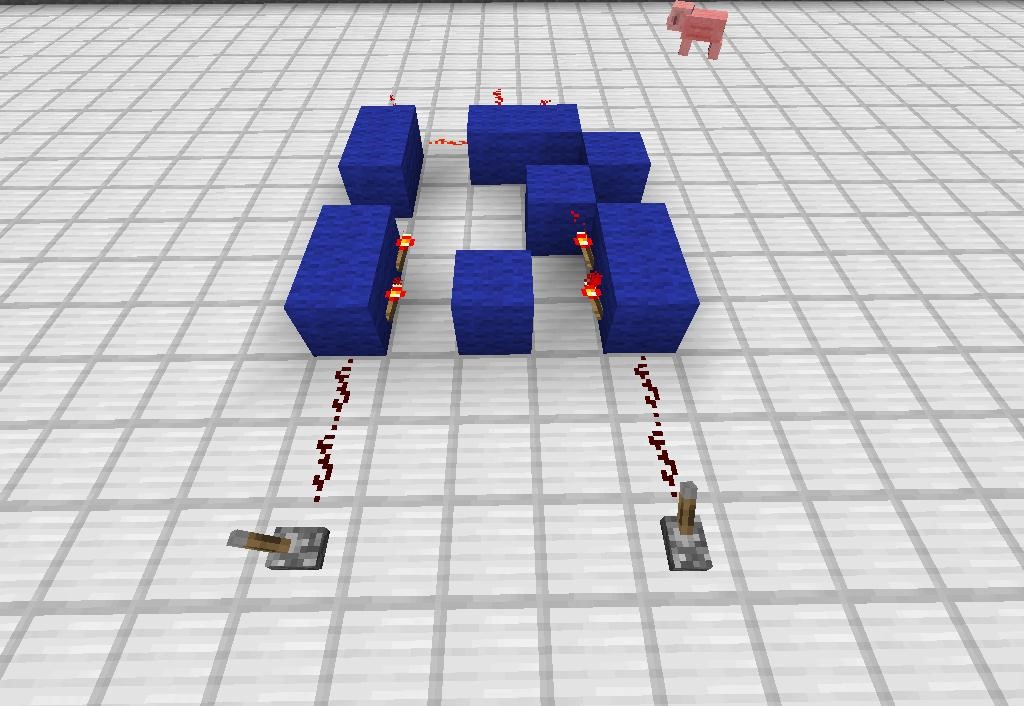
Turning now to the back of the machine, place two torches, one on the furthest left and another on the furthest right block.
Now, connect the two back torches with redstone wire. Run redstone wire behind the back right torch to another redstone torch. Notice that one of the torches shuts off.
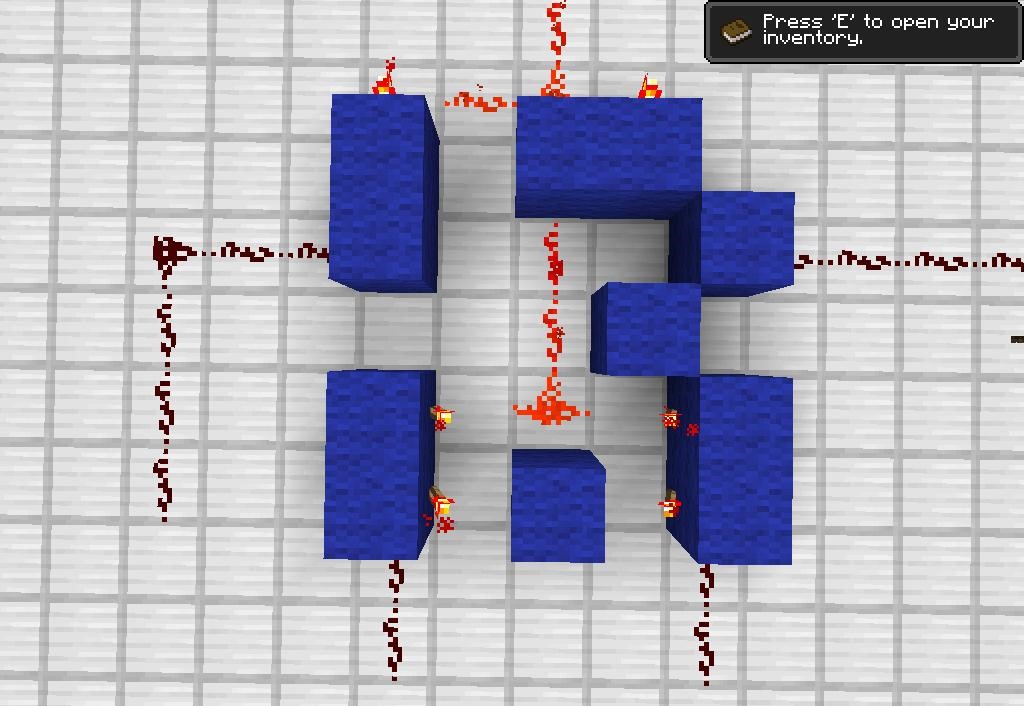
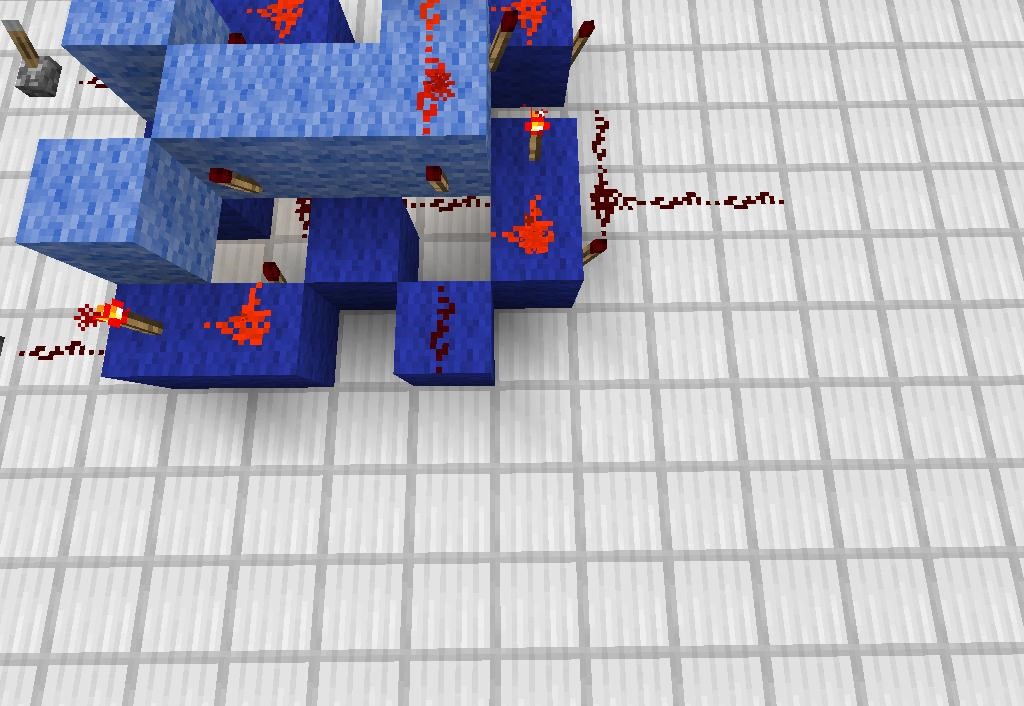
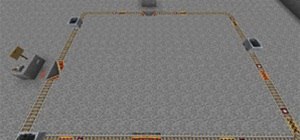
The next picture is an above view of all of the bottom layer wiring. The bottom of this image is the front of the machine, while the top of this image in the back of the machine.
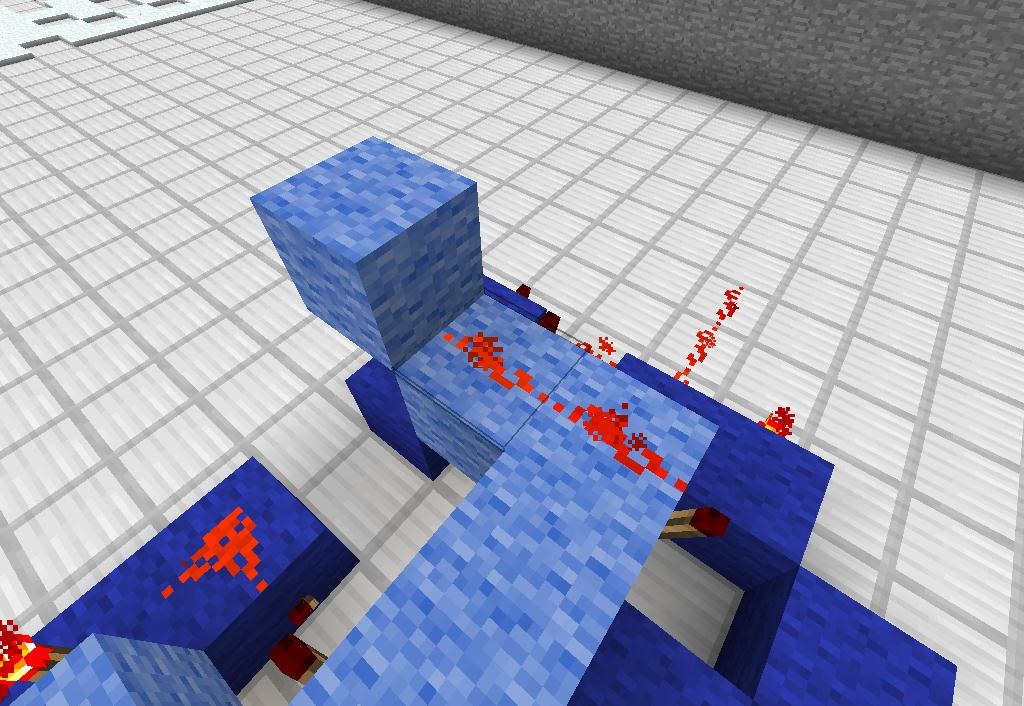
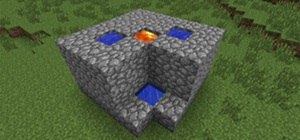
Now, place two blocks (here pictured in light blue wool) on either side of the front middle block pictured below. Run redstone wire from the front middle block, along the ground, and back four blocks.

Place four blocks in the "L" shape featured below. Be sure they are on the same level as the front two blocks you just placed.
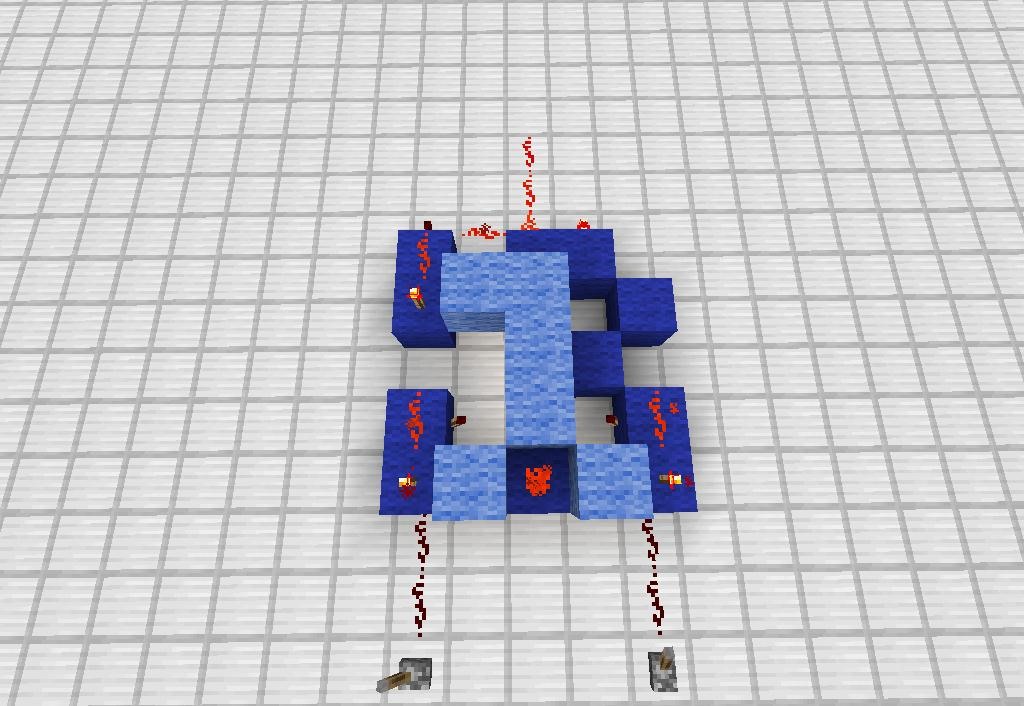
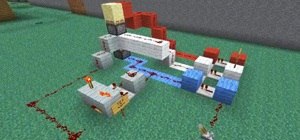
Place a third block at the far left above the level of the blocks you just placed. Run redstone wire accross the back two blocks as seen below. Place two redstone torches opposite each other on the sides of the center light blue block.
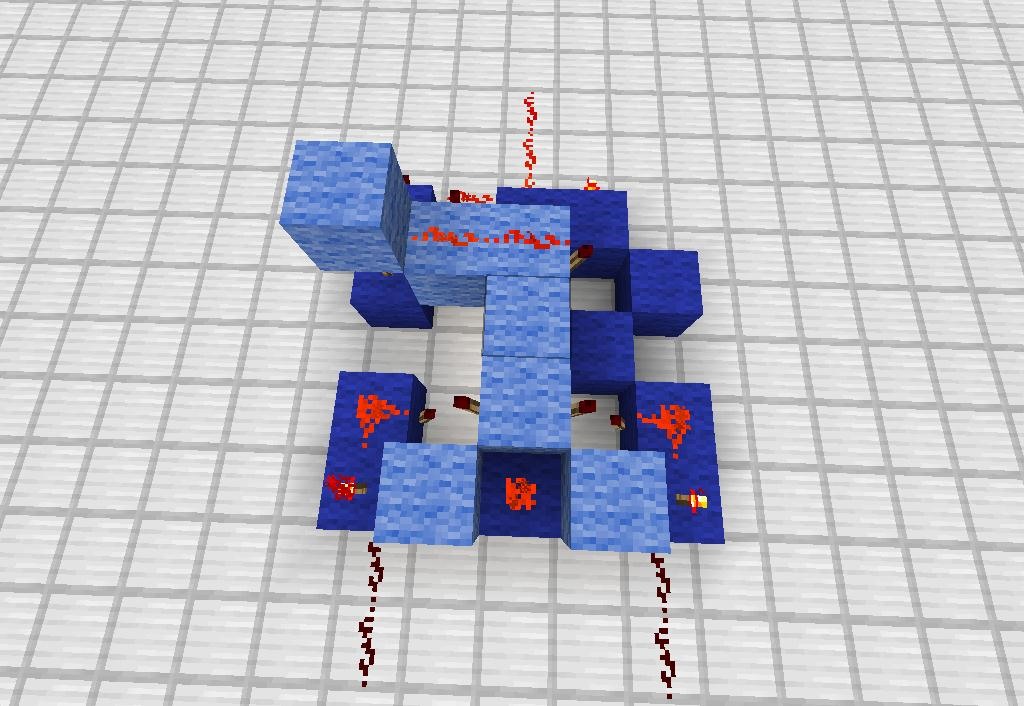
Here is the previous step from another angle. Add a redstone torch at the end of the redstone wire.
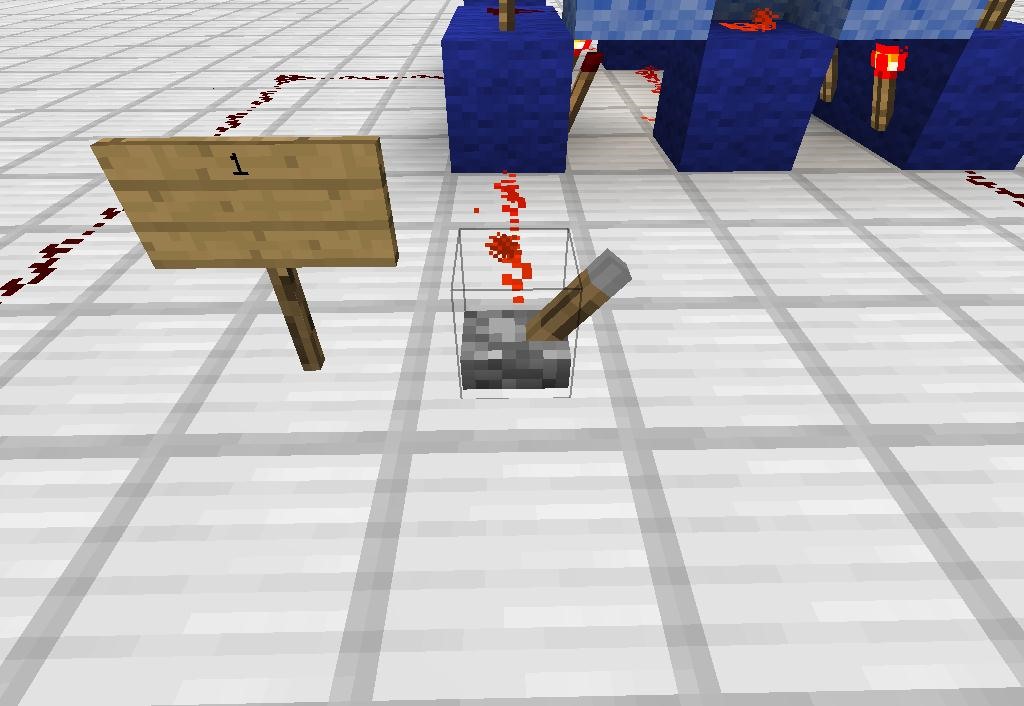
On the right side of the machine, run redstone wire from the block furthest to the right down onto the ground.
Here is the previous step from another angle (behind). Notice I ran redstone wire from the right side of the machine parallel to wire I ran from the two torches in the back of the machine. These two parallel wires are the outputs of our machine.
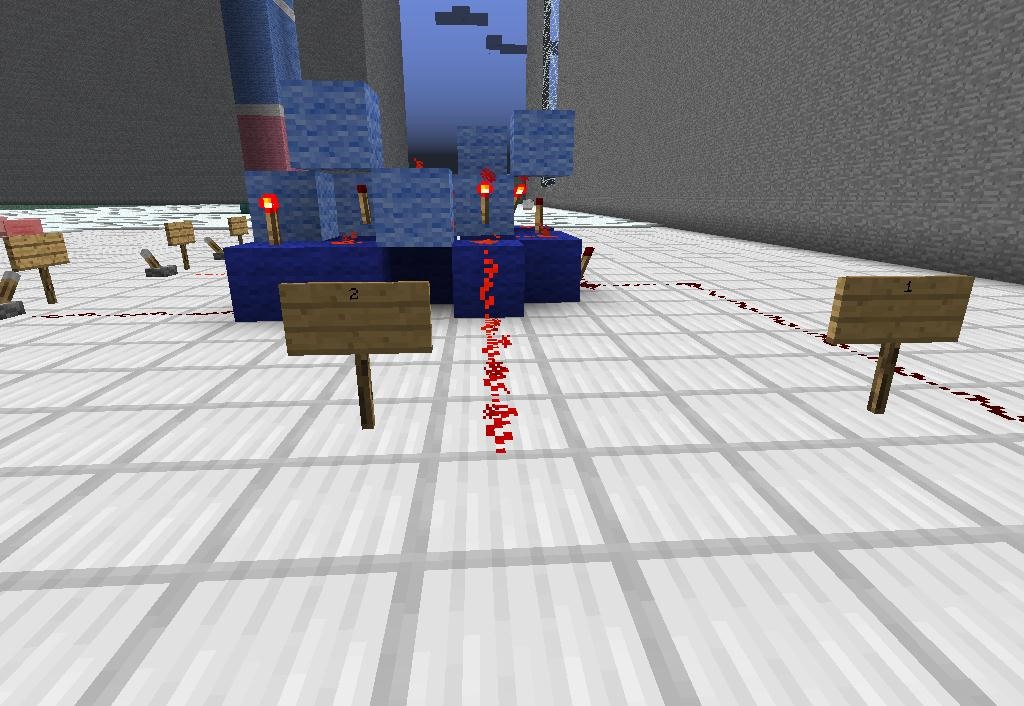
Mark the outputs with signs. The output on the left is a 2, and the output on the right is a 1. Because the output reads in binary, each output can only double itself, so while we only have a 1 and a 2 here, if the machine had an output capacity of five we would have a 1, 2, 4, 8, and 16 with no odd numbers other than 1.

Here are the outputs from another angle.
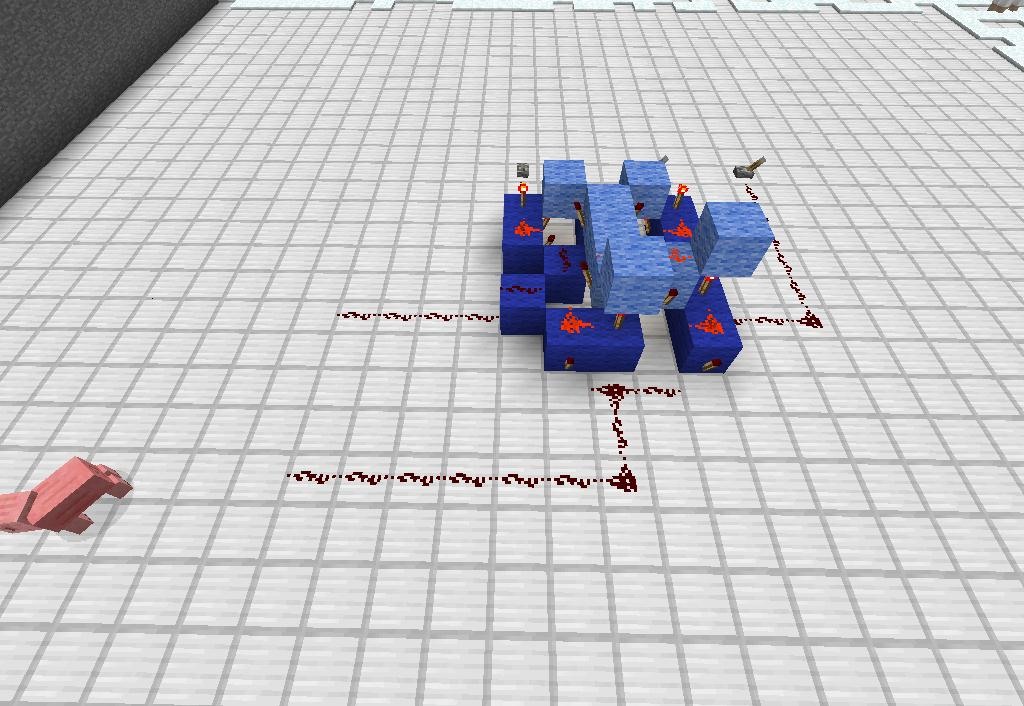
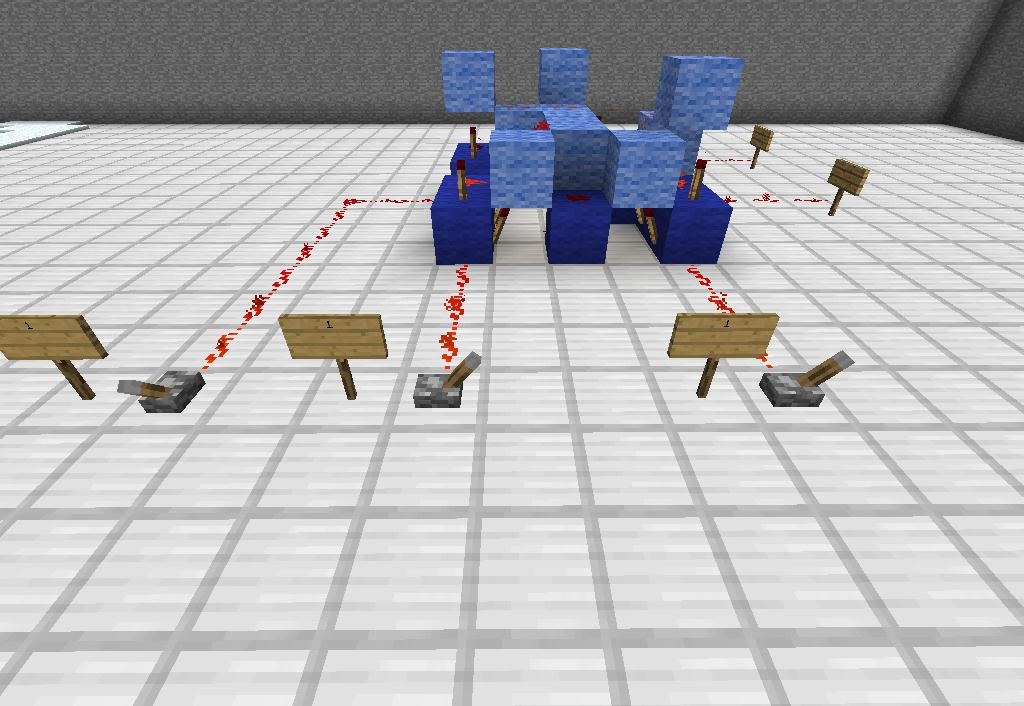
Finally, connect your third and final input (pictured below on the far left) to a lever. If you wish, mark each of the levers with a sign denoting their value. Each input lever here possesses a value of 1.

Now that your simple adding machine is complete, try it out!
The Full Adder in Action
To use this very simple adder, hit any of the three input levers. Remember, each lever represents the number 1. For every lever you activate, you add 1 to the machine. Let's try a truly elementary calculation, like 1 + 0...
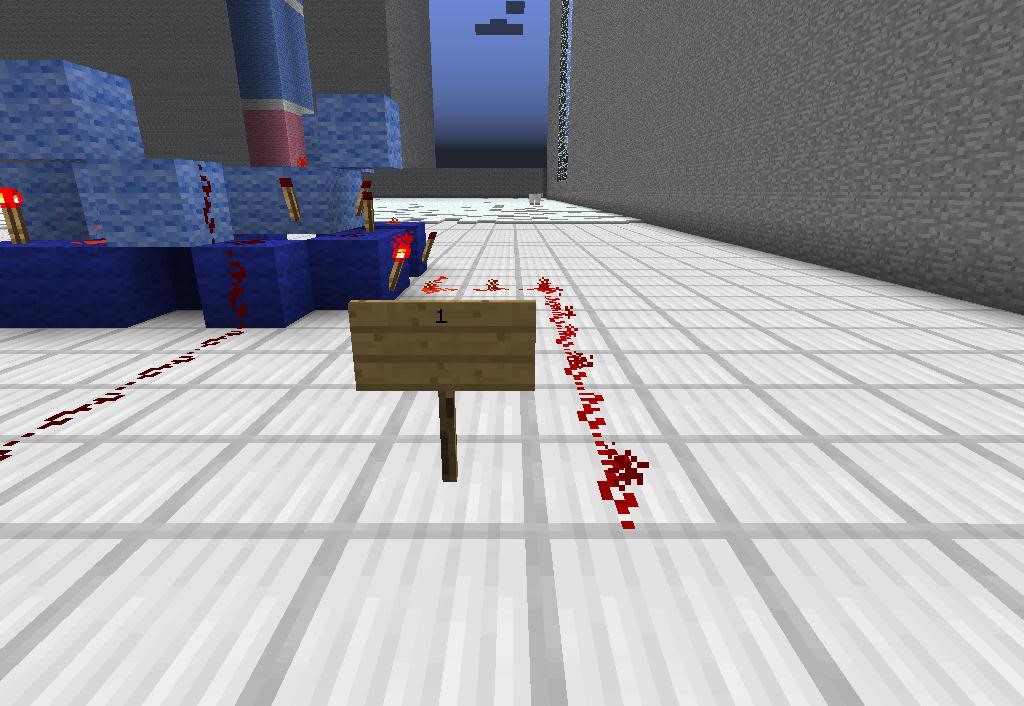
In the image below, I have activated just one redstone input lever.
My result at the input section of the machine is that the redsone wire next to the sign 1 is activated. The machine successfully calculated 1+0=1.
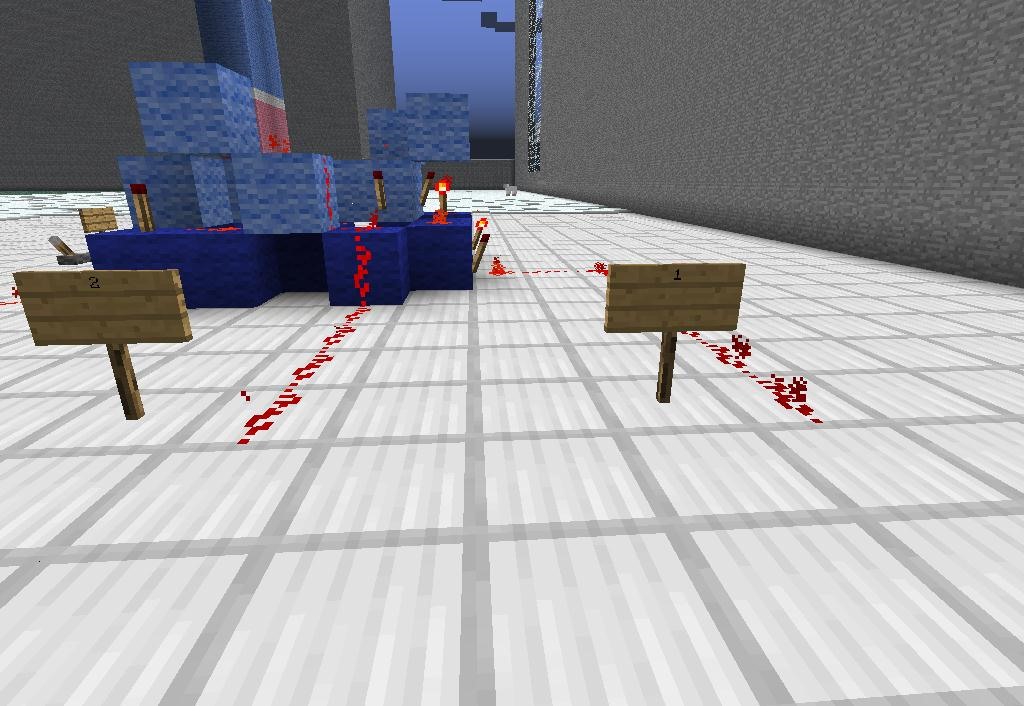
But what if I activate all three input levers? There is only an output of 2 and an output of 1. Let's see what happens. Here I have activated all the input levers for a calculation of 1+1+1.
The output now reads 2 and 1 as being activated. Besides the number one, binary output will never be odd and so there is no number three, but if we add the output together we get the answer we asked in the input: 1+1+1=3.
There you have it. You have successfully created a primitive redstone adder. While this is only a beginner's prototype, logic gates can be used to spawn massively complicated redstone machines capable of complex addition, subtraction, and even multiplication. We will be going over each of those in more tutorials yet to come.
If you have any questions about the build, feel free to leave a comment below. If you're interested in a more hands-on approach, log onto our server and type "/warp adder" in chat to get a feel for the mechanism yourself.
Follow us on Twitter @MinecraftHowTo!
Just updated your iPhone? You'll find new emoji, enhanced security, podcast transcripts, Apple Cash virtual numbers, and other useful features. There are even new additions hidden within Safari. Find out what's new and changed on your iPhone with the iOS 17.4 update.


5 Comments
for when you are doing your homework on the computer and are to lazy to open up your calculator.
lol
Nice!
However that is NOT a half adder. It is a FULL ADDER.
A half adder only takes 2 bits in and delivers an output bit OR a carry bit (to the next higher circuit).
A full adder takes 2 bits input and a carry in bit and delivers an output bit AND a carry bit.
Explanations can be found here:
http://www.askkia.com/articles/how-to-create-a-single-bit-full-adder.html
OBTW - a full adder is more than twice as complicated as a half adder.
Very good observation Alan, I was under the impression that because the adder didn't carry to another set, that it was a half-adder, but I see that since it carries to the output it is in fact a full-adder! Do you build Minecraft computers often? I'd love to work with someone who is more knowledgeable on the subject than myself.
OOPs!
I meant this link:http://isweb.redwoods.edu/INSTRUCT/CalderwoodD/diglogic/full.htm
Share Your Thoughts