

We've already done a tutorial explaining why buttons are superior to levers, but now I want to show you a way to make them even more useful than they already are. You can't get this sort of functionality with levers!
A button only emits a one-second (or so) pulse of power. Well, say that you wanted more than just a second of power? Say you wanted two seconds, or even thirty seconds? Now you can have it!
Check out this demonstration video below:
Now on to the tutorials!
Design 1
All of these are pretty easy, but this one is by far the easiest.
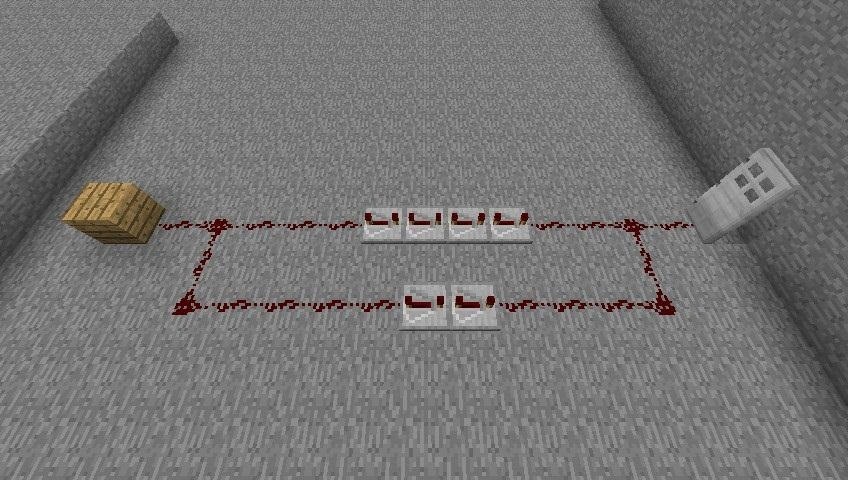
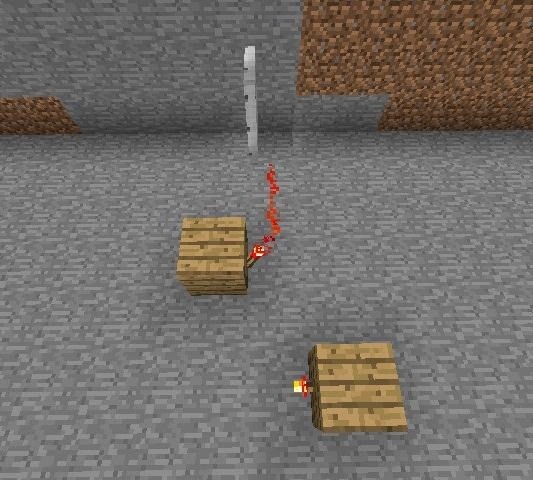
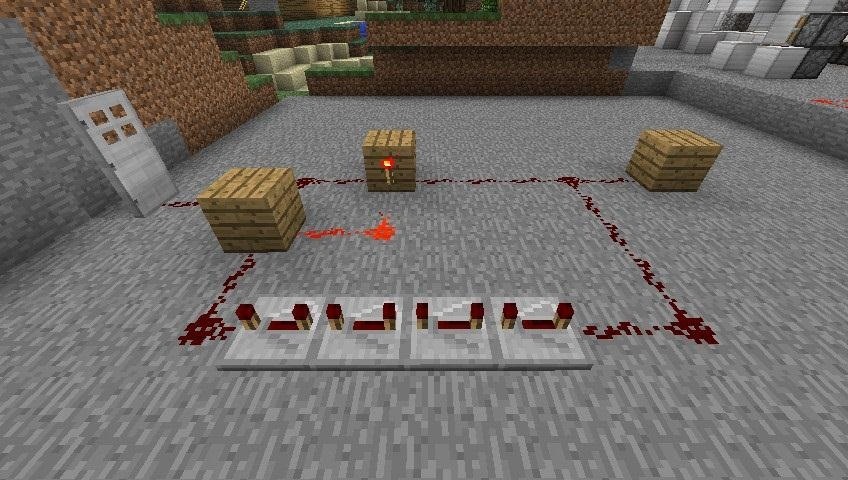
Step 1: Door and Redstone
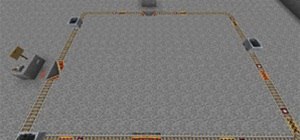
Start with your door, and add a shape of redstone wire like this:
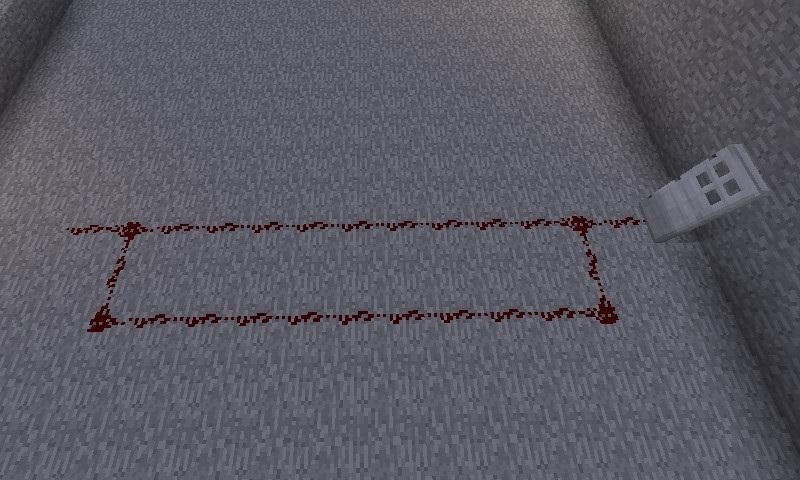
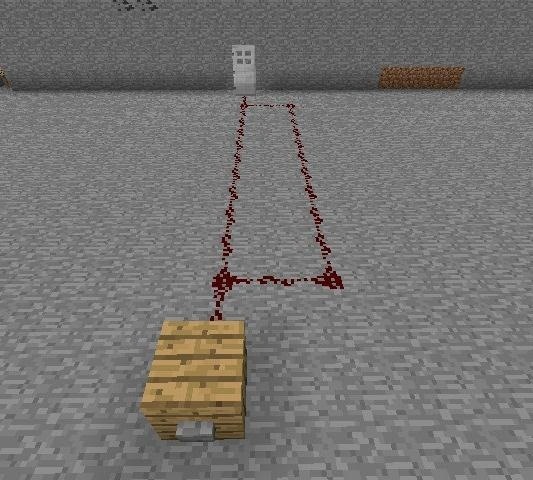
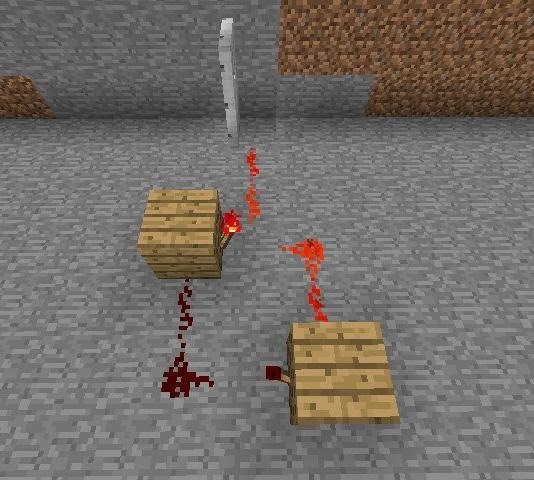
Step 2: Button
Then add your switch wherever you'd like it. Bear in mind that the shape doesn't have to look exactly like this... You can curve it around if you'd like, so long as you maintain two distinct wires that connect at either end.
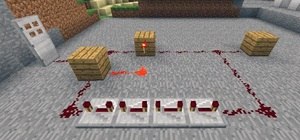
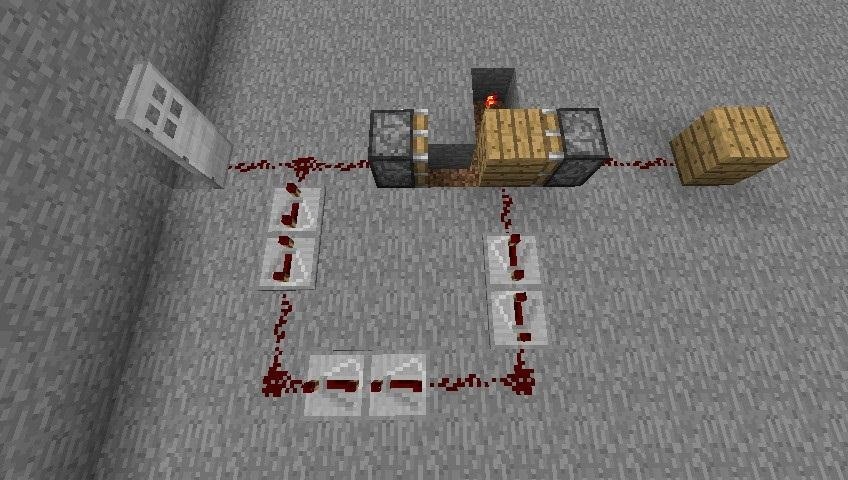
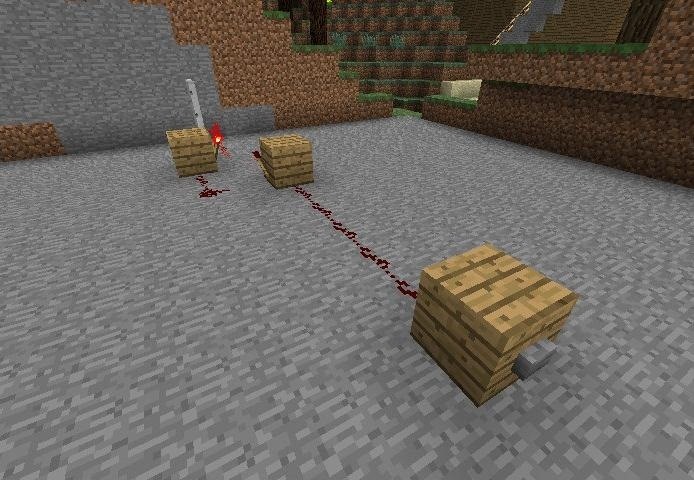
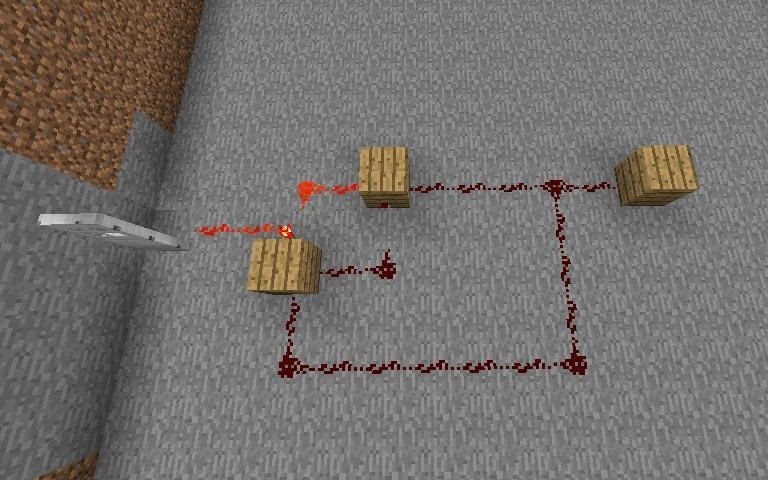
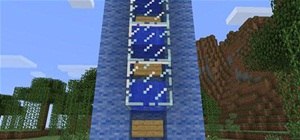
Step 3: Repeaters
Once you've done that, all you need to do is add your repeaters, and you're done! Make sure you add them to both sides to balance out the delay.
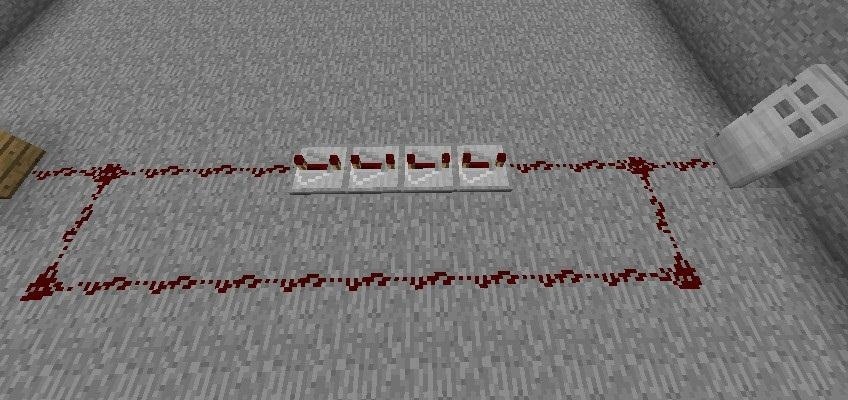

That's really all there is to it. When I said this was the simplest, I really meant it!
Design 2
This version is the hardest of the set, because it involves pistons.
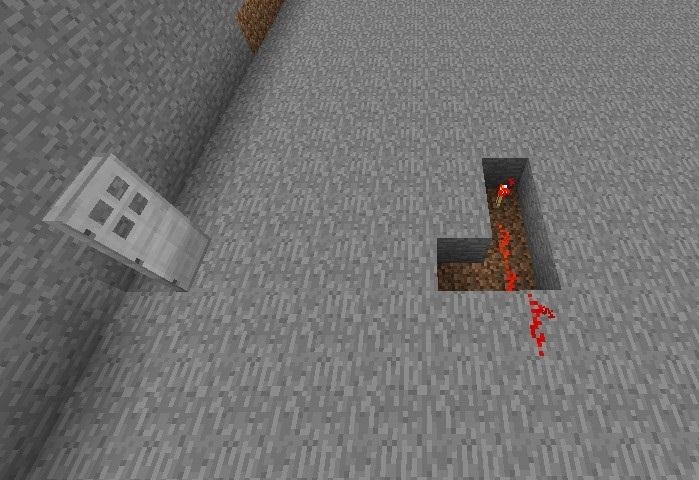
Step 4: Door and an L
Once again, you want to start out with your door, and then a little ways away, dig an L-shaped hole. It should be two wide and three long. Inside the L, add a redstone torch at the far end, and add some wire leading out of it.
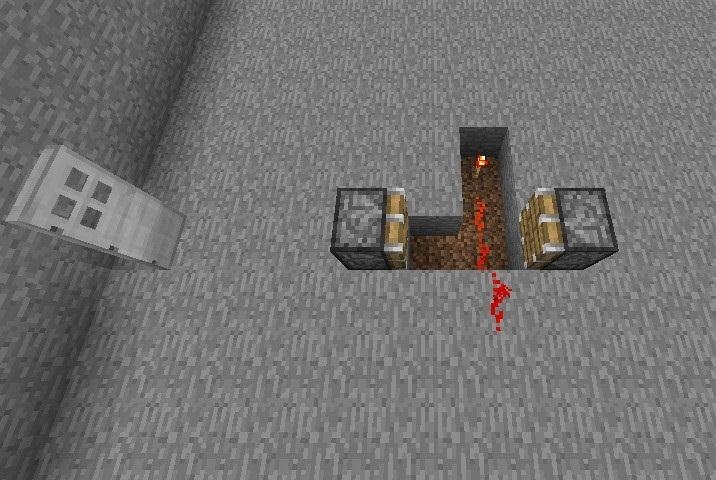
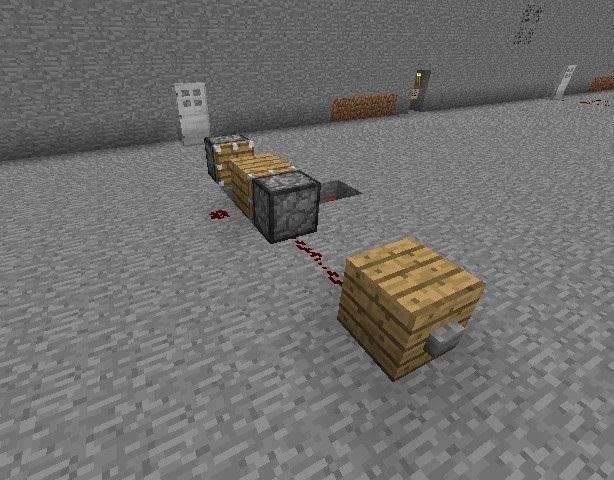
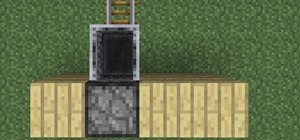
Step 5: Pistooooons
Then add a piston (not a sticky piston) on opposite ends of the bottom of the L, facing each other. Then put a block between them. Just one block.
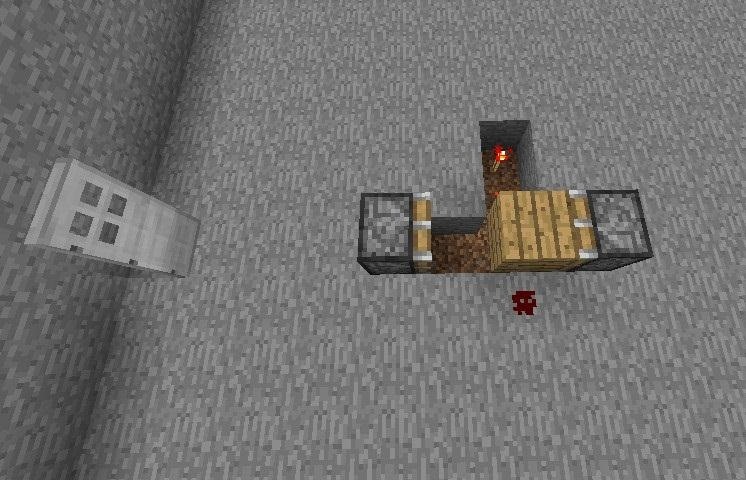
Step 6: Buttons
Now connect your button to the rear piston.
Step 7: Wire It Up
Now connect the redstone wire coming out of your L-shape hole to the door, and to the rear piston.
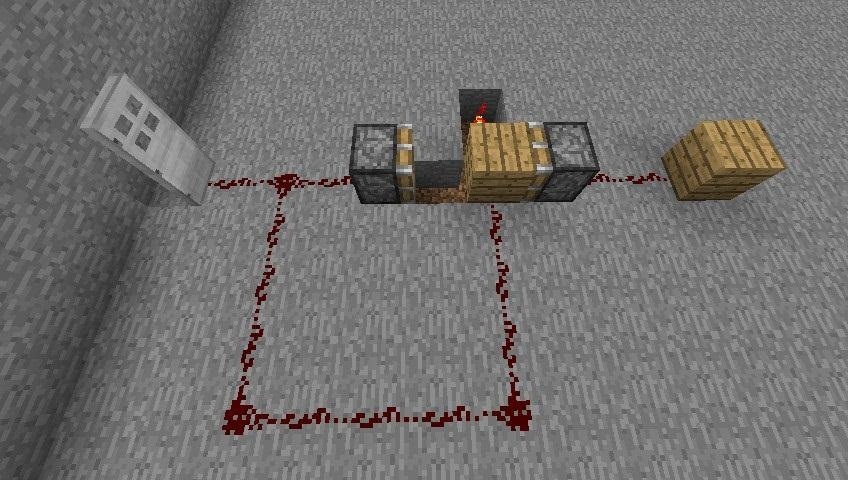
Step 8: Repeat It
Add your repeaters in that loop, and you're done! You can add as many as you like.
Now on to the final (and my favorite) design!
Design 3
This one is of medium difficulty, but is my favorite because it's the fastest to activate and is the most reliable.
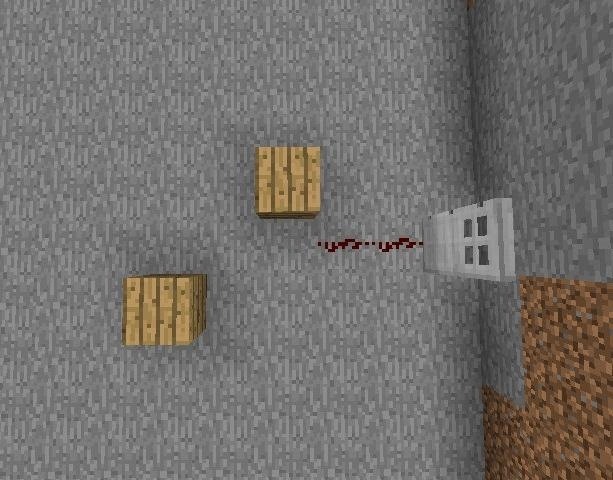
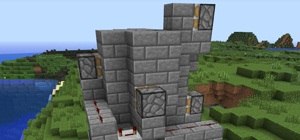
Step 9: Door It Up
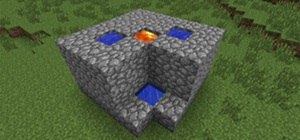
Start with your door, then add two blocks of any variety directly below it, diagonally across from each other, with a space in-between.
Step 10: Torches
Add torches to the blocks, facing inward, and then wire them together.
Congratulations, you've created an RS NOR latch! Wasn't that easy?
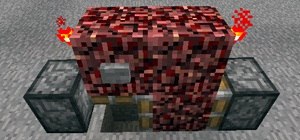
Step 11: Buttons Again
Now connect the rear block to your button.
Step 12: Wiring
Now connect your rear wire to the front RS NOR latch block, like so:
Step 13: Repeaters
The last step is to add your repeaters, and then you're done!
That's all there is to it!
Now you have three different designs that you can use to sustain your redstone pulses from buttons or pressure plates!
Just updated your iPhone? You'll find new emoji, enhanced security, podcast transcripts, Apple Cash virtual numbers, and other useful features. There are even new additions hidden within Safari. Find out what's new and changed on your iPhone with the iOS 17.4 update.


3 Comments
I'm always looking to lean more about redstone usage, this was very helpful, thanks. +1 Kudos
Thank you. That third type was exactly the sort of system i wanted.
cant u just put some repeaters full ticked on one side with blocks alternating with redstone going down the other side because the repeaters will power the redstone going from the blocks which also extends the pulse
Share Your Thoughts