

Welcome to Minecraft World! Check out our tutorials, post to the community corkboard, and come play on our free server!

The workshop last Saturday revolved around creating a working movie screen in Minecraft, and everyone joined in to see how it works. But this tutorial is for everyone out there that missed the workshop and for everyone who would just love to make it—period. This particular tutorial is very customizable. You can make it as big or small as you would like. Just keep in mind... pistons can only push up to 12 blocks at a time. So the width is limited, but height isn't!
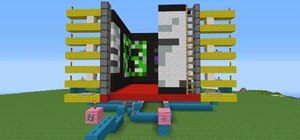
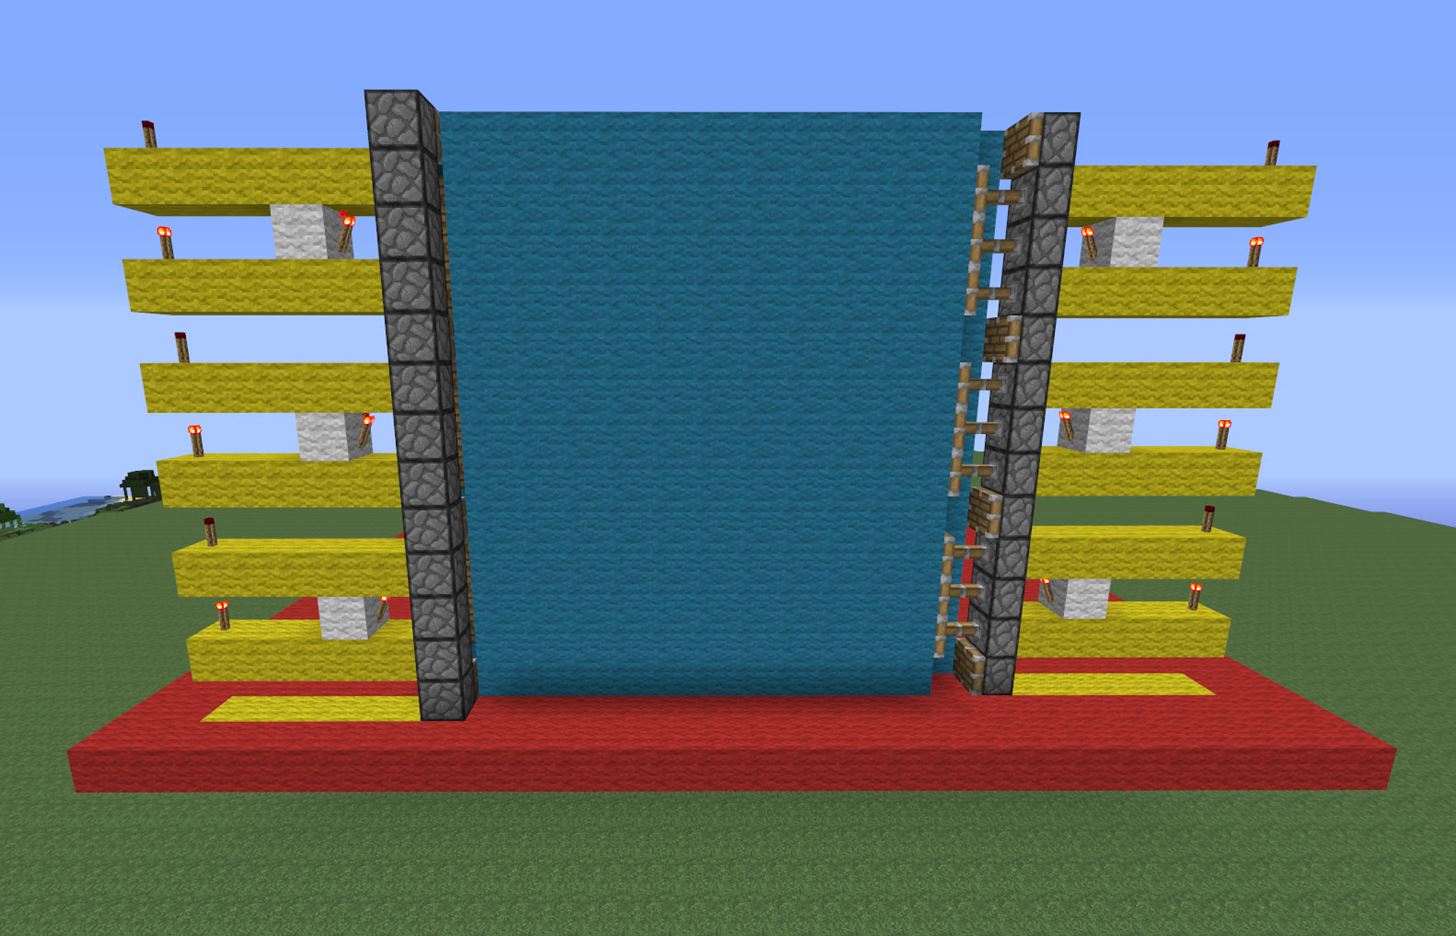
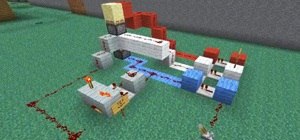
Movie Screen Overview
Here's a quick video of the piston-activated movie screen in action.
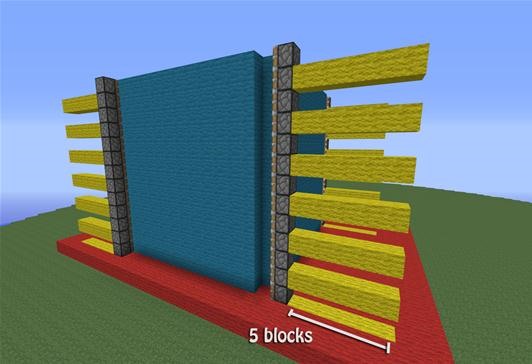
Step 1 Layout
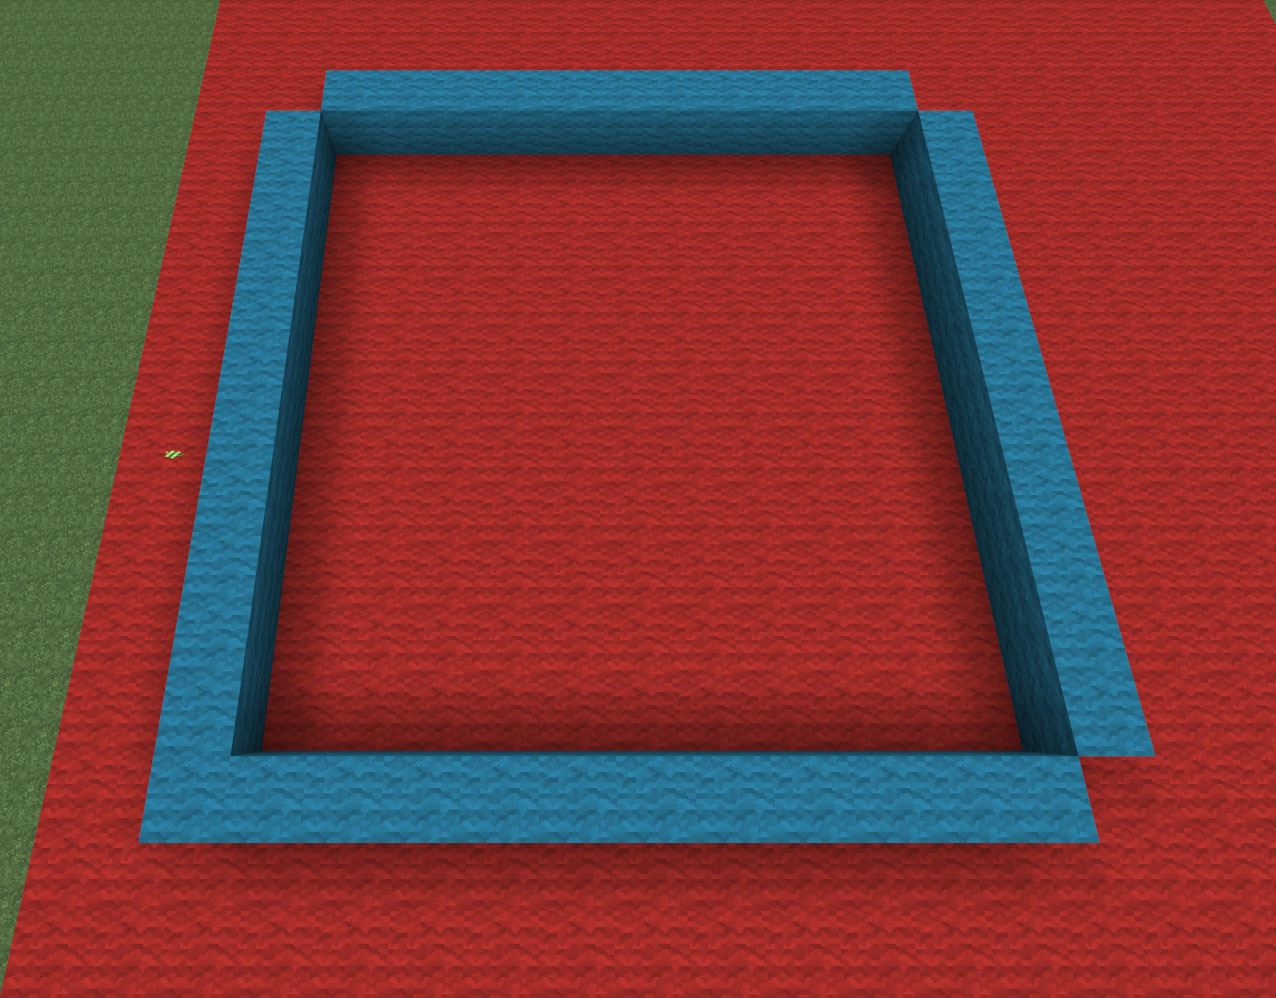
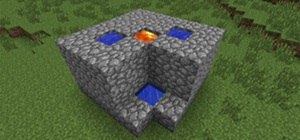
To make things easier, you want to start about 4-5 blocks up from the ground. If you have a basic idea of how redstone works, feel free to make it flat against the ground. We will be leaving room below the platform so that later on when we connect the clock, we will be adding blocks instead of removing them. This makes it a lot easier for me to show you guys the setup.
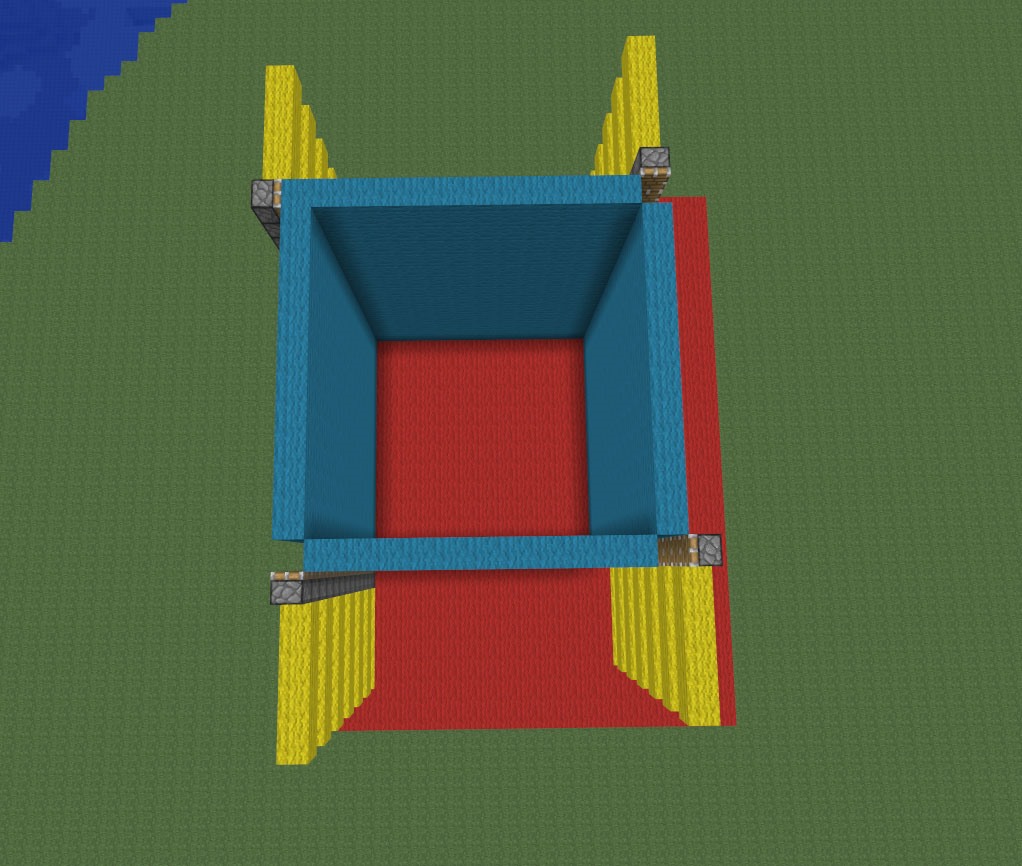
Make a 13x13 hollow square on your platform.

Remove all edge blocks except for 1.
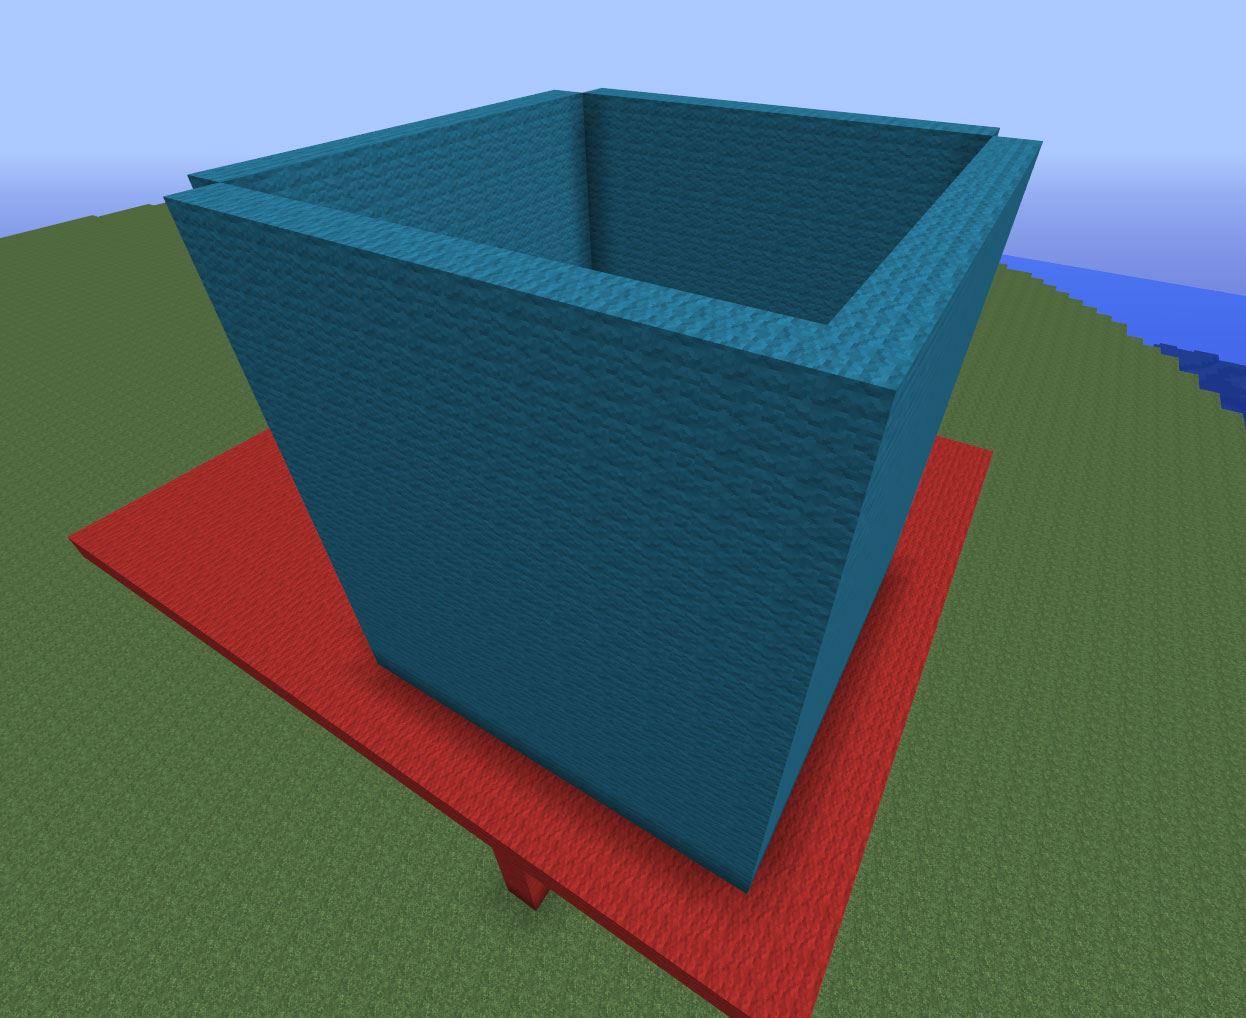
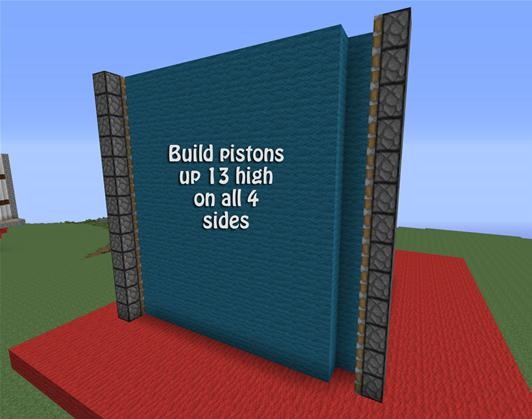
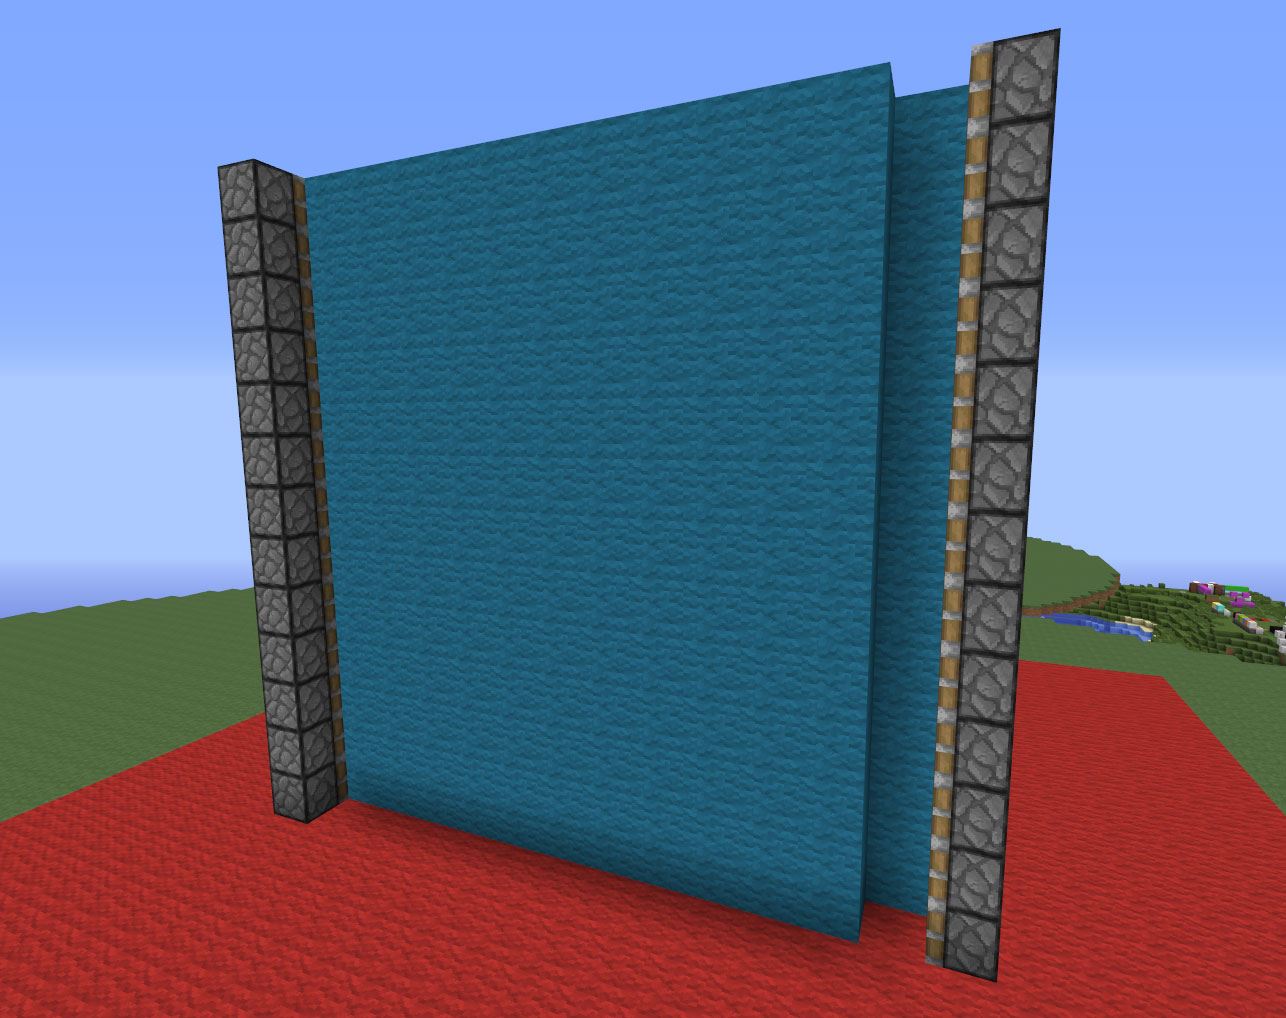
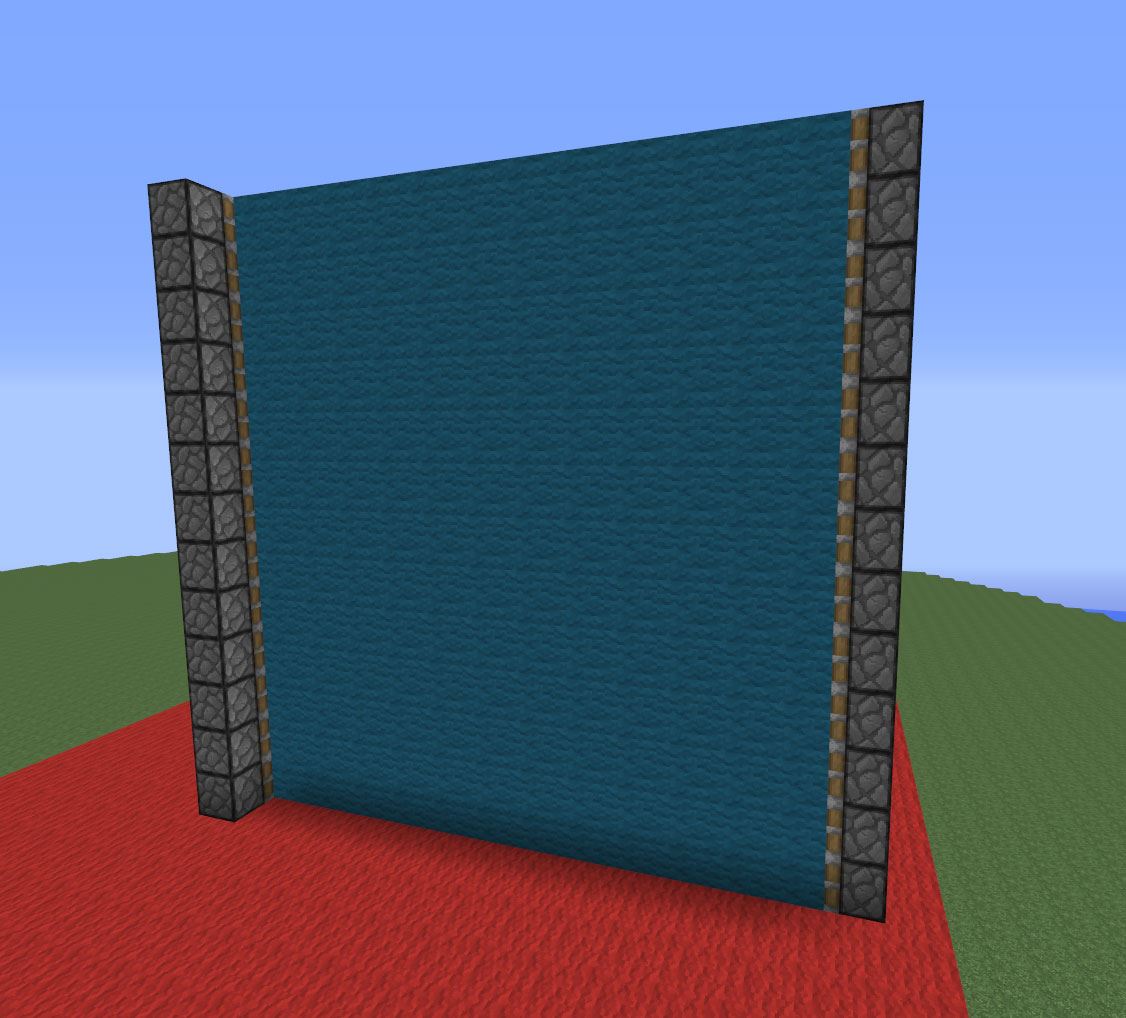
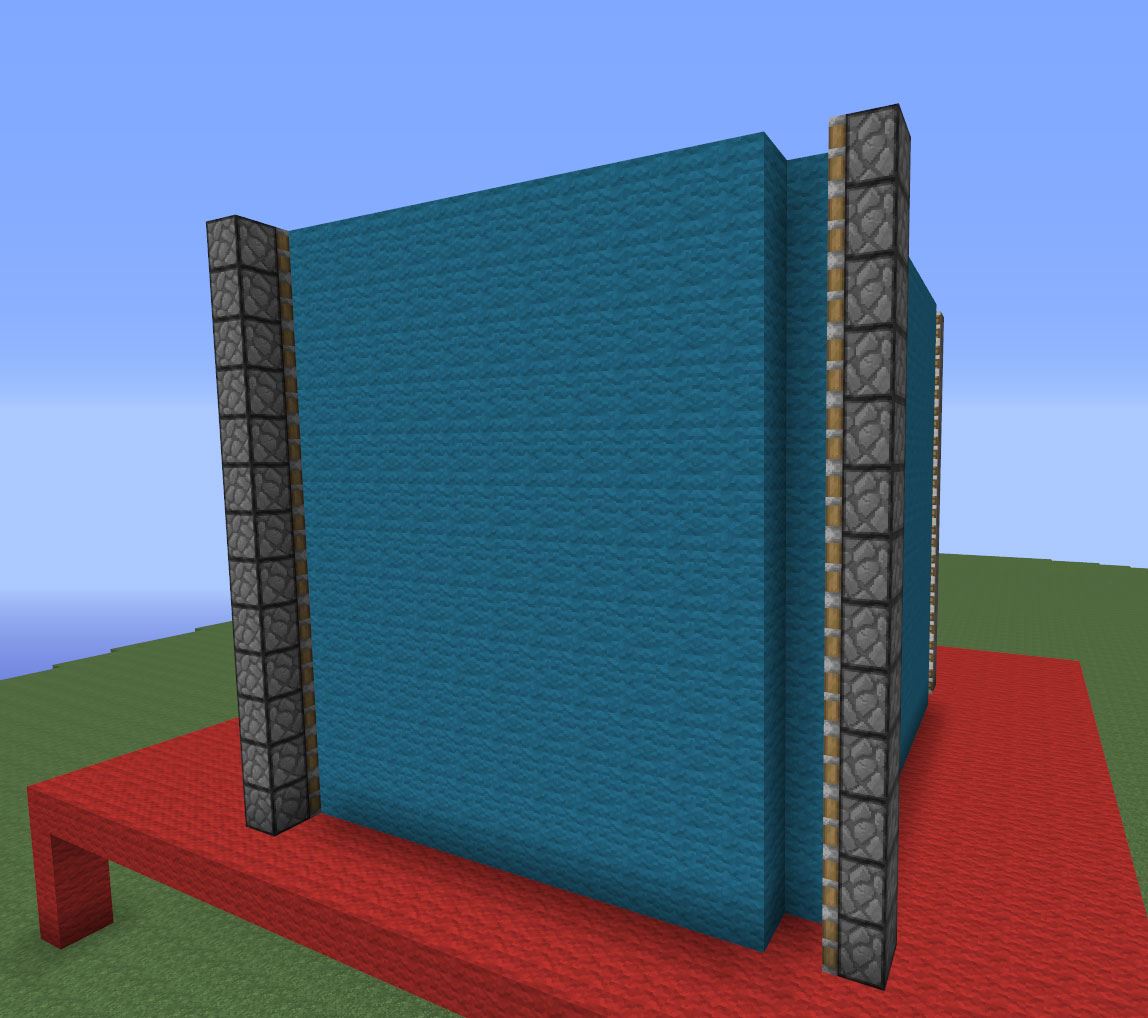
Step 2 Build Up!
Continue building up your 13x13 square so that it is 13 blocks tall.
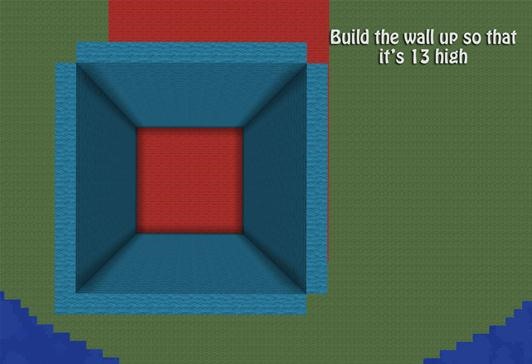
Remember to leave all of the corners out except for one!
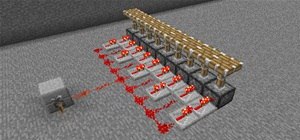
Step 3 Pistons
For this step, all we will be doing is placing pistons. Keep in mind, we're using regular pistons and not sticky pistons! All four corners will need 13 pistons stacked upwards. Remember to keep your pistons facing a way so that you can imagine it completing a square.
For example (the point/tip of the V symbols represent the way the pistons will push):
>| | | | | | v
| | | | | | | |
| | | | | | | |
^| | | | | |<
Tip
- For the corner that doesn't have a spot where you can stand to place the pistons in front of you, just remove that corner temporarily so you can place the pistons down. Don't forget to fill the corner back in when you're done though!
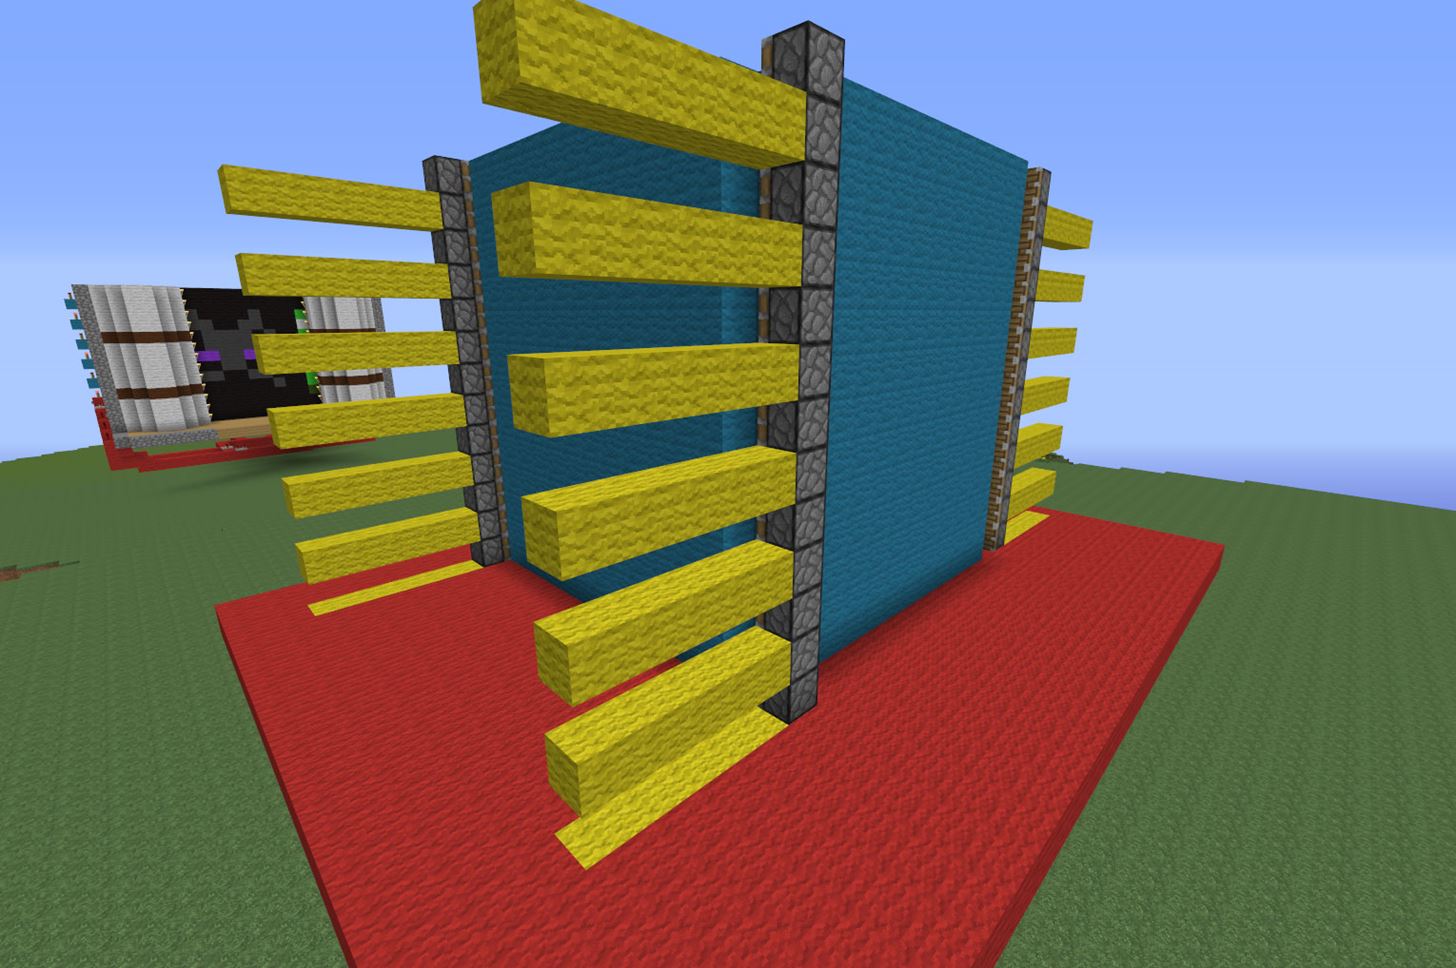
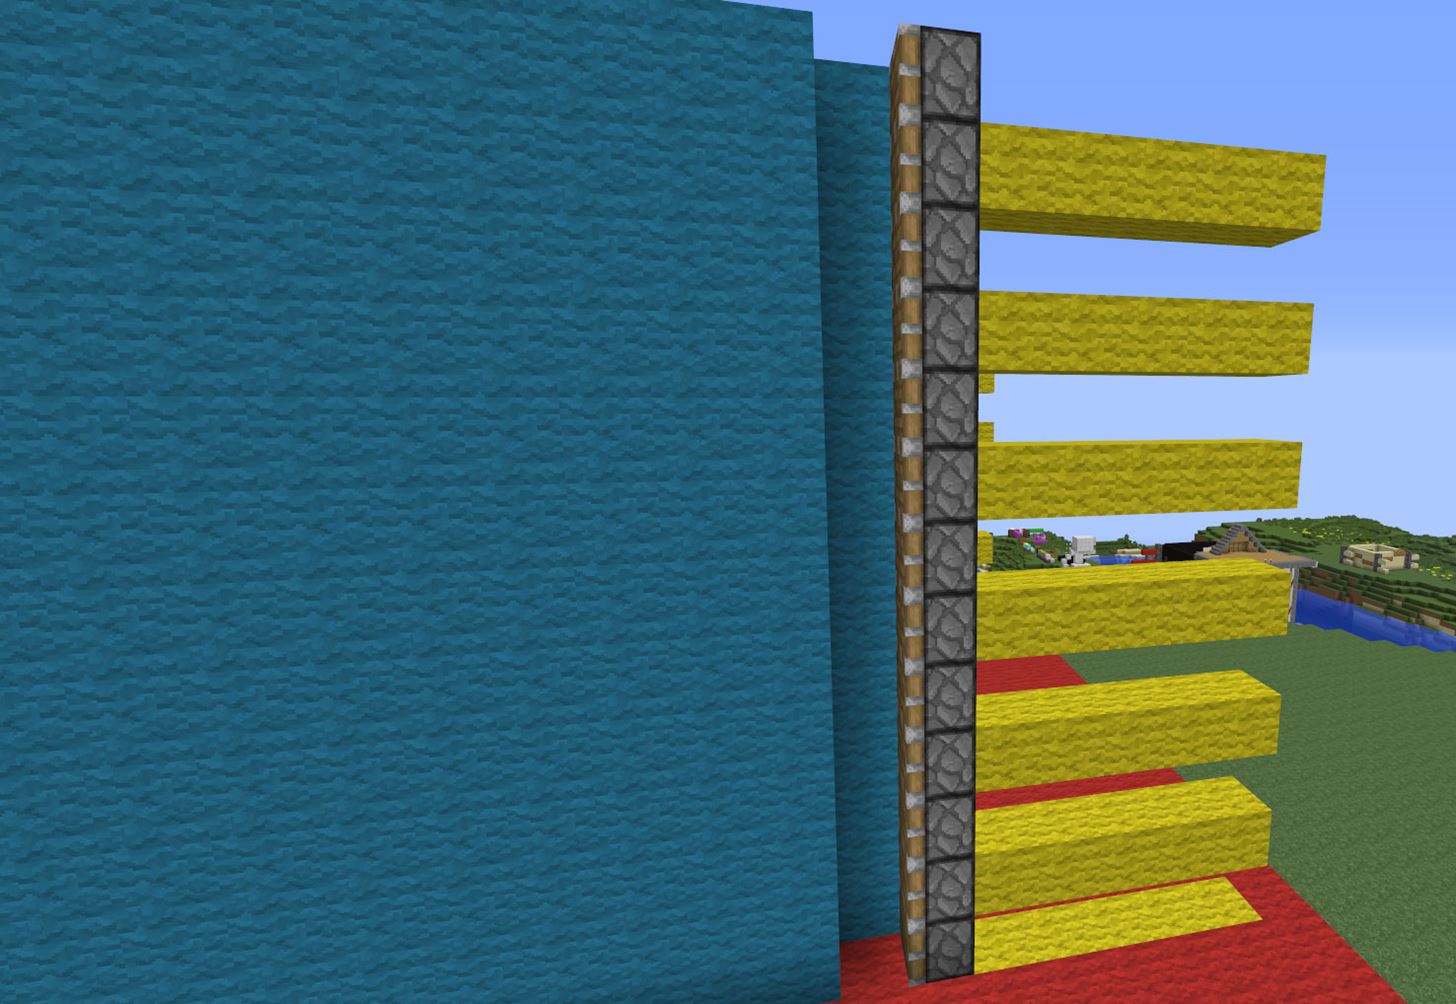
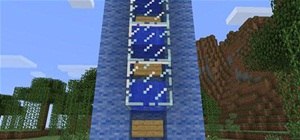
Step 4 Yellow Wool
Now we'll be using yellow wool to make it easy on your eyes for placing the redstone down.
You will need to place a line 5 blocks wide behind every OTHER piston on all four sides. The bottom row (inside your platform) will be the marker for the starting point. From there, you will place 5 blocks long on every other piston.
This is the first step towards the compact wiring we used, which will later make it very easy to decorate around your completed theater!
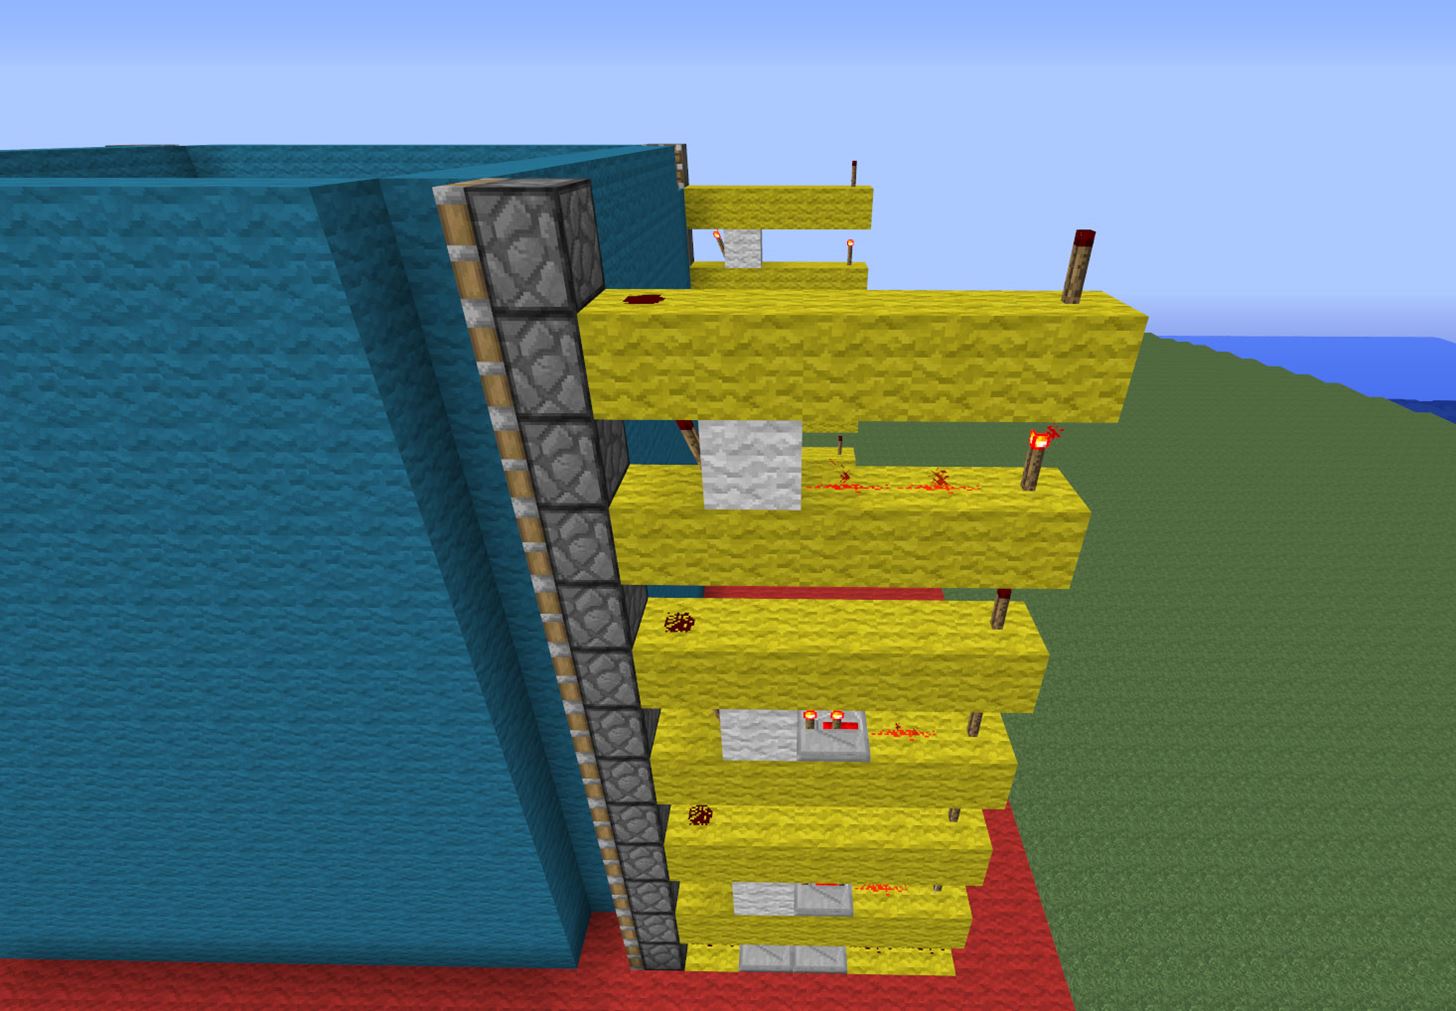
Step 5 Redstone Torches
This step is very easy, call it "the calm before the storm." Place redstone torches at the end of every yellow line you just created... except the bottoms!
These redstone torches will carry the power to the top, which makes for very compact wiring.
Step 6 More Torches!
On every yellow line that has a lit torch, place a block (1 block away from piston). We used white wool here to show contrast. There will be a total of 3 blocks per side (for a total of 12 white wool).
Next, place redstone torches on the side of the white wool that faces the pistons.
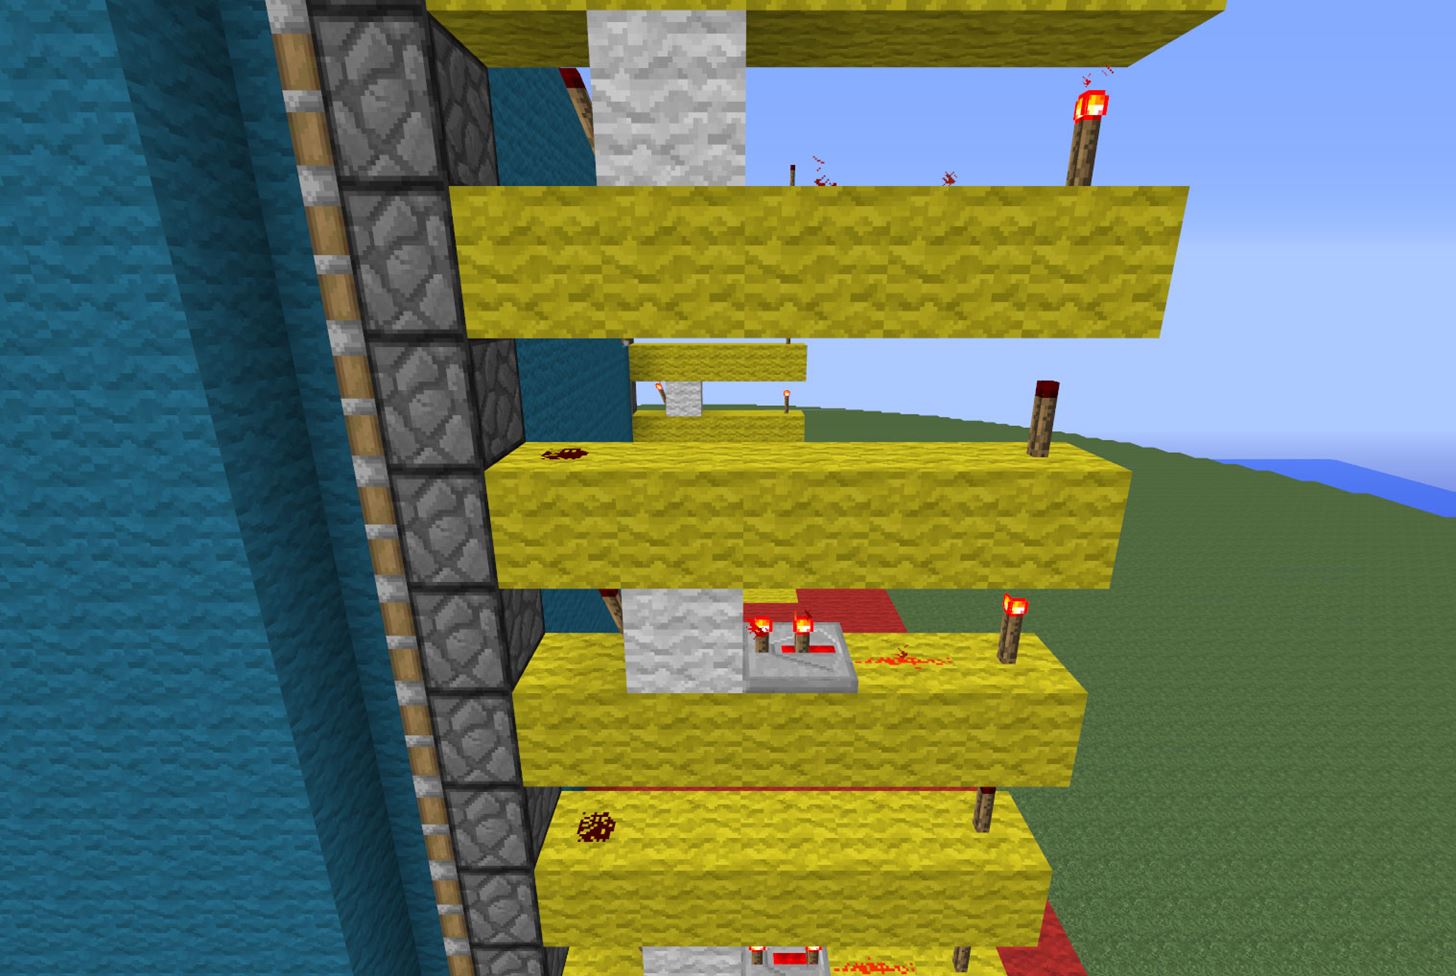
Step 7 Here It Comes...
This step might seem tricky to those that don't know redstone too well. But I'm going to do my best to walk you through it! Let's start off with 1 side so that you're not running all over the place.
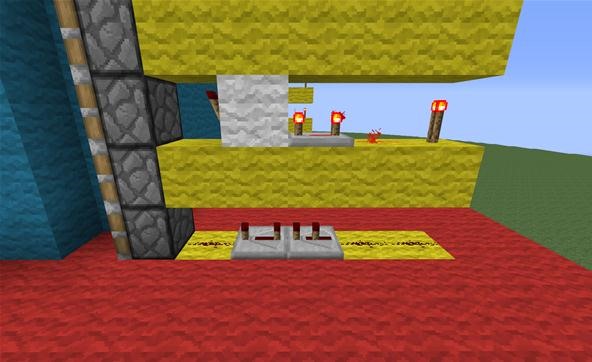
On the platform-level yellow wool line, place 1 redstone dust directly behind the piston.
Next, face the piston and place down two repeaters so that they are facing the pistons. The first repeater will be on the biggest delay (4) and the repeater behind that will be set to 2 (right-click repeater once).
Place two dust behind those repeaters you just placed. This dust will ensure that all levels of the pistons are powered.
On the second level of yellow wool, turn your character to the left side and place a repeater directly behind the white wool block. This repeater will be set to 4. Now you will want to connect that repeater to the redstone torch behind it with one redstone dust.
Tip
- Redstone repeaters have a sort of "triangle" design on them if you look closely. The "point / top" of the triangle will always face the way the power is being directed.
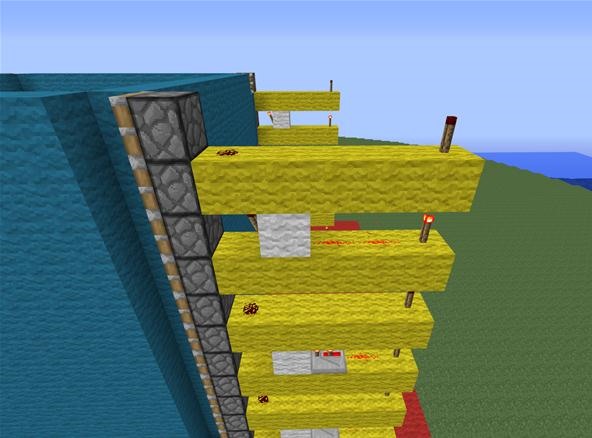
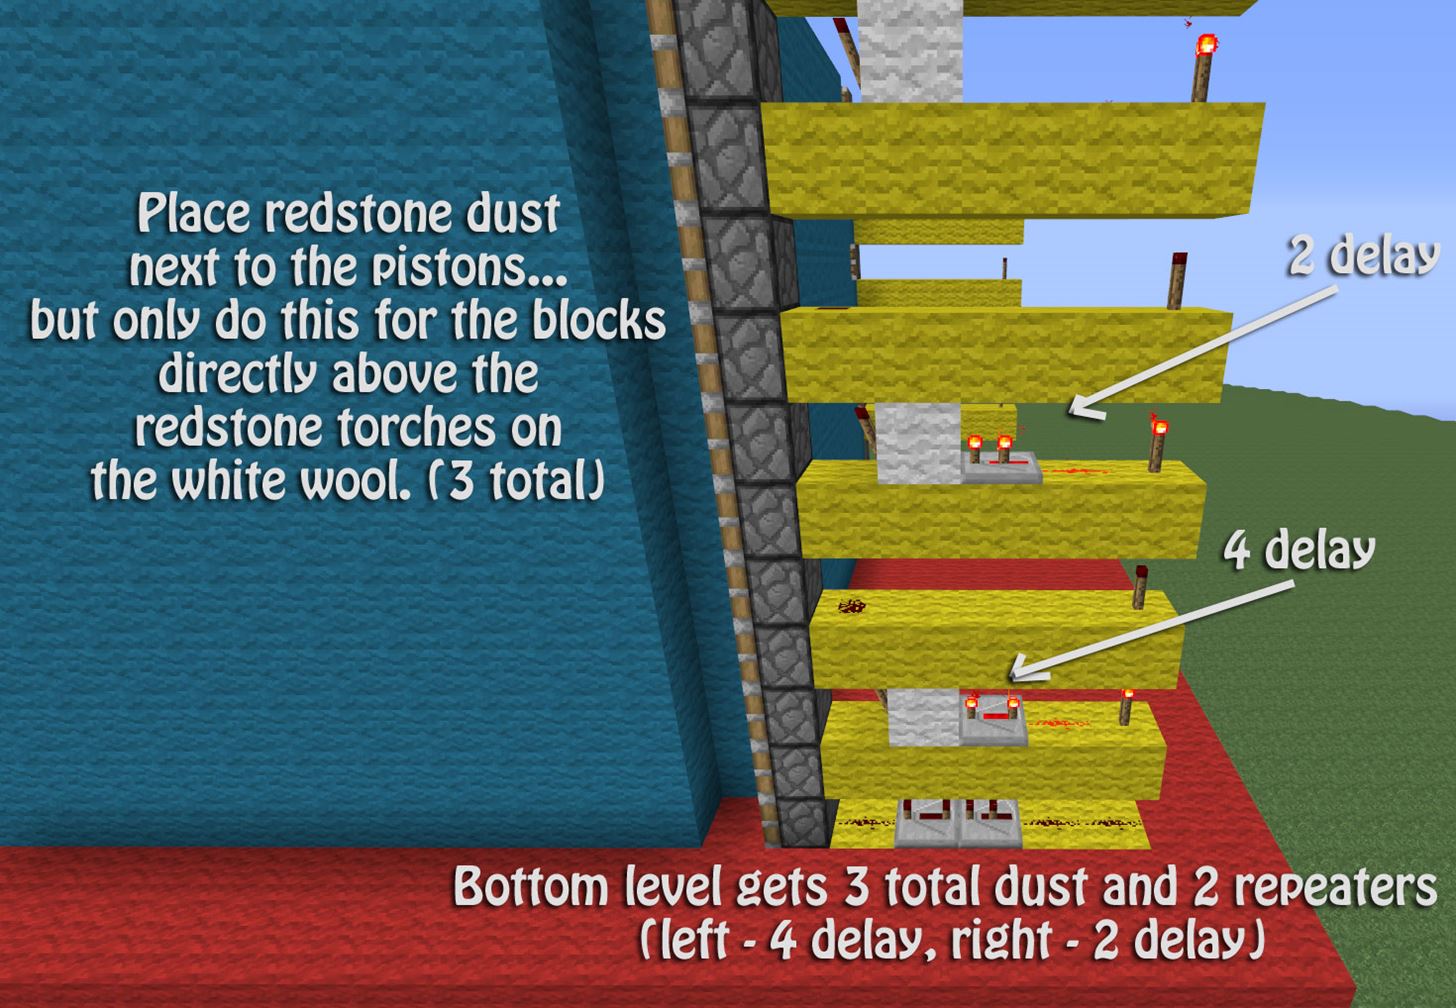
On the next yellow line, you will place one redstone dust directly next to the piston (above the redstone torch). That is all you will need to do for that yellow line.
For the next yellow line (4th yellow line up from the bottom—remember—the yellow line on the platform counts as one) you will place another repeater. Place a repeater directly behind the white wool, and put the delay to 2 (one right-click). Keep in mind, the repeater still needs to face the white wool, as that is the way the power will be flowing. Place a redstone dust behind that repeater to connect it to the redstone torch.
You will need to finish putting redstone dust above all the redstone torches that are attached to the white wool on this side.
Lastly, place two redstone dust behind the final white wool to connect it to the back redstone torch.
Repeat these steps on the remaining three sides. Extra pictures are below!

Step 8 Fix Corners
This step is very simple and quick. You may have noticed that some of the blocks got pushed around a bit when we were powering the pistons. What you will need to do is remove all the blocks that got misplaced. Remember—3 sides should have nothing in their intersecting corners, and 1 side should be completely filled.
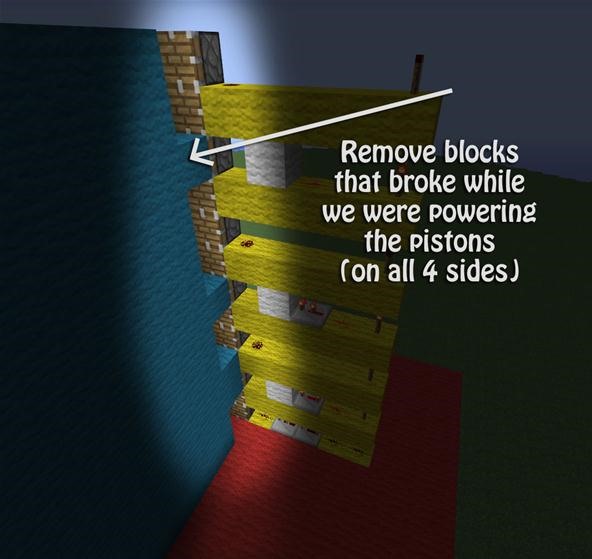
It doesn't matter which corner you choose to have filled!
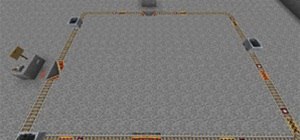
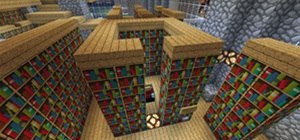
Step 9 Square
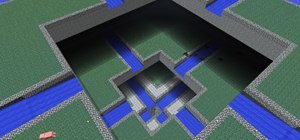
Underneath your platform, you will want to make a square/rectangle—it doesn't matter, honestly. This will be what connects all four of our sides together.

Don't worry about anything else in the image for now, just worry about the rectangle! My rectangle here is about 9x6, but honestly it doesn't matter, as later on we may or may not have to extend it a bit to make it work.
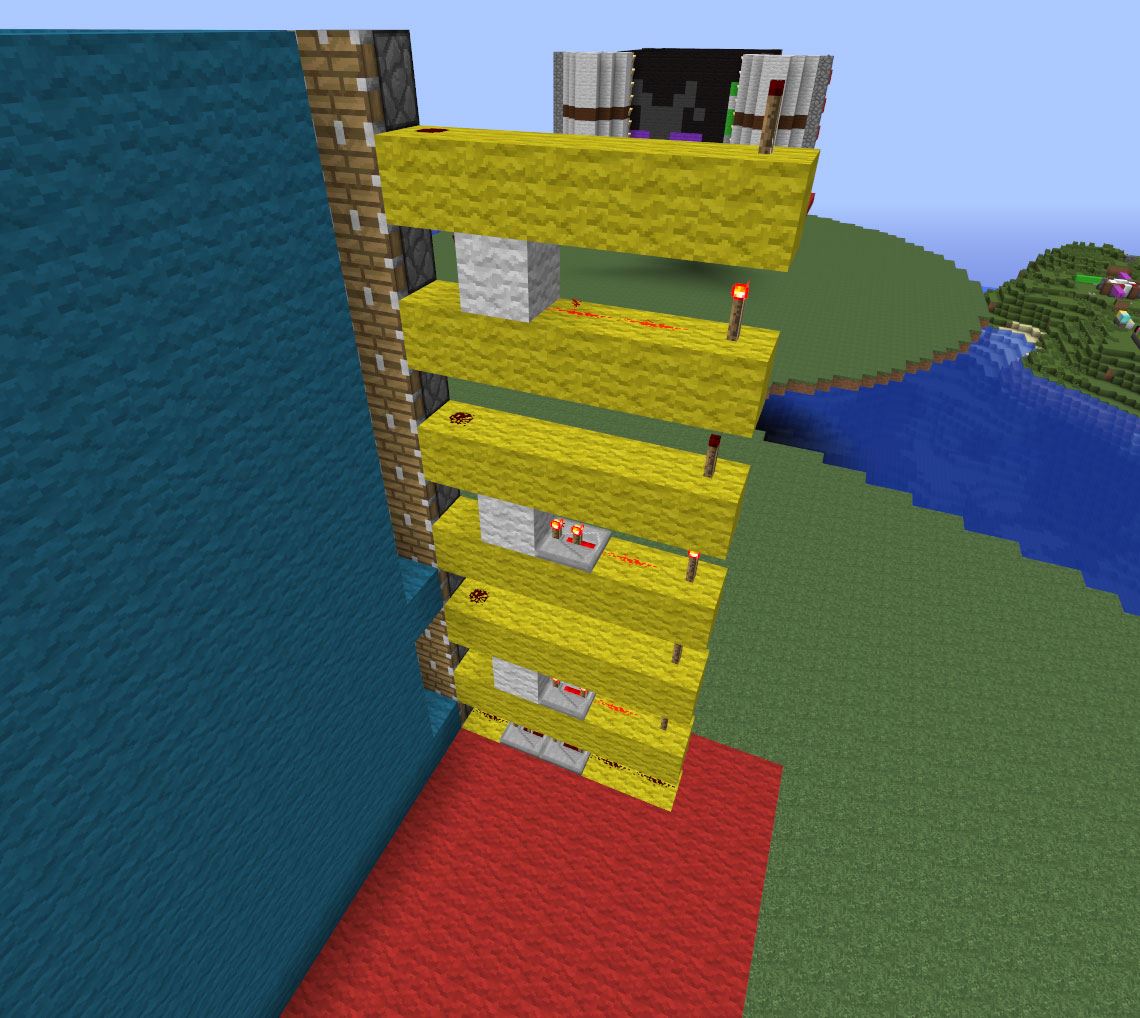
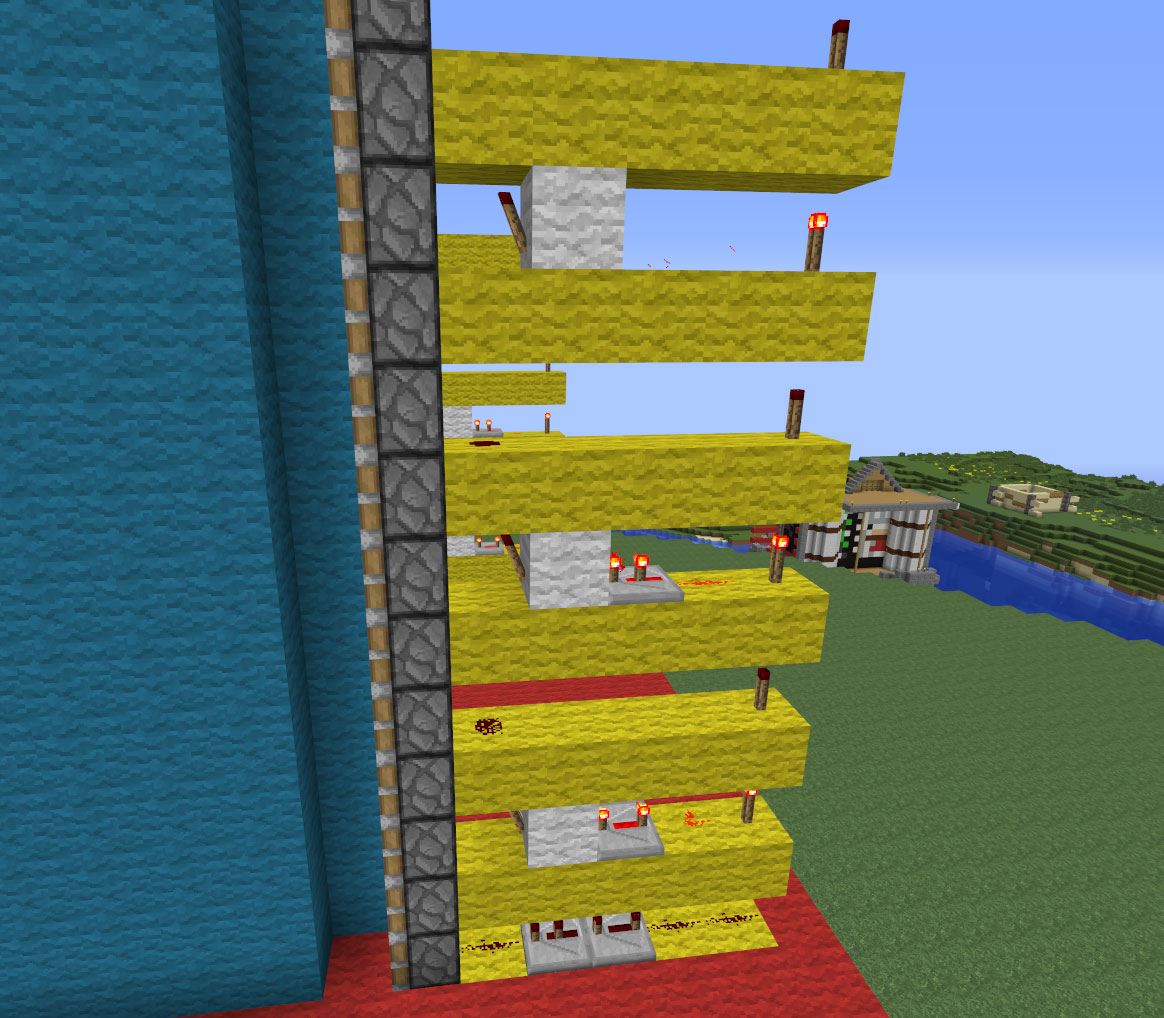
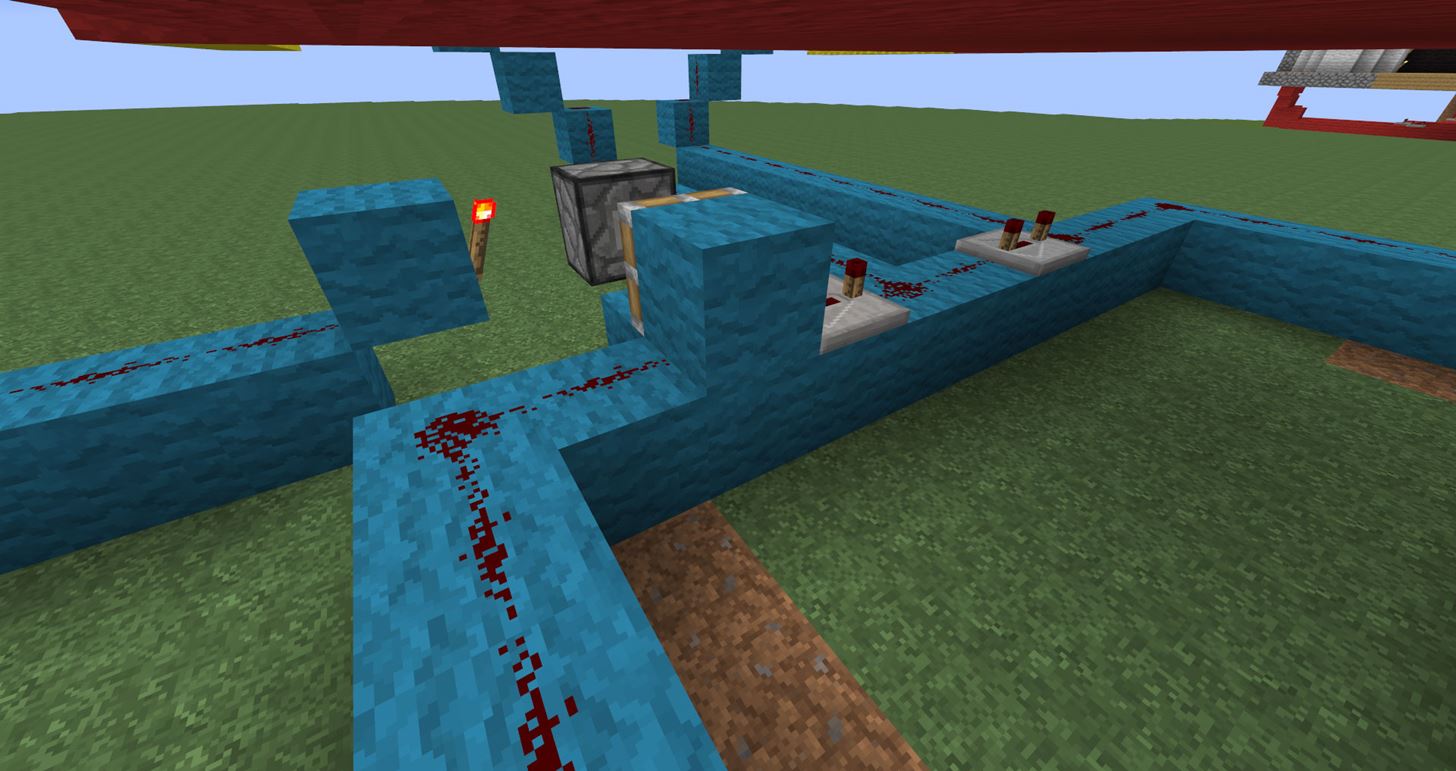
Step 10 Connect the Dots
Here you will be connecting the sides to the center rectangle we just made. I cleared out my platform (red wool) so this step would be easier to show you guys. You can do the same, as it should make things easier for you, as well! Keep in mind that you should only be clearing out the red wool that sticks out. You can keep all the other red wool in place.
Next, take 1 block (I used cyan wool) and place it directly next to the lowest yellow line. Now, place another cyan wool block on top of that and place a repeater. The repeater should be facing the second level of yellow wool, as it will still power the redstone torch on that piece of wool.
Place another cyan wool block behind the repeater you just placed, going towards the right (as shown below).
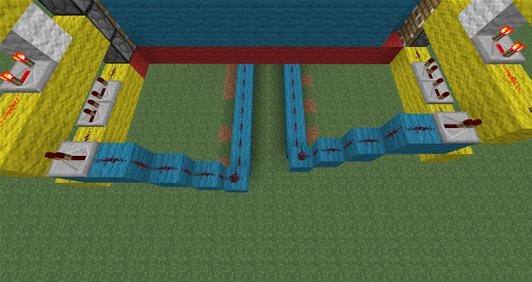
You will now need to make a staircase of sorts leading down to the same level your rectangle is on.v Then, place redstone dust on all the stairs and pathway leading down to your rectangle.
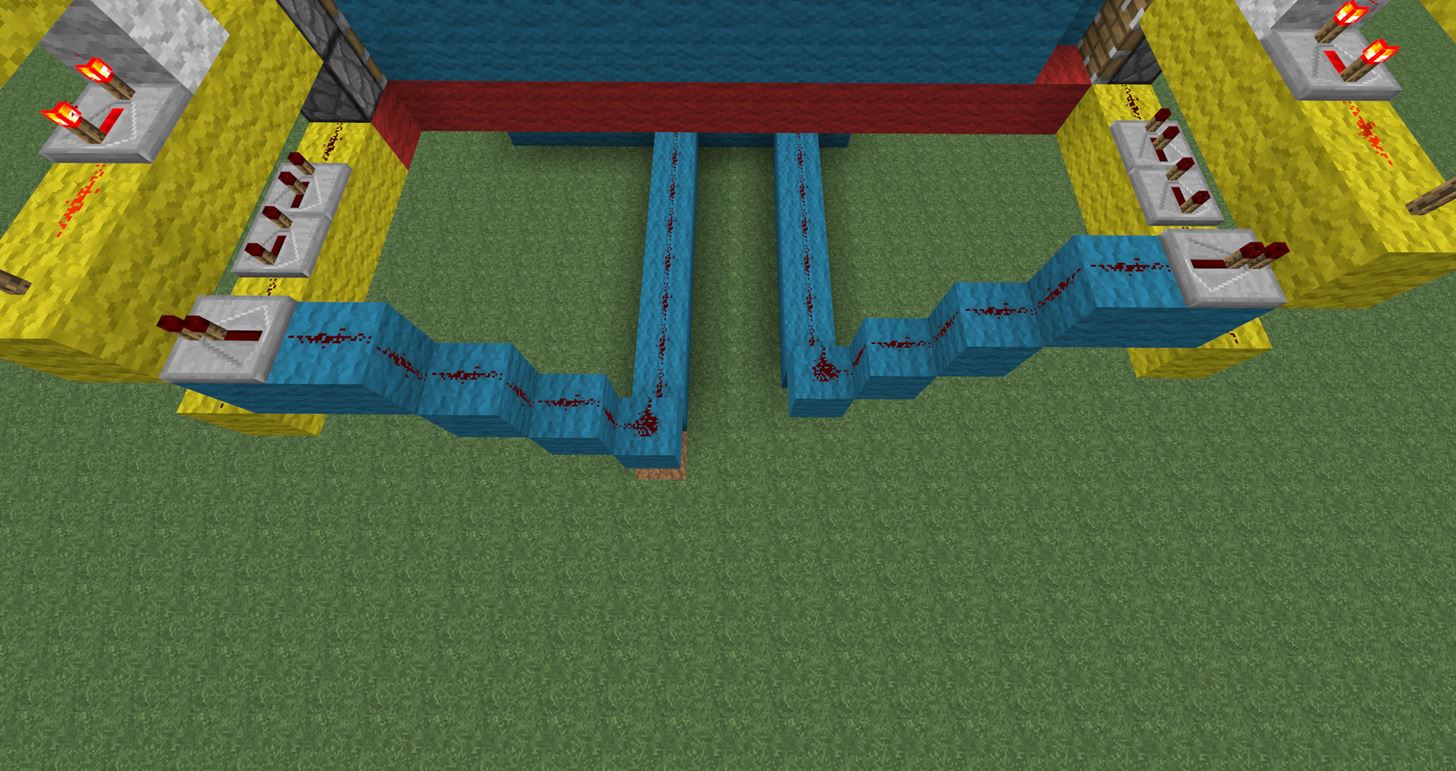
Repeat this step for all 4 corners; use the images above to help!
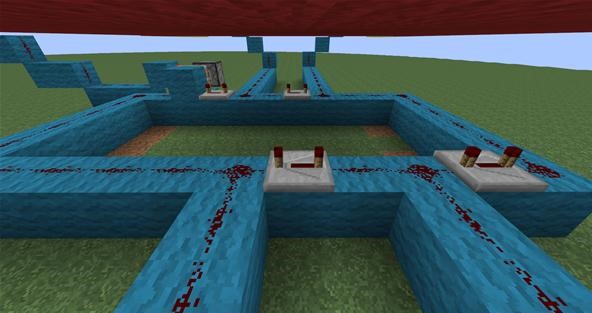
Step 11 Repeaters
This step only requires you to place repeaters (four total) on your rectangle below your movie screen. Each repeater will need maximum delay (4) and will NEED to be placed one block behind where your pathways intersect with your rectangle. Repeaters should face to your left, just like when we placed the pistons in Step 3.
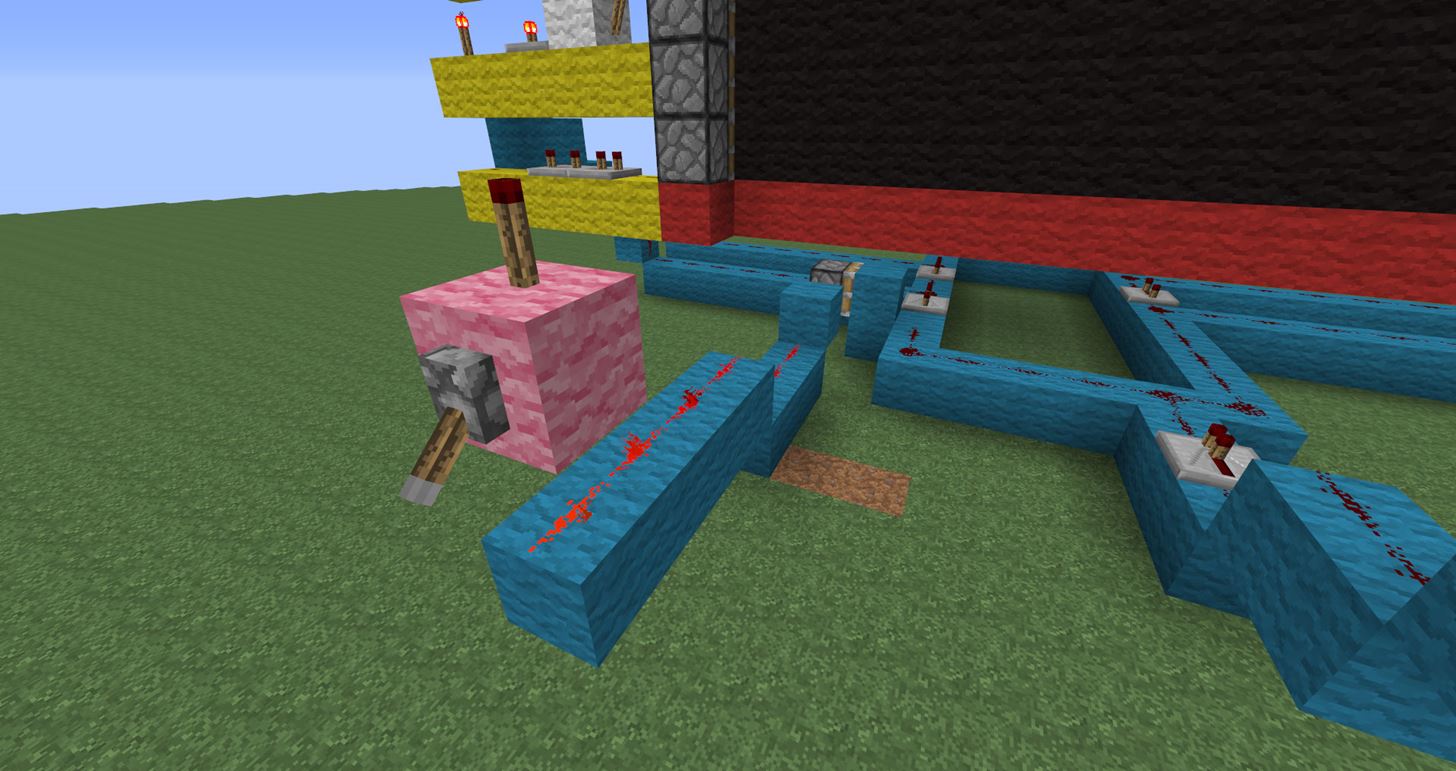
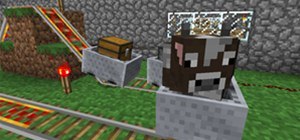
Step 12 On/Off Switch
In order for our movie screen to have a working on/off switch, we will need a sticky piston to do the work for us. Pick the side where you want your on/off switches to be. If you need to extend your rectangle to make room, go right ahead!
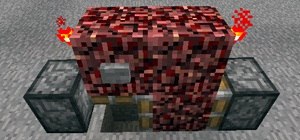
For adding your on/off addition, you will need to find a spot that is directly BEHIND a repeater. When you figure out where you want to place it, you will need to remove 1 redstone and place a cyan wool block where the redstone used to be. This ensures that when the power is flowing, it will first hit your block to continue the flow of power OR it will hit nothing (because we removed the redstone there).
Behind the cyan wool you just placed (where your one redstone dust used to be), place a block level to your rectangle. Next, place another block behind that. Stand directly behind your cyan wool that is on the rectangle and have your back to it. Place a sticky piston one block in front of you.
Next, go behind your sticky piston so that you are looking at the back of it. Two blocks to your right, you will need to place a pillar two blocks tall. Next, place a redstone torch on the side facing the sticky piston. This will activate the sticky piston.
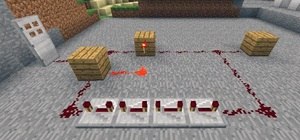
Step 13 Adding Your Lever and Button
Behind the block you just placed with the redstone torch attached to it, continue a line out from under the movie screen. This line will be as long or as short as you want it to be, as you will need to decide how far out you want to place your on/off buttons.
I went down one block, back three for the first part under the movie screen. Next, I went up one block and back four. Once you attach your blocks to the block with the redstone torch, place redstone dust on top of them.
Go back to the end of the line and place 1 block on top of the last redstone dust. On the side facing outwards from your movie screen, place a lever. I placed a redstone torch on top of the block my lever is on so that users know when the device is on or off. You can do the same! The torch will light up when it's on, and shut off when there's no power getting to it.
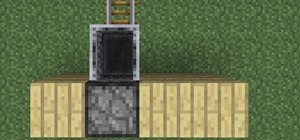
The button is very simple to set up. The button will act as your On switch. Pick a spot (preferably close to your Off switch) and extend the blocks so that they are attached to your rectangle.
Depending on how long your line is, you may need to use a repeater. Keep in mind that repeaters can only power 15 blocks. So if your redstone line is longer than 15 blocks, you will need to add a repeater with no delay. This repeater will face towards your rectangle, like mine does in the picture above.
Lastly, plop a button down on a block that's powered by the redstone you just placed to finish off your On button.
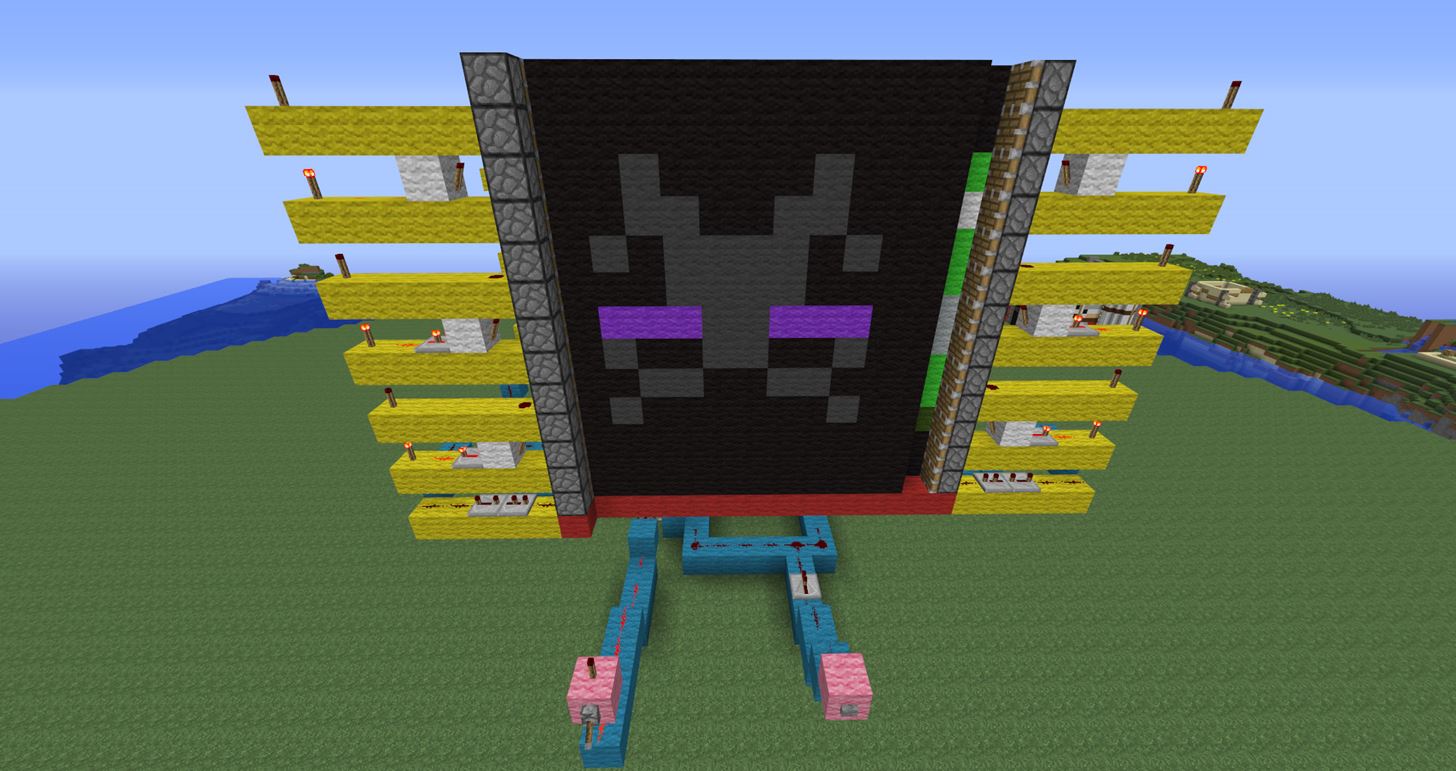
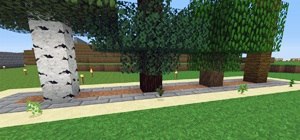
Step 14 Final Product
Be sure that your redstone torch is lit up and push your On button. Everything should be working smoothly, unless your server has a bit of lag. If your server does have some lag, you may have to play with the delays on the repeaters. If you decide to change the delays, make sure the device is turned off (redstone torch above lever isn't lit). Keep in mind that you should never have to change delays on the rectangle below your movie screen. Also, if you're changing delays on the yellow wool lines—all four sides have to match!
Questions for the Audience:
- Have you ever made something similar to this?
- Was this tutorial helpful?
- Have any suggestions on how to make it better?
- Did you enjoy the tutorial, or has it inspired you at all?
- What kind of redstone tutorials would you like to see in the future?
- Are you a more advanced redstone user, or are you just starting out?
I would love to hear a few words from the audience, so please... don't be shy!
Stay Tuned...
The new Weekly Workshop will be be announced tomorrow, so be sure to check back to see what will be covering next! If you have a suggestion for this week's and/or next week's workshop, leave a comment below. We'd love to hear your ideas!
We use TeamSpeak3 for our workshop tutorials; you can download it free here.
Our channel is: ts.wonderhowto.com
Follow us on Twitter @MinecraftHowTo!
Just updated your iPhone? You'll find new emoji, enhanced security, podcast transcripts, Apple Cash virtual numbers, and other useful features. There are even new additions hidden within Safari. Find out what's new and changed on your iPhone with the iOS 17.4 update.


9 Comments
Nice tutorial Maro love the server :)
Glad you liked the tutorial! <3
Awsome! I want to make one now... rggg.. Must... resist... Urge... to click... NOO!!! *Minecraft opens*
XD
Longest read ever :O
To be fair, if you're completing the project and following the steps as you build it... it doesn't seem nearly as long as it is ;)
Excellent Tutorial! Very clear and detailed.
can you please upload a video i cant understand
i stuck at 11 step
All the pistons are moving, but when it gets to the "full" corner it gets stuck. Sorry my voice goes out….
It's not working!!
Share Your Thoughts